Blade Care and Replacement
WARNING: When removing the cutting blade for sharpening or replacement, protect your hands with a pair of heavy gloves or use a heavy rag to hold the blade.
Periodically inspect the blade adapter for cracks, especially if you strike a foreign object. Replace when necessary. Follow the steps below for blade service:
•Disconnect spark plug wire from spark plug.
•Tip mower as specified in separate engine manual. If it does not specify turn mower on its side making sure that the air filter and the carburetor are up.
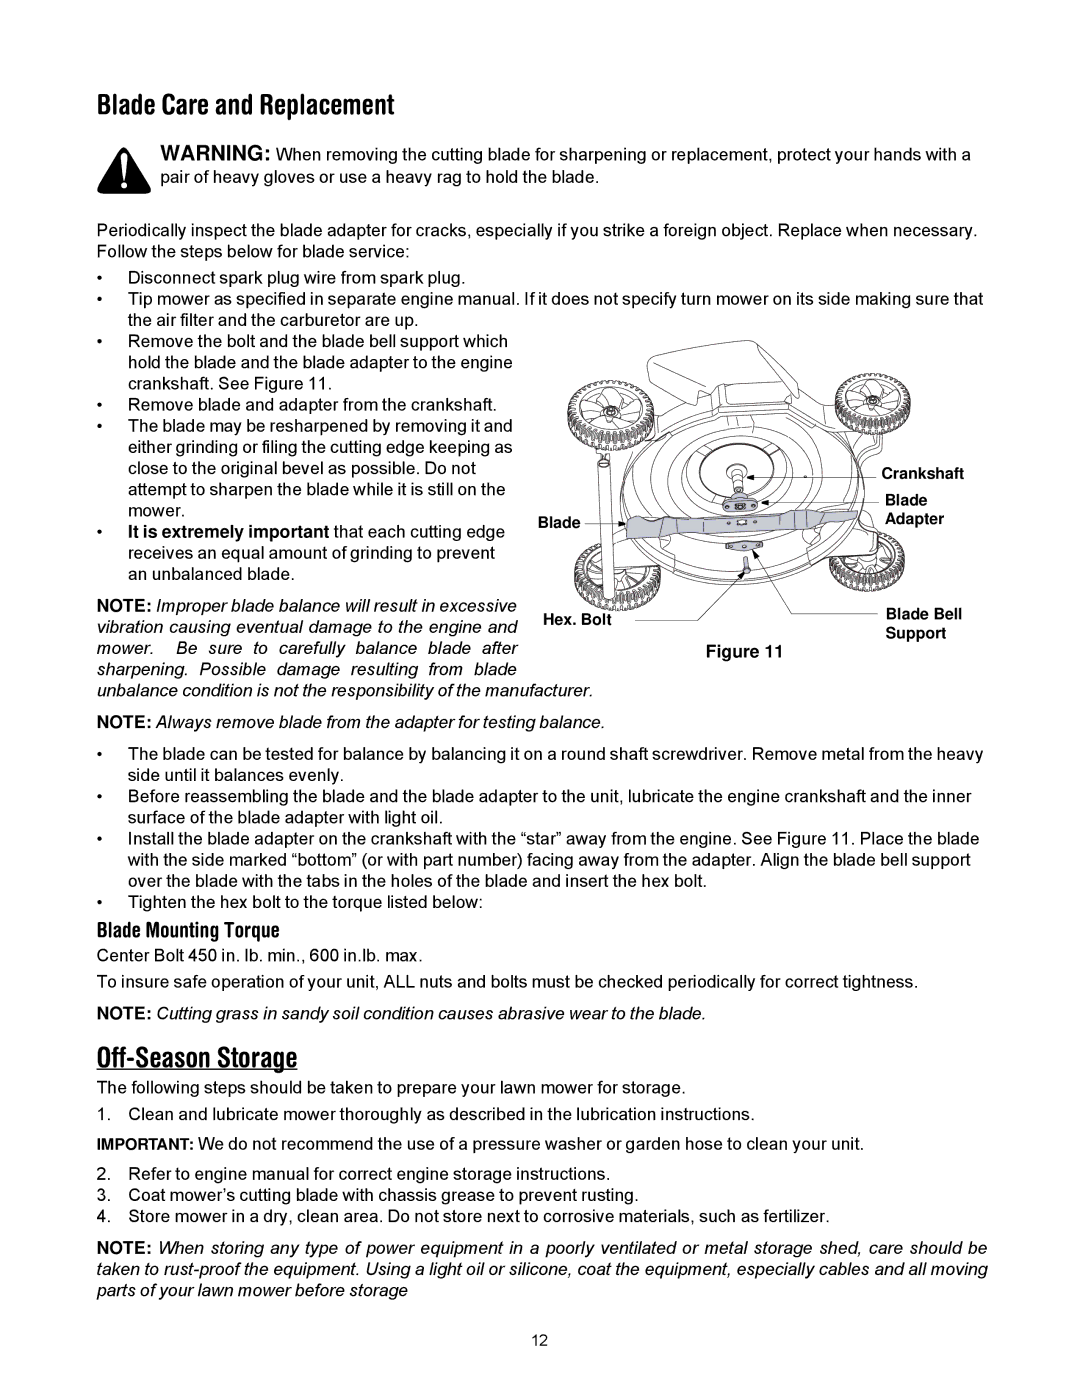
•Remove the bolt and the blade bell support which hold the blade and the blade adapter to the engine crankshaft. See Figure 11.
•Remove blade and adapter from the crankshaft.
•The blade may be resharpened by removing it and either grinding or filing the cutting edge keeping as
| close to the original bevel as possible. Do not |
| Crankshaft | |
| attempt to sharpen the blade while it is still on the |
| Blade | |
| mower. |
| ||
| Blade | Adapter | ||
• | It is extremely important that each cutting edge | |||
|
| |||
| receives an equal amount of grinding to prevent |
|
| |
| an unbalanced blade. |
|
| |
NOTE: Improper blade balance will result in excessive | Hex. Bolt | Blade Bell | ||
vibration causing eventual damage to the engine and | ||||
Support | ||||
| ||||
mower. Be sure to carefully balance blade after |
| Figure 11 | ||
sharpening. Possible damage resulting from blade unbalance condition is not the responsibility of the manufacturer.
NOTE: Always remove blade from the adapter for testing balance.
•The blade can be tested for balance by balancing it on a round shaft screwdriver. Remove metal from the heavy side until it balances evenly.
•Before reassembling the blade and the blade adapter to the unit, lubricate the engine crankshaft and the inner surface of the blade adapter with light oil.
•Install the blade adapter on the crankshaft with the “star” away from the engine. See Figure 11. Place the blade with the side marked “bottom” (or with part number) facing away from the adapter. Align the blade bell support over the blade with the tabs in the holes of the blade and insert the hex bolt.
•Tighten the hex bolt to the torque listed below:
Blade Mounting Torque
Center Bolt 450 in. lb. min., 600 in.lb. max.
To insure safe operation of your unit, ALL nuts and bolts must be checked periodically for correct tightness.
NOTE: Cutting grass in sandy soil condition causes abrasive wear to the blade.
Off-Season Storage
The following steps should be taken to prepare your lawn mower for storage.
1. Clean and lubricate mower thoroughly as described in the lubrication instructions.
IMPORTANT: We do not recommend the use of a pressure washer or garden hose to clean your unit.
2.Refer to engine manual for correct engine storage instructions.
3.Coat mower’s cutting blade with chassis grease to prevent rusting.
4.Store mower in a dry, clean area. Do not store next to corrosive materials, such as fertilizer.
NOTE: When storing any type of power equipment in a poorly ventilated or metal storage shed, care should be taken to
12