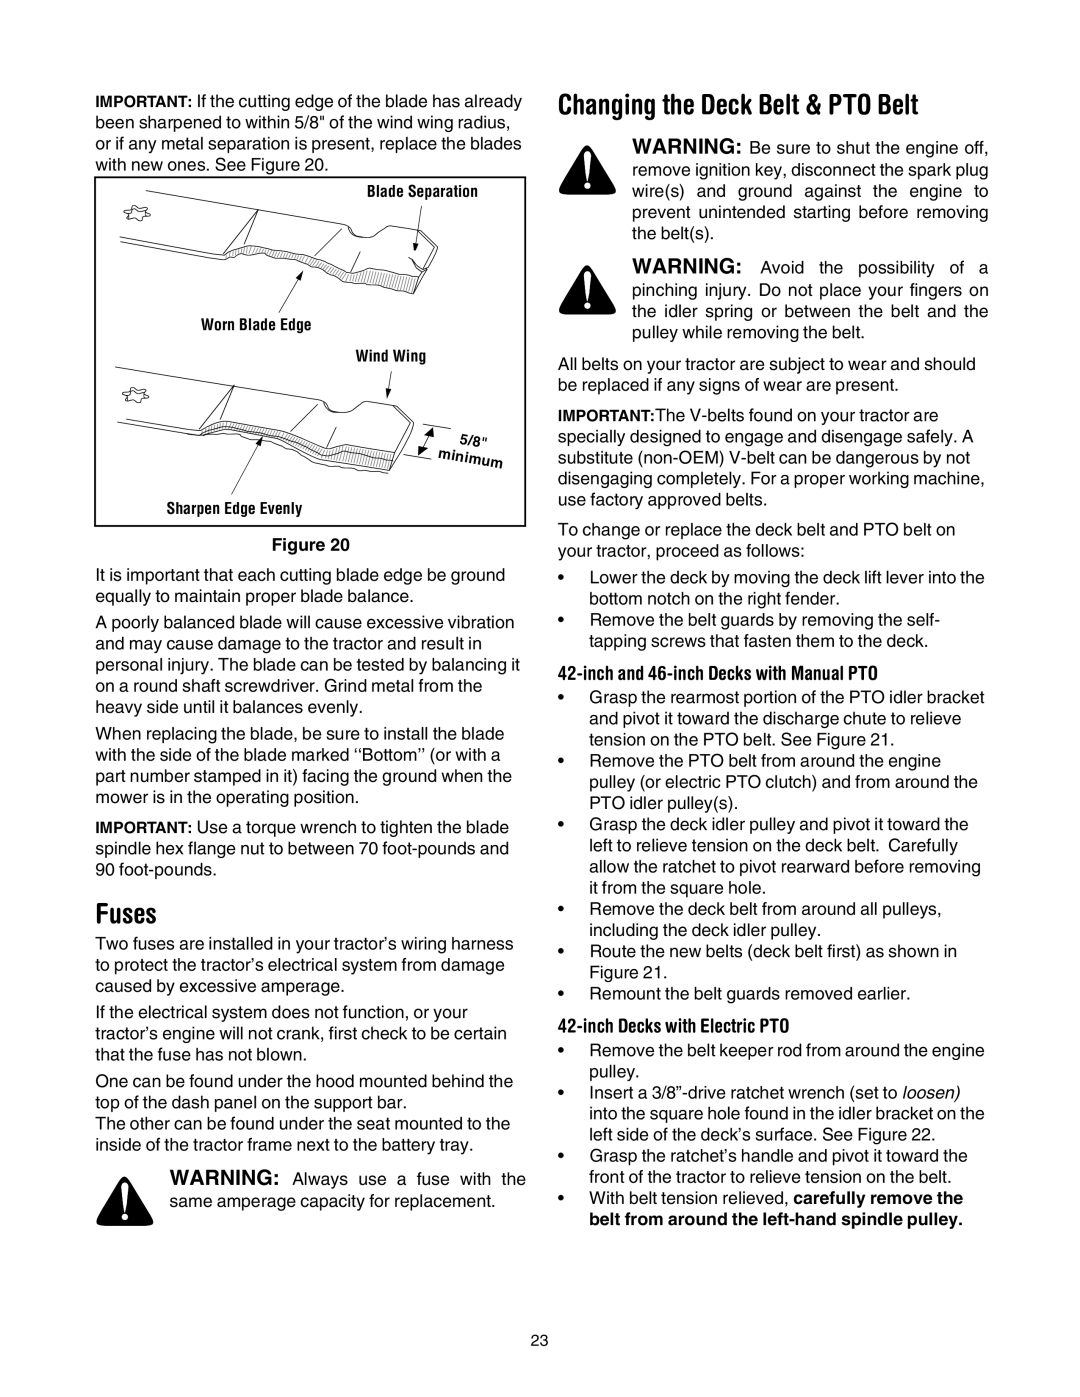
IMPORTANT: If the cutting edge of the blade has already been sharpened to within 5/8" of the wind wing radius, or if any metal separation is present, replace the blades with new ones. See Figure 20.
Blade Separation |
Worn Blade Edge |
Wind Wing |
5/8" |
mi |
nimum |
Sharpen Edge Evenly |
Figure 20
It is important that each cutting blade edge be ground equally to maintain proper blade balance.
A poorly balanced blade will cause excessive vibration and may cause damage to the tractor and result in personal injury. The blade can be tested by balancing it on a round shaft screwdriver. Grind metal from the heavy side until it balances evenly.
When replacing the blade, be sure to install the blade with the side of the blade marked ‘‘Bottom’’ (or with a part number stamped in it) facing the ground when the mower is in the operating position.
IMPORTANT: Use a torque wrench to tighten the blade spindle hex flange nut to between 70
Fuses
Two fuses are installed in your tractor’s wiring harness to protect the tractor’s electrical system from damage caused by excessive amperage.
If the electrical system does not function, or your tractor’s engine will not crank, first check to be certain that the fuse has not blown.
One can be found under the hood mounted behind the top of the dash panel on the support bar.
The other can be found under the seat mounted to the inside of the tractor frame next to the battery tray.
WARNING: Always use a fuse with the same amperage capacity for replacement.
Changing the Deck Belt & PTO Belt
WARNING: Be sure to shut the engine off, remove ignition key, disconnect the spark plug wire(s) and ground against the engine to prevent unintended starting before removing the belt(s).
WARNING: Avoid the possibility of a pinching injury. Do not place your fingers on the idler spring or between the belt and the pulley while removing the belt.
All belts on your tractor are subject to wear and should be replaced if any signs of wear are present.
IMPORTANT:The
To change or replace the deck belt and PTO belt on your tractor, proceed as follows:
•Lower the deck by moving the deck lift lever into the bottom notch on the right fender.
•Remove the belt guards by removing the self- tapping screws that fasten them to the deck.
42-inch and 46-inch Decks with Manual PTO
•Grasp the rearmost portion of the PTO idler bracket and pivot it toward the discharge chute to relieve tension on the PTO belt. See Figure 21.
•Remove the PTO belt from around the engine pulley (or electric PTO clutch) and from around the PTO idler pulley(s).
•Grasp the deck idler pulley and pivot it toward the left to relieve tension on the deck belt. Carefully allow the ratchet to pivot rearward before removing it from the square hole.
•Remove the deck belt from around all pulleys, including the deck idler pulley.
•Route the new belts (deck belt first) as shown in Figure 21.
•Remount the belt guards removed earlier.
42-inch Decks with Electric PTO
•Remove the belt keeper rod from around the engine pulley.
•Insert a
•Grasp the ratchet’s handle and pivot it toward the front of the tractor to relieve tension on the belt.
•With belt tension relieved, carefully remove the belt from around the
23