SECTION 3: TRACTOR SET-UP
NOTE: This owner’s manual covers various models of lawn tractors. The units illustrated may vary slightly from your unit. Follow only those instructions which pertain to your model lawn tractor.
Attaching the Battery Cables
NOTE: The positive battery terminal is marked Pos.
(+). The negative battery terminal is marked Neg. (–).
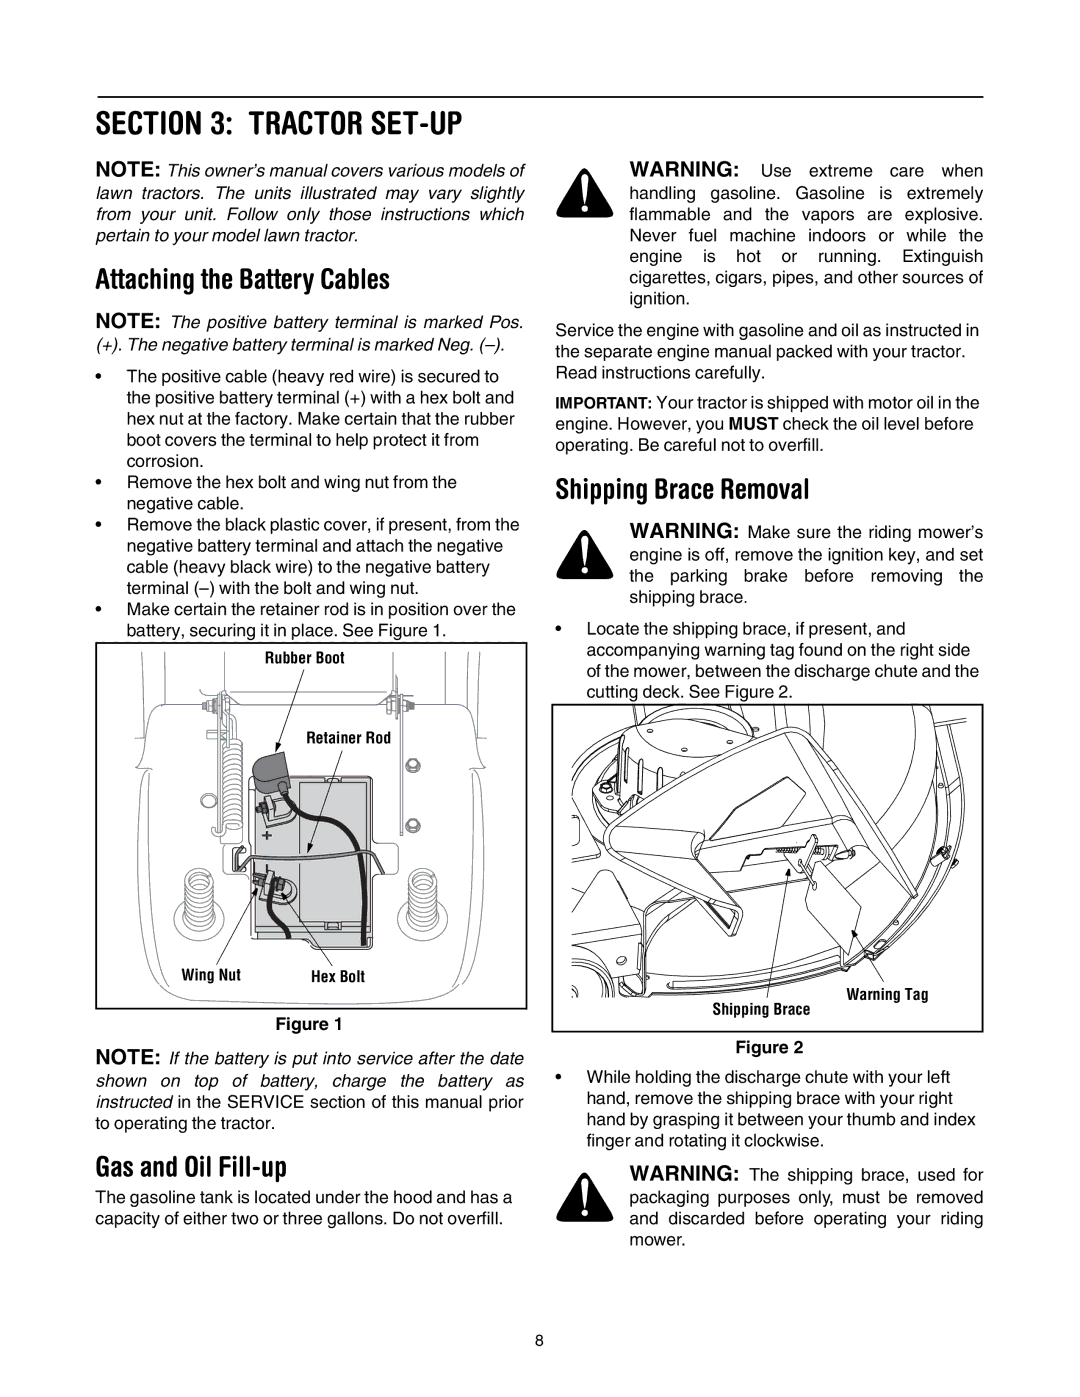
•The positive cable (heavy red wire) is secured to the positive battery terminal (+) with a hex bolt and hex nut at the factory. Make certain that the rubber boot covers the terminal to help protect it from corrosion.
•Remove the hex bolt and wing nut from the negative cable.
•Remove the black plastic cover, if present, from the negative battery terminal and attach the negative cable (heavy black wire) to the negative battery terminal
•Make certain the retainer rod is in position over the battery, securing it in place. See Figure 1.
| Rubber Boot |
| Retainer Rod |
Wing Nut | Hex Bolt |
Figure 1
NOTE: If the battery is put into service after the date shown on top of battery, charge the battery as instructed in the SERVICE section of this manual prior to operating the tractor.
Gas and Oil Fill-up
The gasoline tank is located under the hood and has a capacity of either two or three gallons. Do not overfill.
WARNING: Use extreme care when handling gasoline. Gasoline is extremely flammable and the vapors are explosive. Never fuel machine indoors or while the engine is hot or running. Extinguish cigarettes, cigars, pipes, and other sources of ignition.
Service the engine with gasoline and oil as instructed in the separate engine manual packed with your tractor. Read instructions carefully.
IMPORTANT: Your tractor is shipped with motor oil in the engine. However, you MUST check the oil level before operating. Be careful not to overfill.
Shipping Brace Removal
WARNING: Make sure the riding mower’s engine is off, remove the ignition key, and set the parking brake before removing the shipping brace.
•Locate the shipping brace, if present, and accompanying warning tag found on the right side of the mower, between the discharge chute and the cutting deck. See Figure 2.
Warning Tag |
Shipping Brace |
Figure 2
•While holding the discharge chute with your left hand, remove the shipping brace with your right hand by grasping it between your thumb and index finger and rotating it clockwise.
WARNING: The shipping brace, used for packaging purposes only, must be removed and discarded before operating your riding mower.
8