About the X2 Headphones
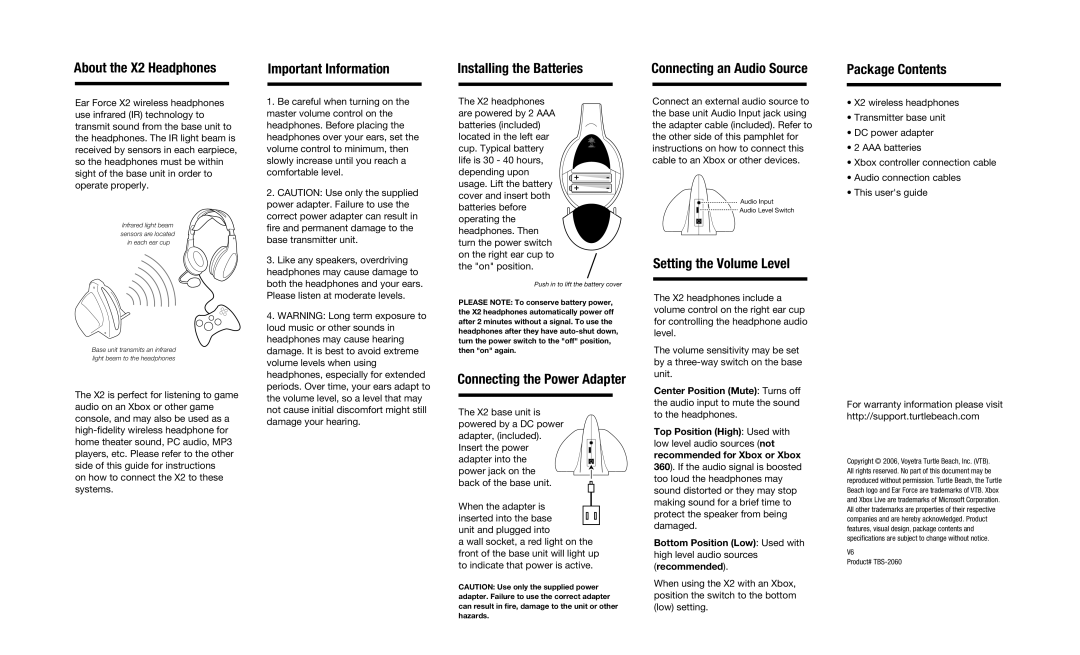
Ear Force X2 wireless headphones use infrared (IR) technology to transmit sound from the base unit to the headphones. The IR light beam is received by sensors in each earpiece, so the headphones must be within sight of the base unit in order to operate properly.
Infrared light beam sensors are located in each ear cup
Base unit transmits an infrared light beam to the headphones
The X2 is perfect for listening to game audio on an Xbox or other game console, and may also be used as a
on how to connect the X2 to these systems.
Important Information
1.Be careful when turning on the master volume control on the headphones. Before placing the headphones over your ears, set the volume control to minimum, then slowly increase until you reach a comfortable level.
2.CAUTION: Use only the supplied power adapter. Failure to use the correct power adapter can result in fire and permanent damage to the base transmitter unit.
3.Like any speakers, overdriving
headphones may cause damage to both the headphones and your ears. Please listen at moderate levels.
4.WARNING: Long term exposure to loud music or other sounds in headphones may cause hearing damage. It is best to avoid extreme volume levels when using headphones, especially for extended periods. Over time, your ears adapt to the volume level, so a level that may not cause initial discomfort might still damage your hearing.
Installing the Batteries
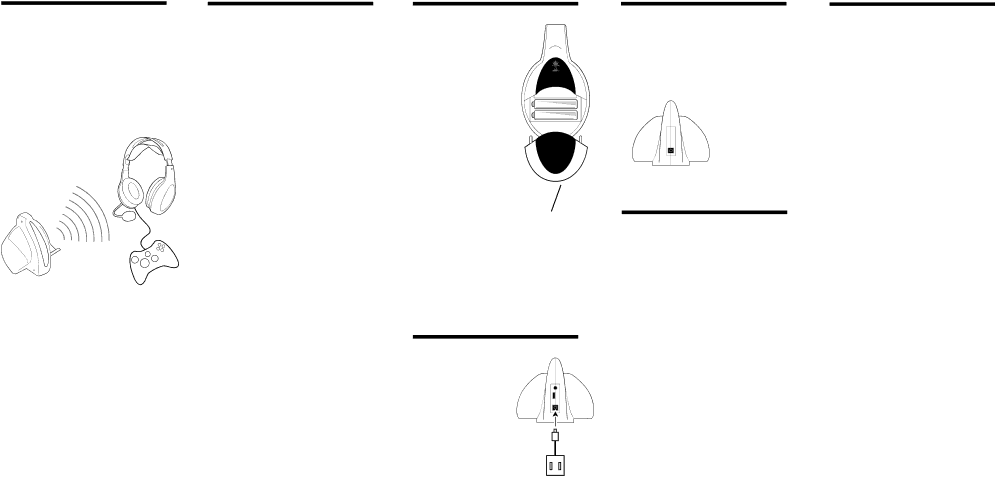
The X2 headphones |
|
| |
are powered by 2 AAA |
|
| |
batteries (included) |
|
| |
located in the left ear |
|
| |
cup. Typical battery |
|
| |
life is 30 - 40 hours, |
|
| |
depending upon | + | - | |
usage. Lift the battery | |||
+ | - | ||
cover and insert both | |||
|
|
batteries before operating the headphones. Then turn the power switch on the right ear cup to the "on" position.
Push in to lift the battery cover
PLEASE NOTE: To conserve battery power, the X2 headphones automatically power off after 2 minutes without a signal. To use the headphones after they have
Connecting the Power Adapter
The X2 base unit is powered by a DC power adapter, (included). Insert the power adapter into the power jack on the back of the base unit.
When the adapter is inserted into the base unit and plugged into
a wall socket, a red light on the front of the base unit will light up to indicate that power is active.
CAUTION: Use only the supplied power adapter. Failure to use the correct adapter can result in fire, damage to the unit or other hazards.
Connecting an Audio Source
Connect an external audio source to the base unit Audio Input jack using the adapter cable (included). Refer to the other side of this pamphlet for instructions on how to connect this cable to an Xbox or other devices.
![]()
![]() Audio Input
Audio Input
![]()
![]() Audio Level Switch
Audio Level Switch
Setting the Volume Level
The X2 headphones include a volume control on the right ear cup for controlling the headphone audio level.
The volume sensitivity may be set by a
Center Position (Mute): Turns off the audio input to mute the sound to the headphones.
Top Position (High): Used with low level audio sources (not recommended for Xbox or Xbox 360). If the audio signal is boosted too loud the headphones may sound distorted or they may stop making sound for a brief time to protect the speaker from being damaged.
Bottom Position (Low): Used with high level audio sources (recommended).
When using the X2 with an Xbox, position the switch to the bottom (low) setting.
Package Contents
•X2 wireless headphones
•Transmitter base unit
•DC power adapter
•2 AAA batteries
•Xbox controller connection cable
•Audio connection cables
•This user's guide
For warranty information please visit http://support.turtlebeach.com
Copyright © 2006, Voyetra Turtle Beach, Inc. (VTB). All rights reserved. No part of this document may be reproduced without permission. Turtle Beach, the Turtle Beach logo and Ear Force are trademarks of VTB. Xbox and Xbox Live are trademarks of Microsoft Corporation. All other trademarks are properties of their respective companies and are hereby acknowledged. Product features, visual design, package contents and specifications are subject to change without notice.
V6
Product#