
2115WCOL2, 2175WCOL2 specifications
The U-Line 2175WCOL2 and 2115WCOL2 are premium undercounter refrigerators designed to enhance both functionality and style in various settings, including kitchens, bars, and outdoor spaces. As part of U-Line's innovative beverage center offerings, these models stand out for their advanced features, reliability, and versatility, catering to a discerning consumer base.Both models boast a sleek, contemporary design that seamlessly integrates into existing cabinetry. With a capacity to hold up to 24 cans for the 2175WCOL2 and 15 bottles for the 2115WCOL2, they are perfect for entertaining or simply enjoying a refreshment at home. The adjustable shelving in these units allows for customizable storage arrangements, accommodating a wide range of beverage sizes, from cans to wine bottles.
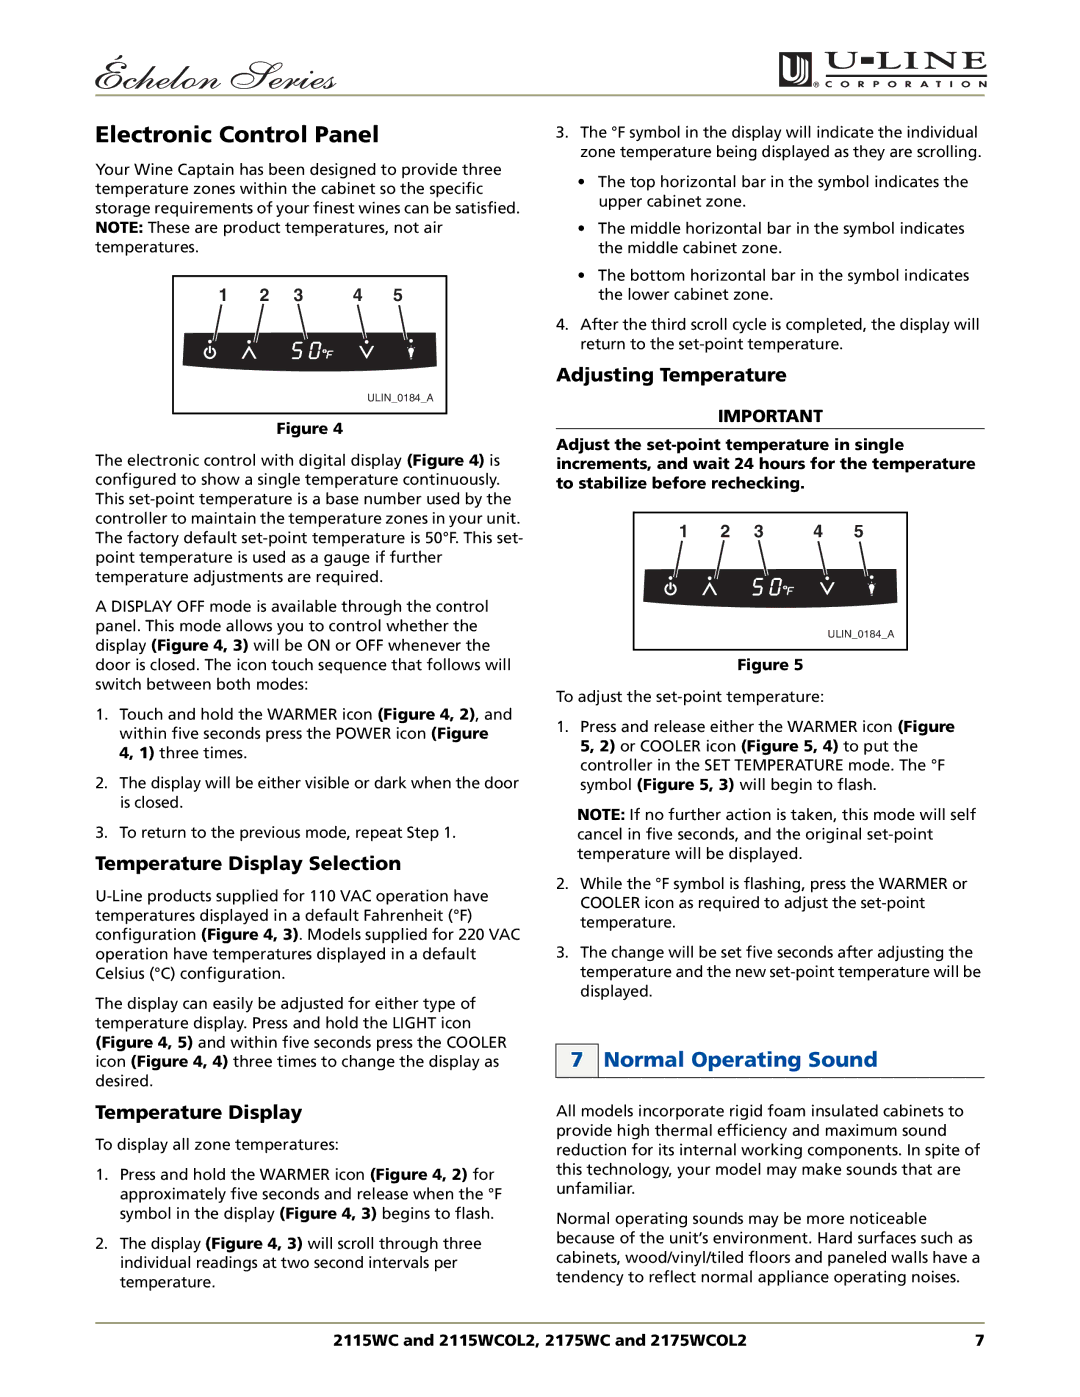
Temperature control is a hallmark of the U-Line brand, and these models do not disappoint. They feature a temperature range of 34°F to 65°F, ensuring that beverages are stored at optimal conditions. The precision cooling system utilizes an advanced compressor, complemented by a dynamically adjustable airflow system that minimizes temperature fluctuations. This technology keeps drinks at the perfect chill, while also protecting their flavors and freshness.
Another standout feature is the energy efficiency of the U-Line 2175WCOL2 and 2115WCOL2. Both models are ENERGY STAR qualified, reflecting their commitment to environmental sustainability without sacrificing performance. The LED lighting enhances visibility and creates an inviting ambiance, while using less energy than traditional lighting options.
User convenience is central to the design of these undercounter refrigerators. The models come with a door lock option, providing an added layer of security for stored beverages. The intuitive digital control panel allows for straightforward adjustments, making it easy to maintain the desired internal climate.
Overall, the U-Line 2175WCOL2 and 2115WCOL2 are well-engineered, stylish, and functional appliances that cater to modern lifestyles. Their blend of cutting-edge technology, energy efficiency, and customizable storage options makes them a perfect addition to any home, ensuring that beverages are always within reach, perfectly chilled, and ready to enjoy. Whether for personal use or entertaining guests, these undercounter refrigerators deliver reliability and elegance in any setting.