UltraLink 2 | Quick Start Guide | |||||||||
|
|
|
|
|
|
|
|
| ||
|
|
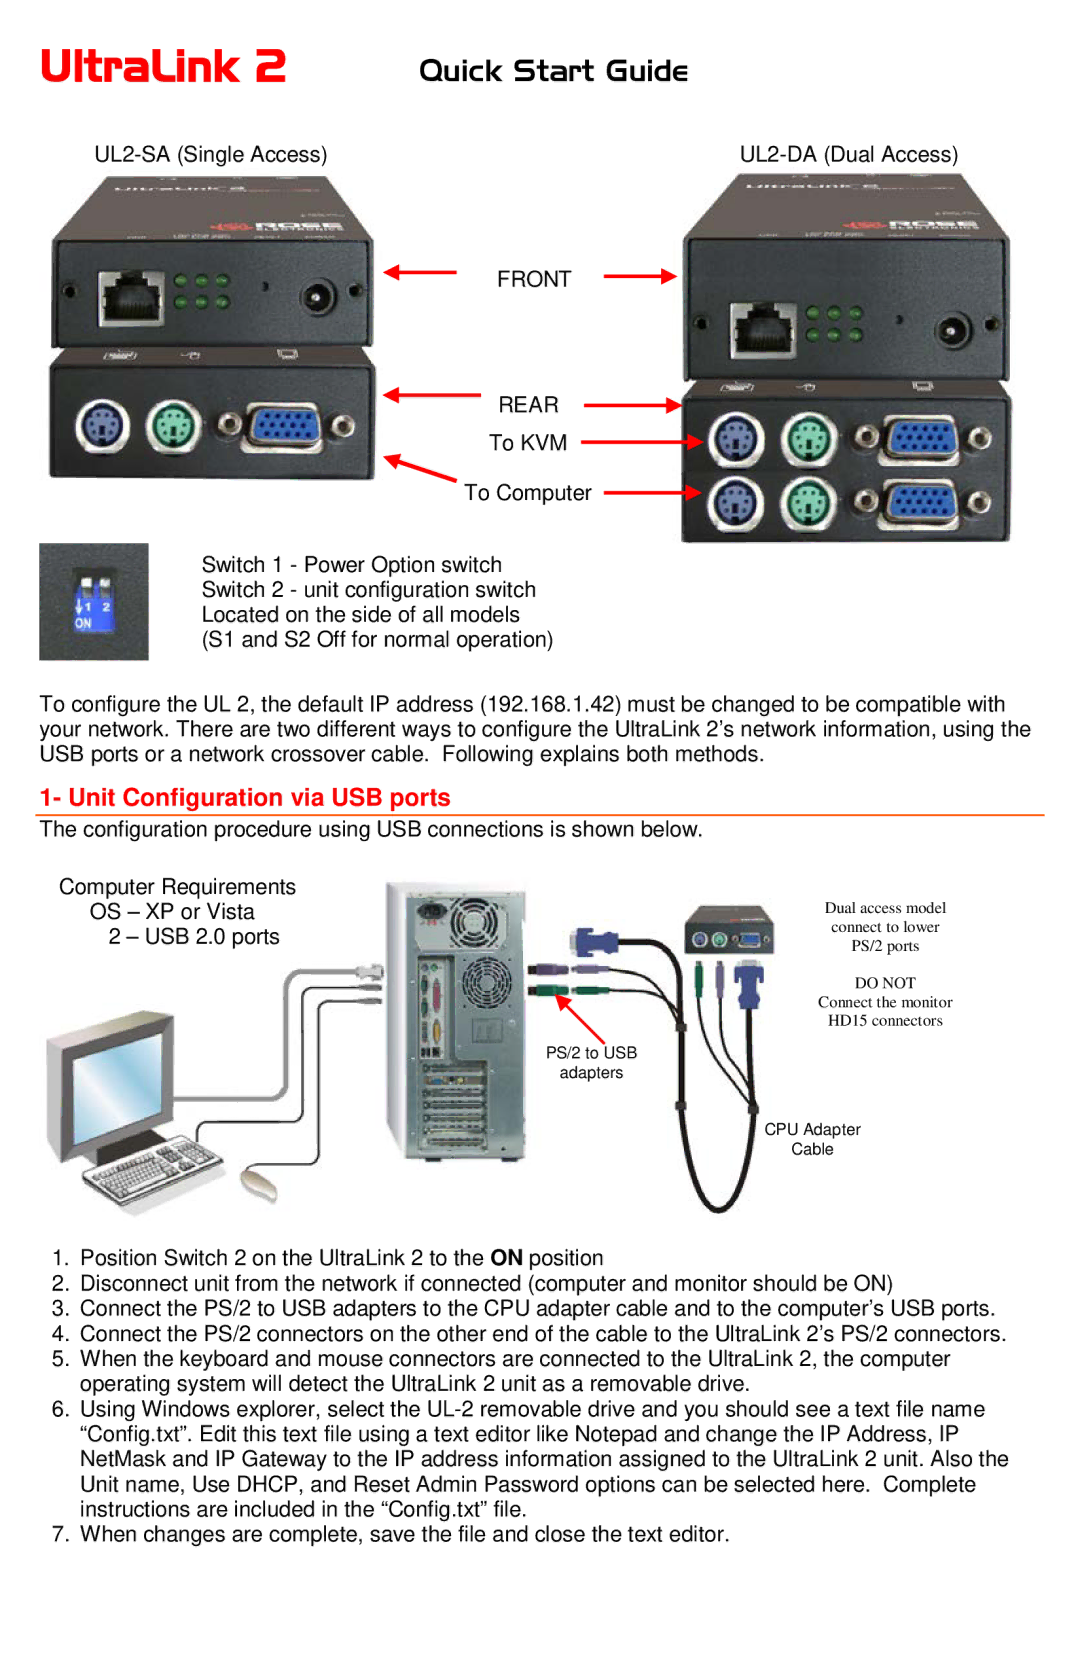
| FRONT |
|
|
| ||||
|
|
|
| |||||||
|
|
| REAR |
|
| |||||
|
|
| ||||||||
|
|
|
| |||||||
|
|
| To KVM |
|
|
|
|
|
|
|
|
|
|
|
|
|
| ||||
|
| To Computer |
|
|
|
| ||||
|
|
|
| |||||||
Switch 1 - Power Option switch Switch 2 - unit configuration switch Located on the side of all models (S1 and S2 Off for normal operation)
To configure the UL 2, the default IP address (192.168.1.42) must be changed to be compatible with your network. There are two different ways to configure the UltraLink 2’s network information, using the USB ports or a network crossover cable. Following explains both methods.
1- Unit Configuration via USB ports
The configuration procedure using USB connections is shown below.
Computer Requirements
OS – XP or Vista | Dual access model |
2 – USB 2.0 ports | connect to lower |
PS/2 ports | |
| DO NOT |
| Connect the monitor |
| HD15 connectors |
PS/2 to USB
adapters
CPU Adapter
Cable
1.Position Switch 2 on the UltraLink 2 to the ON position
2.Disconnect unit from the network if connected (computer and monitor should be ON)
3.Connect the PS/2 to USB adapters to the CPU adapter cable and to the computer’s USB ports.
4.Connect the PS/2 connectors on the other end of the cable to the UltraLink 2’s PS/2 connectors.
5.When the keyboard and mouse connectors are connected to the UltraLink 2, the computer operating system will detect the UltraLink 2 unit as a removable drive.
6.Using Windows explorer, select the
7.When changes are complete, save the file and close the text editor.