
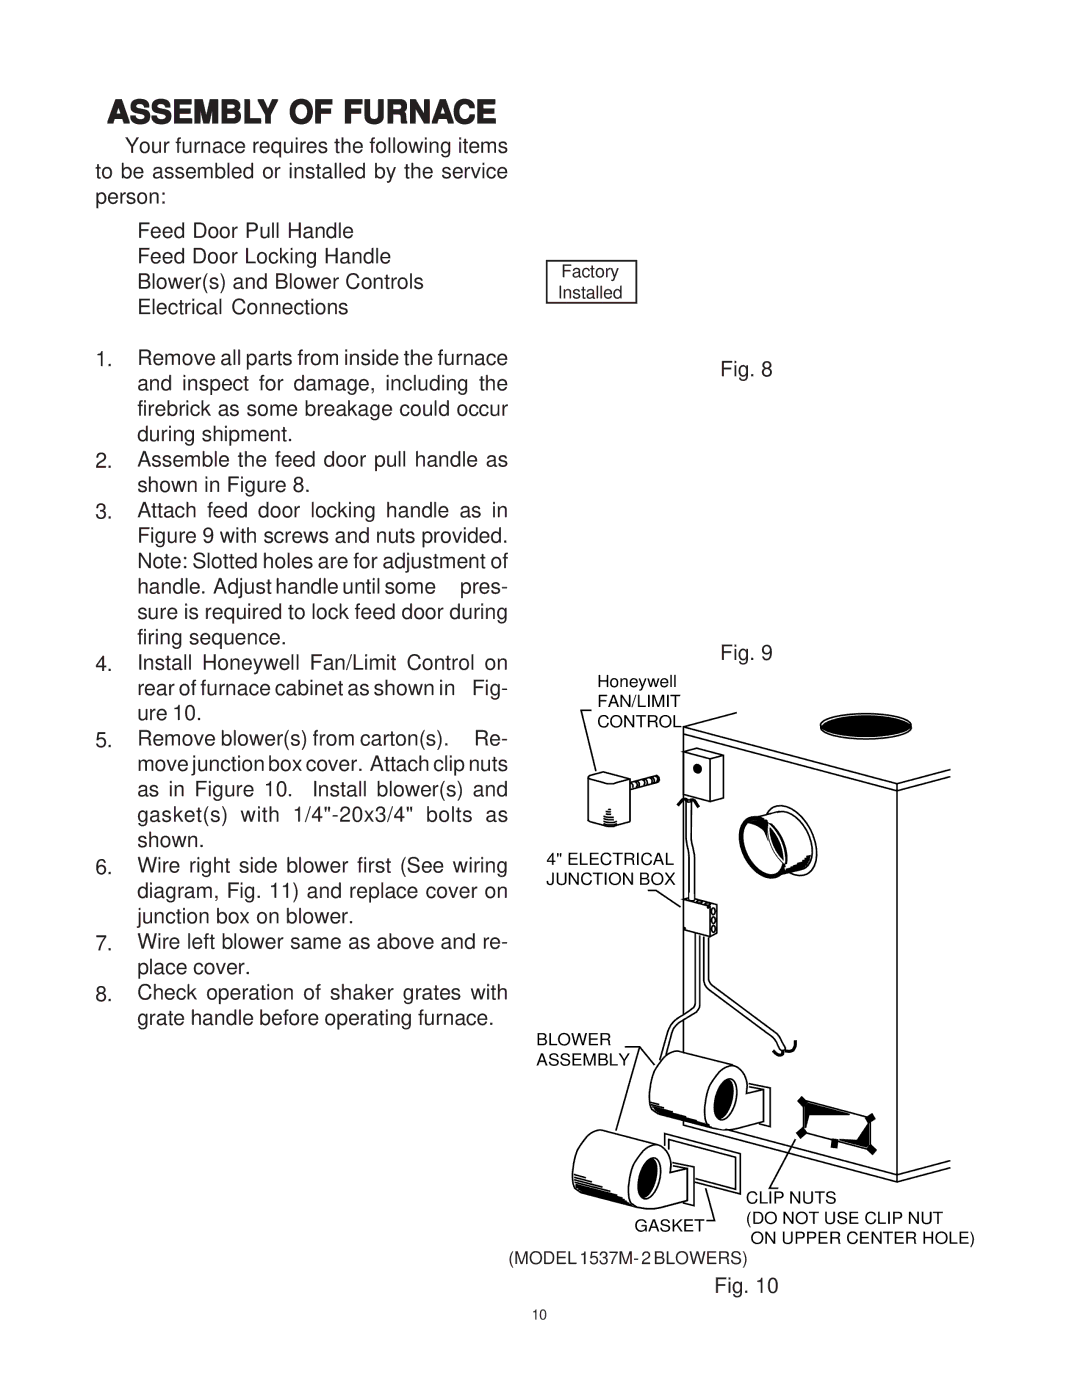
1537M specifications
The United States Stove 1537M is a remarkable wood-burning stove that combines efficiency, aesthetic appeal, and modern features. Designed for residential heating, this model is particularly suited for medium-sized spaces, making it a popular choice among homeowners seeking an economical and environmentally friendly heating solution.One of the primary features of the United States Stove 1537M is its impressive heating capacity. It can effectively heat areas up to 1,500 square feet, ensuring warmth during the cold winter months. The stove utilizes a large firebox that can accommodate logs up to 18 inches long, allowing for longer burn times and reduced need for frequent reloading.
The 1537M incorporates advanced technologies to maximize combustion efficiency and minimize emissions. It is equipped with a secondary combustion system that ensures that any unburned gases are ignited in the upper part of the firebox. This not only increases the heat output but also reduces the amount of creosote buildup in the chimney, enhancing safety and maintenance ease.
The stove features a built-in thermostat control, enabling users to regulate the interior temperature easily. Additionally, it boasts an air wash system designed to keep the glass door clear, offering a beautiful view of the flames while enhancing visibility and ambiance in any room.
Constructed with robust materials, the United States Stove 1537M is built to last. Its durable steel body ensures long-term usage, while the cast iron door provides a traditional look with the added benefit of durability and heat retention. The attractive design features a classic black finish, blending seamlessly with various home interiors.
Moreover, this model prioritizes user comfort and convenience. It includes a large loading door for easy access to the firebox, allowing for stress-free loading of wood. Cleaning is also straightforward, with a removable ash pan that simplifies the disposal of ashes.
In summary, the United States Stove 1537M stands out as a top-quality wood-burning stove that effectively combines functionality, efficiency, and aesthetic appeal. With its advanced combustion technologies, substantial heating capacity, and ease of use, this stove is an excellent investment for those looking to enhance their home heating solutions while maintaining a cozy and inviting atmosphere.