INSTALLATION AND OPERATION
INSTALLATION INSTRUCTIONS: CAUTION!! READ CAREFULLY.
CAUTION: THIS UNIT IS SEALED. THE COVER IS NOT REMOVABLE!
•A mounting plate is provided on the back of the alarm.
•Remove the mounting plate from the back of the alarm by holding the mounting plate and twisting the alarm in the direction indicated by the "OFF" arrow on the alarm cover.
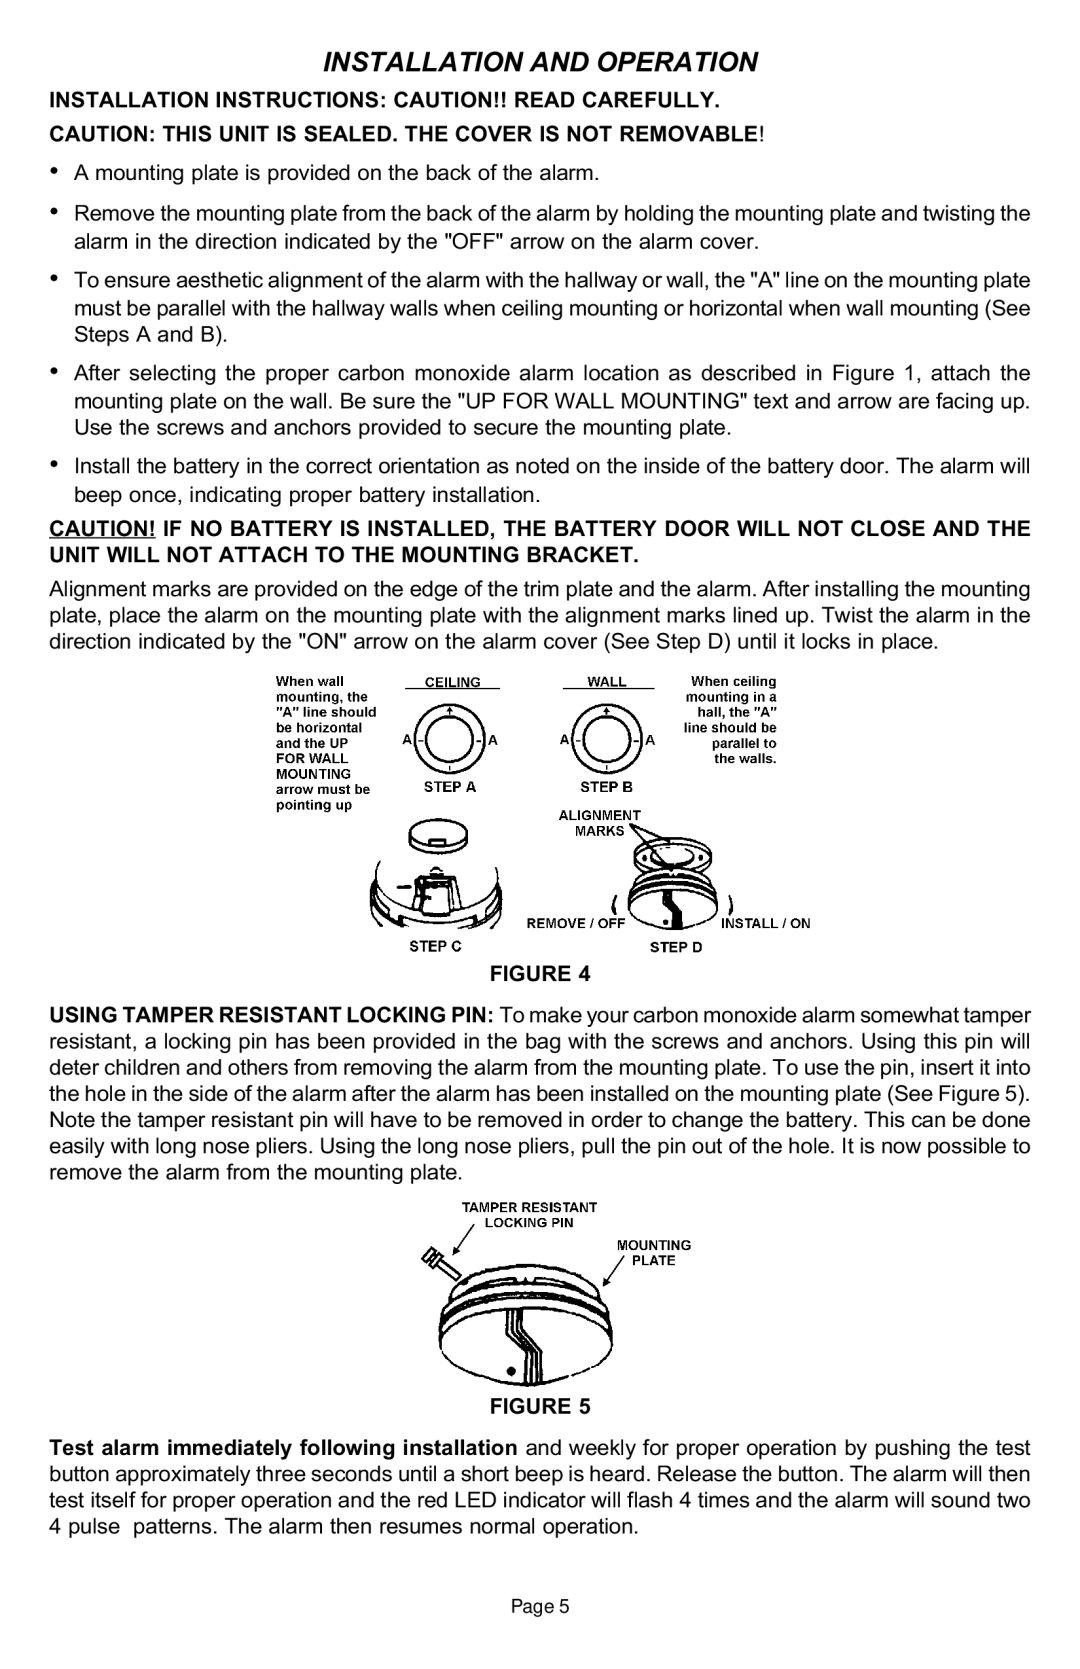
•To ensure aesthetic alignment of the alarm with the hallway or wall, the "A" line on the mounting plate must be parallel with the hallway walls when ceiling mounting or horizontal when wall mounting (See Steps A and B).
•After selecting the proper carbon monoxide alarm location as described in Figure 1, attach the mounting plate on the wall. Be sure the "UP FOR WALL MOUNTING" text and arrow are facing up. Use the screws and anchors provided to secure the mounting plate.
•Install the battery in the correct orientation as noted on the inside of the battery door. The alarm will beep once, indicating proper battery installation.
CAUTION! IF NO BATTERY IS INSTALLED, THE BATTERY DOOR WILL NOT CLOSE AND THE UNIT WILL NOT ATTACH TO THE MOUNTING BRACKET.
Alignment marks are provided on the edge of the trim plate and the alarm. After installing the mounting plate, place the alarm on the mounting plate with the alignment marks lined up. Twist the alarm in the direction indicated by the "ON" arrow on the alarm cover (See Step D) until it locks in place.
FIGURE 4
USING TAMPER RESISTANT LOCKING PIN: To make your carbon monoxide alarm somewhat tamper resistant, a locking pin has been provided in the bag with the screws and anchors. Using this pin will deter children and others from removing the alarm from the mounting plate. To use the pin, insert it into the hole in the side of the alarm after the alarm has been installed on the mounting plate (See Figure 5). Note the tamper resistant pin will have to be removed in order to change the battery. This can be done easily with long nose pliers. Using the long nose pliers, pull the pin out of the hole. It is now possible to remove the alarm from the mounting plate.
FIGURE 5
Test alarm immediately following installation and weekly for proper operation by pushing the test button approximately three seconds until a short beep is heard. Release the button. The alarm will then test itself for proper operation and the red LED indicator will flash 4 times and the alarm will sound two 4 pulse patterns. The alarm then resumes normal operation.
Page 5