10.Locate the USER LEFT AND RIGHT SEAT POST SHROUDS (#7 & #8). Position the USER LEFT SEAT POST SHROUD
(#7) below the seat covering the ADJUSTMENT LEVER (F) as | F | |
shown. Interlock the two tabs of the USER RIGHT SEAT | ||
| ||
POST SHROUD (#8) to the corresponding slots of the USER |
| |
LEFT SEAT POST SHROUD and pivot it forward to meet the |
| |
USER LEFT SEAT POST SHROUD enclosing the SEAT |
| |
ADJUSTMENT LEVER. Secure the SEAT POST SHROUDS |
| |
together using one SCREW (#12). |
|
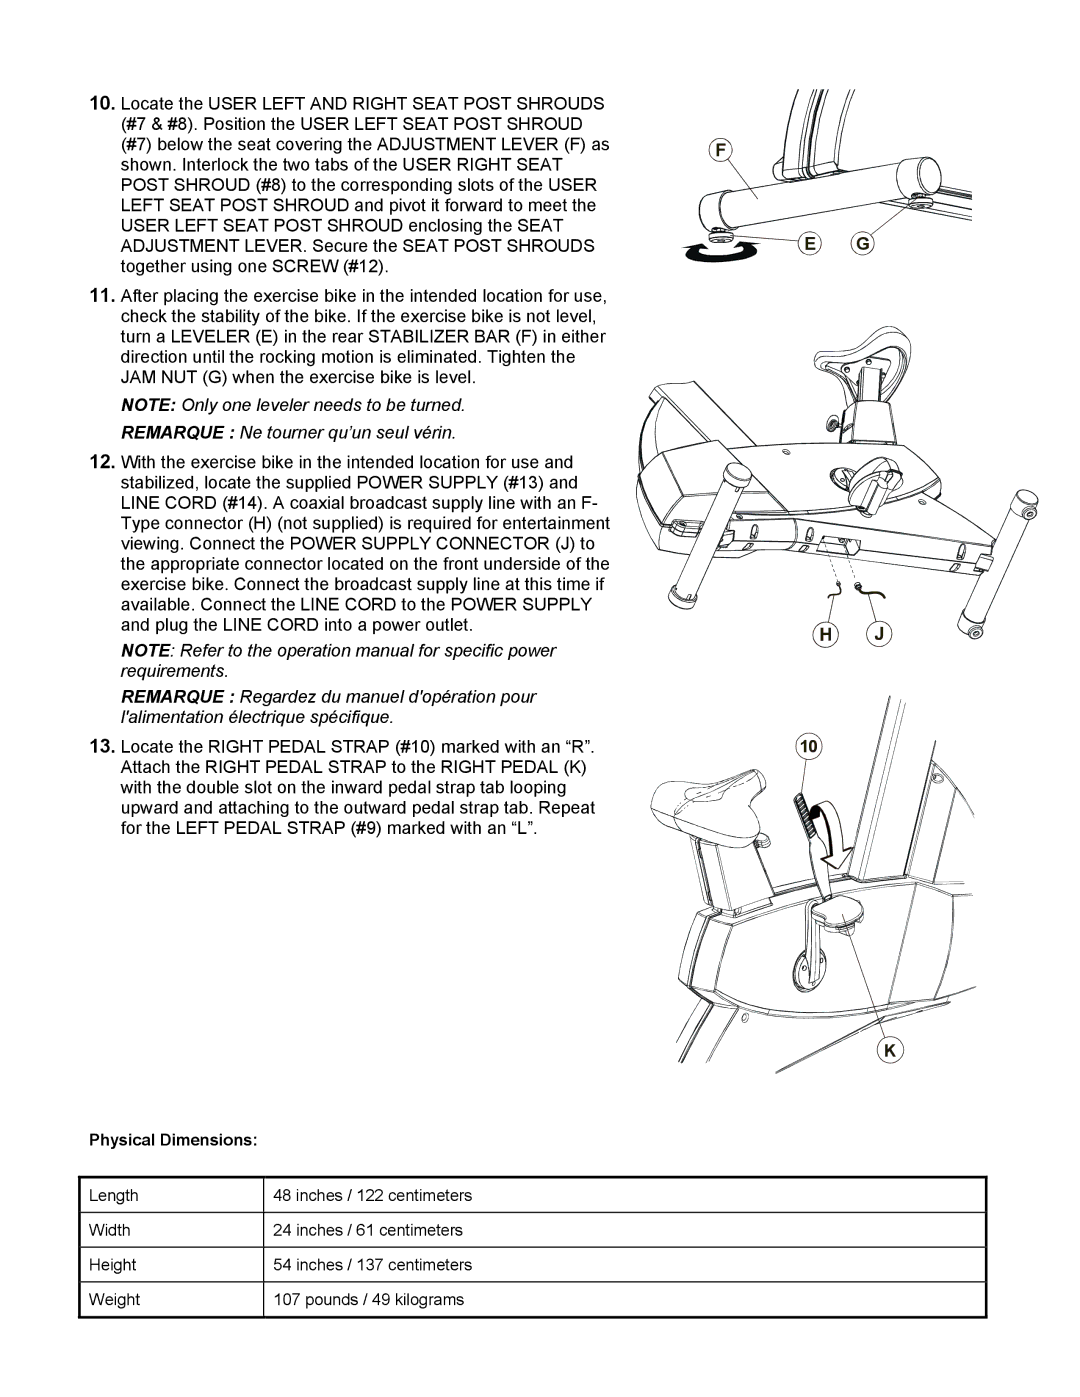
11.After placing the exercise bike in the intended location for use, check the stability of the bike. If the exercise bike is not level, turn a LEVELER (E) in the rear STABILIZER BAR (F) in either direction until the rocking motion is eliminated. Tighten the JAM NUT (G) when the exercise bike is level.
NOTE: Only one leveler needs to be turned.
REMARQUE : Ne tourner qu’un seul vérin.
12. With the exercise bike in the intended location for use and stabilized, locate the supplied POWER SUPPLY (#13) and LINE CORD (#14). A coaxial broadcast supply line with an F- Type connector (H) (not supplied) is required for entertainment viewing. Connect the POWER SUPPLY CONNECTOR (J) to the appropriate connector located on the front underside of the exercise bike. Connect the broadcast supply line at this time if available. Connect the LINE CORD to the POWER SUPPLY and plug the LINE CORD into a power outlet.
NOTE: Refer to the operation manual for specific power requirements.
REMARQUE : Regardez du manuel d'opération pour l'alimentation électrique spécifique.
13.Locate the RIGHT PEDAL STRAP (#10) marked with an “R”. Attach the RIGHT PEDAL STRAP to the RIGHT PEDAL (K)
with the double slot on the inward pedal strap tab looping upward and attaching to the outward pedal strap tab. Repeat for the LEFT PEDAL STRAP (#9) marked with an “L”.
Physical Dimensions: |
|
|
|
Length | 48 inches / 122 centimeters |
|
|
Width | 24 inches / 61 centimeters |
|
|
Height | 54 inches / 137 centimeters |
|
|
Weight | 107 pounds / 49 kilograms |
|
|
E G
10
K