
VGN30 specifications
The Vanguard Heating VGN30 is a cutting-edge heating solution that has been designed to deliver exceptional performance and efficiency for residential and commercial spaces. This heating unit is known for its advanced technology, reliability, and ease of use, making it an ideal choice for consumers looking to enhance their indoor comfort.One of the standout features of the VGN30 is its high-efficiency heating system. With a thermal efficiency rating that exceeds industry standards, this unit utilizes innovative combustion technology to maximize heat output while minimizing fuel consumption. This results in reduced energy bills and a lower environmental footprint, making it an eco-friendly choice.
The VGN30 is equipped with a robust stainless steel heat exchanger that enhances durability and ensures long-lasting performance. This material is resistant to corrosion and wear, allowing the unit to maintain peak efficiency over time. Furthermore, the heat exchanger's design promotes optimal heat transfer, ensuring that spaces are heated quickly and evenly.
User comfort and convenience are paramount in the design of the VGN30. The unit features a user-friendly digital thermostat that enables precise temperature control and allows users to program heating schedules based on their preferences. This smart technology not only enhances comfort but also contributes to energy savings.
Safety is another critical aspect of the VGN30. The unit includes multiple safety features, such as overheat protection and a flame failure cutoff system, which automatically shuts off the heating element in case of any malfunctions. This provides peace of mind for users, knowing that their heating system prioritizes safety.
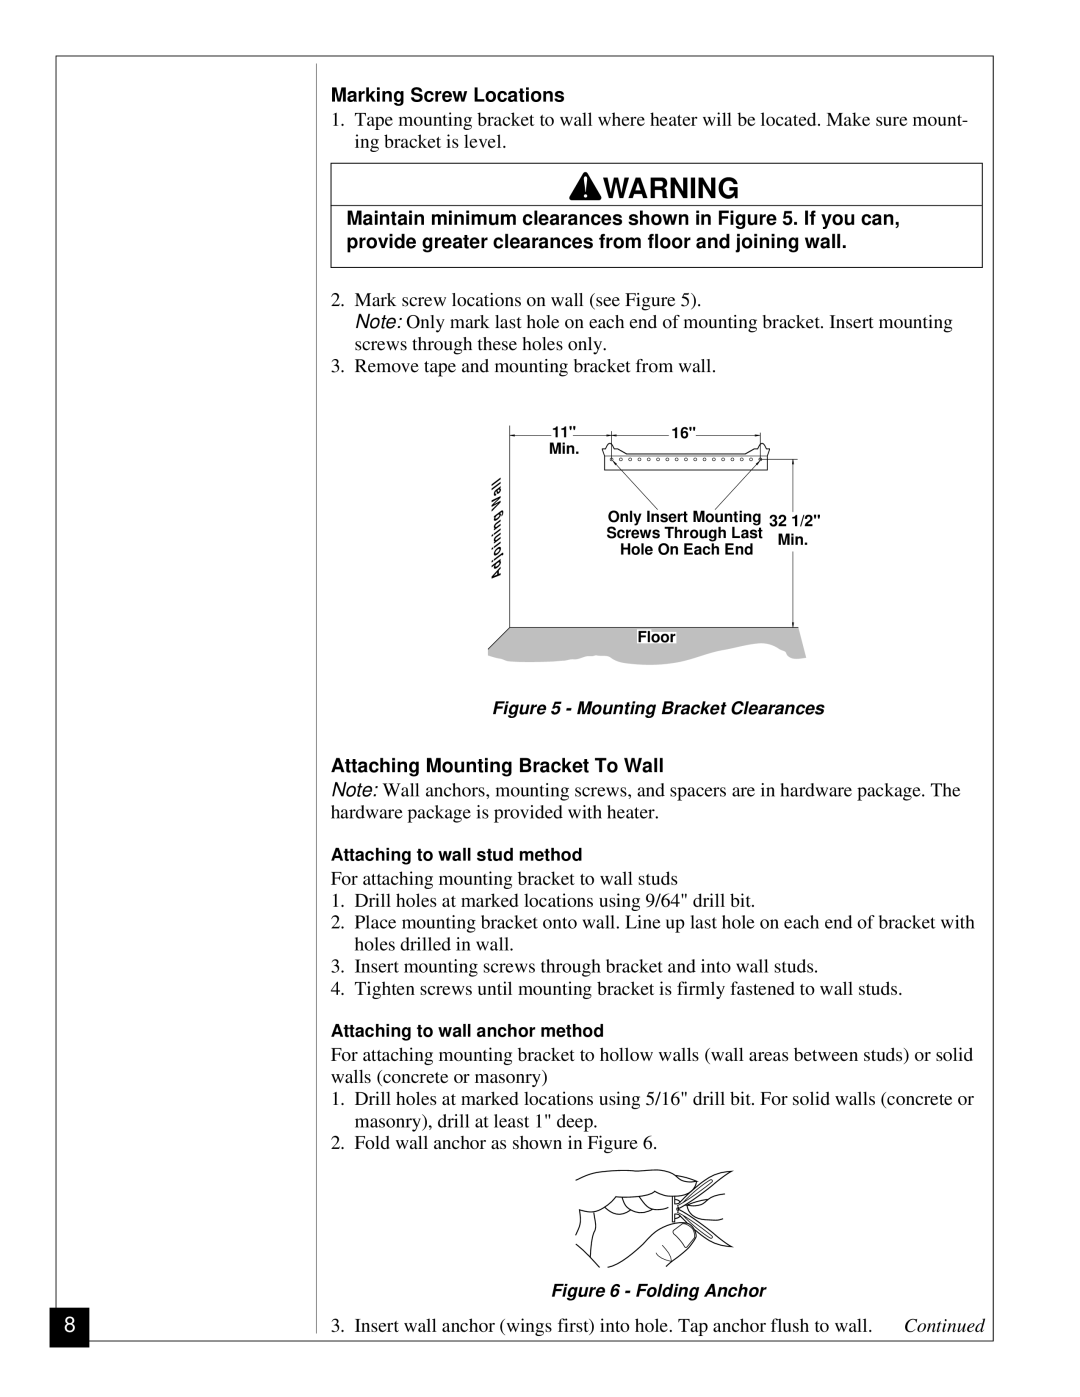
Installation and maintenance are straightforward with the VGN30. The unit is designed for easy access to components, facilitating routine maintenance and ensuring that it operates efficiently throughout its lifespan. Additionally, the VGN30’s compact design allows for versatile placement in various environments, whether in a utility room or basement.
In summary, the Vanguard Heating VGN30 stands out as a reliable and efficient heating solution. Its high efficiency, durable construction, user-friendly technology, and safety features make it a top contender for anyone seeking to improve their heating system. With the VGN30, users can enjoy a warm, comfortable environment while reducing energy costs and their impact on the planet.