VMH26TPA specifications
The Vanguard Heating VMH26TPA is designed to provide efficient, reliable, and eco-friendly heating solutions for modern homes. This heating unit boasts a variety of advanced features and technologies that ensure optimal performance and comfort, making it a popular choice among homeowners.One of the standout characteristics of the VMH26TPA is its high efficiency rating. With an impressive Annual Fuel Utilization Efficiency (AFUE) rating, this unit operates at a significantly lower cost compared to traditional heating systems. This means not only lower energy bills but also a reduced carbon footprint, making it a sustainable choice for environmentally-conscious consumers.
Moreover, the VMH26TPA employs innovative technologies that enhance user control and comfort. It comes equipped with a smart thermostat, allowing homeowners to adjust settings remotely using a smartphone or tablet. This feature enables precise temperature control, so users can ensure their home remains comfortable even when they are away.
The compact design of the VMH26TPA is another advantage. This unit is specially engineered to fit in smaller spaces without sacrificing performance. Its sleek and modern aesthetic also ensures that it can blend seamlessly with a variety of home decors, making it not just functional but visually appealing.
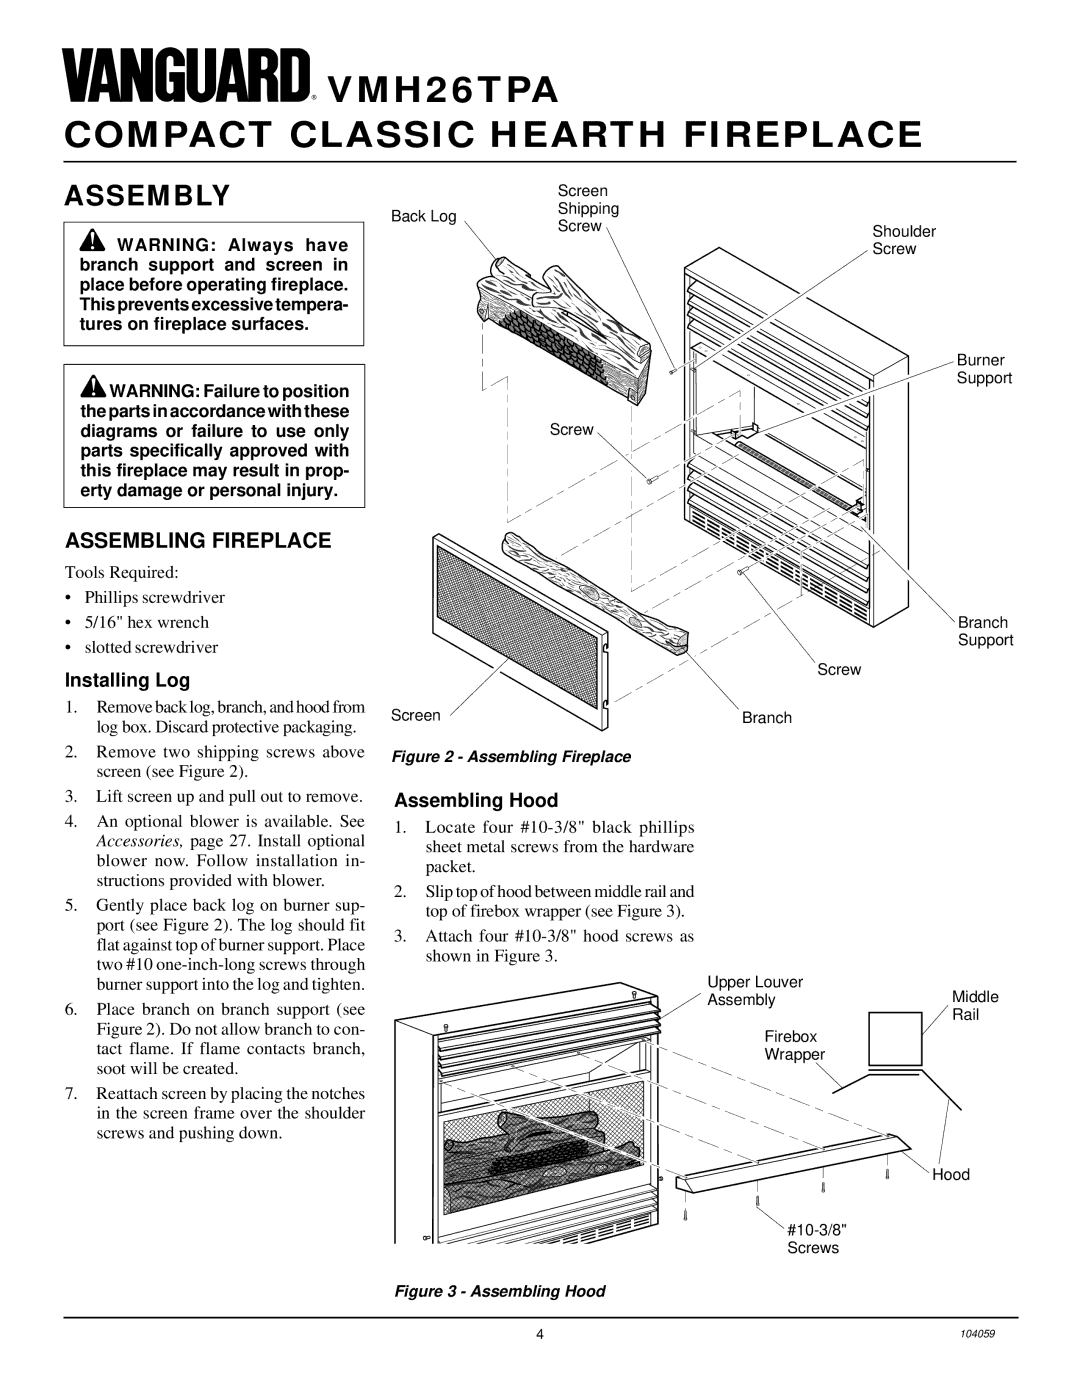
In terms of installation, the VMH26TPA features a streamlined process that is generally straightforward for professionals. This reduces the time and hassle typically associated with heating system installations. Additionally, the unit is built with durable materials that ensure longevity and reduce the likelihood of malfunction over time.
Noise levels during operation are minimal, thanks to Vanguard Heating's engineering innovations. This means homeowners can enjoy a quiet environment without interruptions from traditional heating noises.
Maintenance is made easy with the VMH26TPA, as it is designed to be user-friendly. Regular upkeep can be performed with basic tools, and Vanguard provides clear guidelines, ensuring that homeowners can keep the system in excellent working order without excessive effort or cost.
In summary, the Vanguard Heating VMH26TPA embodies efficiency, convenience, and durability. With its advanced technology, high efficiency rating, compact design, and user-friendly features, it provides an outstanding heating solution for homeowners looking to enhance their comfort while being mindful of their energy consumption. This makes it a strong contender in today's competitive heating market, appealing to a wide array of consumers.

