10
INSTALLING TO WALL
Continued
For convenience and efficiency, install heater
•where there is easy access for operation, inspection, and service
•in coldest part of room
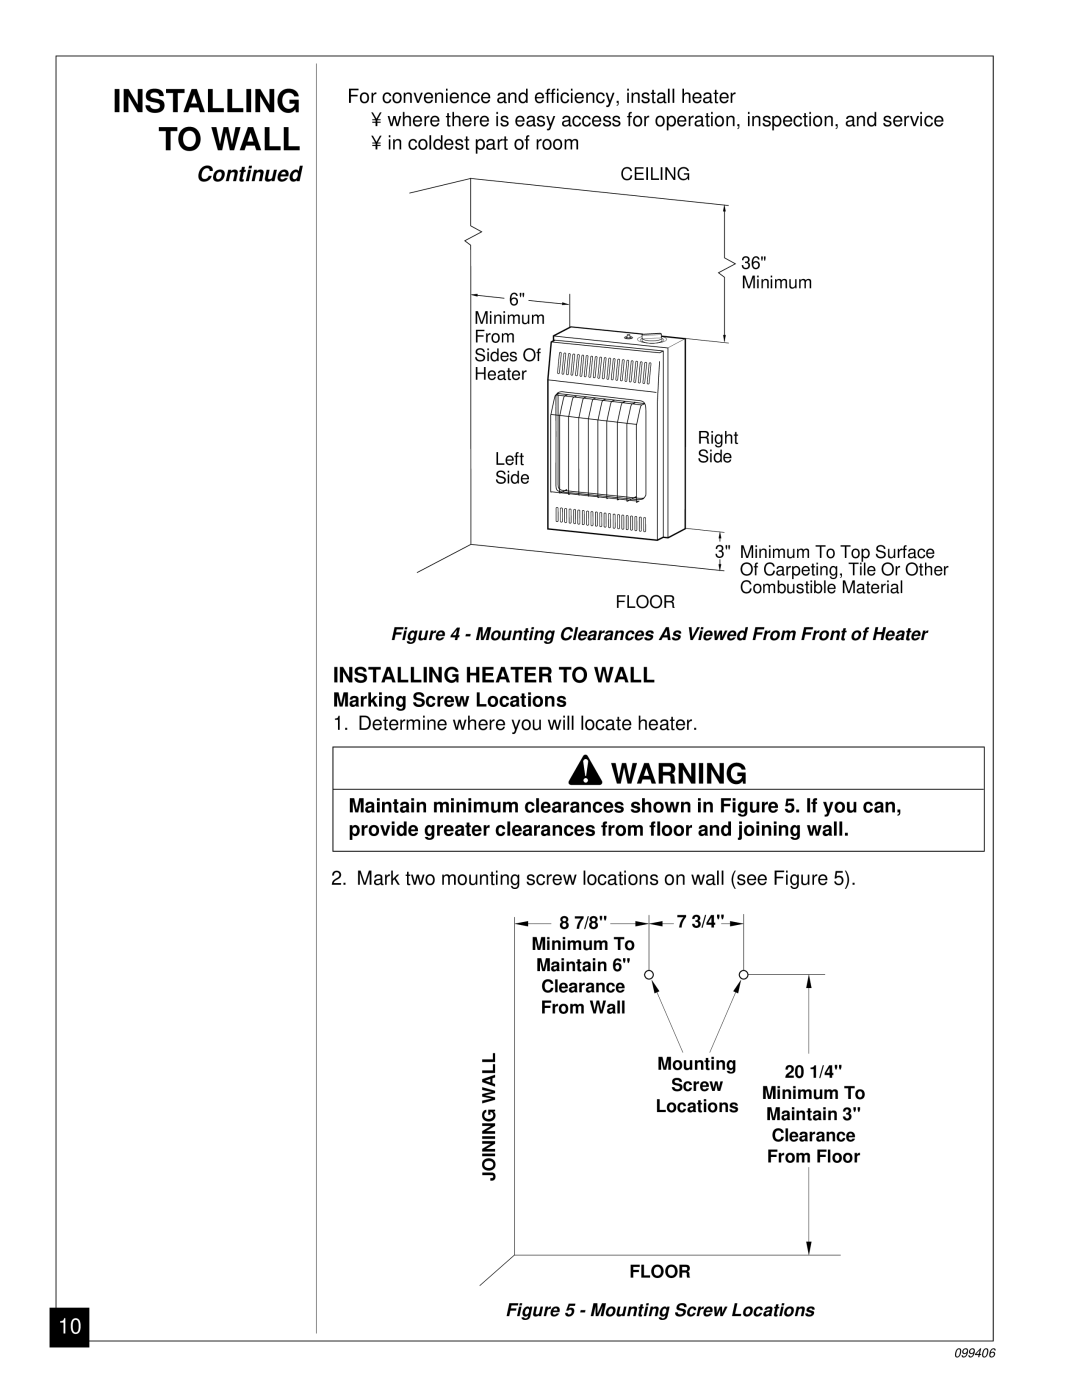
CEILING
36"
Minimum
![]() 6" Minimum
6" Minimum
From ![]()
![]()
![]() Sides Of
Sides Of
Heater
Right
LeftSide
Side
3" Minimum To Top Surface
Of Carpeting, Tile Or Other
Combustible Material
FLOOR
Figure 4 - Mounting Clearances As Viewed From Front of Heater
INSTALLING HEATER TO WALL
Marking Screw Locations
1. Determine where you will locate heater.
WARNING
WARNING ICON | G 001 |
Maintain minimum clearances shown in Figure 5. If you can, provide greater clearances from floor and joining wall.
2. Mark two mounting screw locations on wall (see Figure 5).
|
| 8 7/8" |
|
|
| 7 3/4" |
|
|
|
|
| |
|
|
|
|
|
|
|
| |||||
| Minimum To |
|
|
|
|
|
|
| ||||
| Maintain 6" |
|
|
|
|
|
|
| ||||
|
|
|
|
|
|
| ||||||
| Clearance |
|
|
|
|
|
|
| ||||
| From Wall |
|
|
|
|
|
|
| ||||
WALL | Mounting |
|
|
|
| |||||||
20 1/4" | ||||||||||||
Screw | ||||||||||||
| Minimum To | |||||||||||
JOINING | Locations |
| Maintain 3" | |||||||||
|
|
|
| |||||||||
|
|
|
| Clearance | ||||||||
|
|
|
|
|
|
|
|
| ||||
|
|
|
|
|
|
|
|
| From Floor | |||
FLOOR
Figure 5 - Mounting Screw Locations
099406