ASSEMBLY INSTRUCTIONS
Before assembling, please review all instructions.
1.Carefully remove all parts from the box and make sure all parts listed on the spare parts illustration are included. If any parts are missing, please contact Verilux at
2.Assemble 3 shaft sections (A) according to the illustration and make sure sections are joined together securely.
NOTE: The middle shaft section can be taken out when using Sweeper on stairs or on upholstery
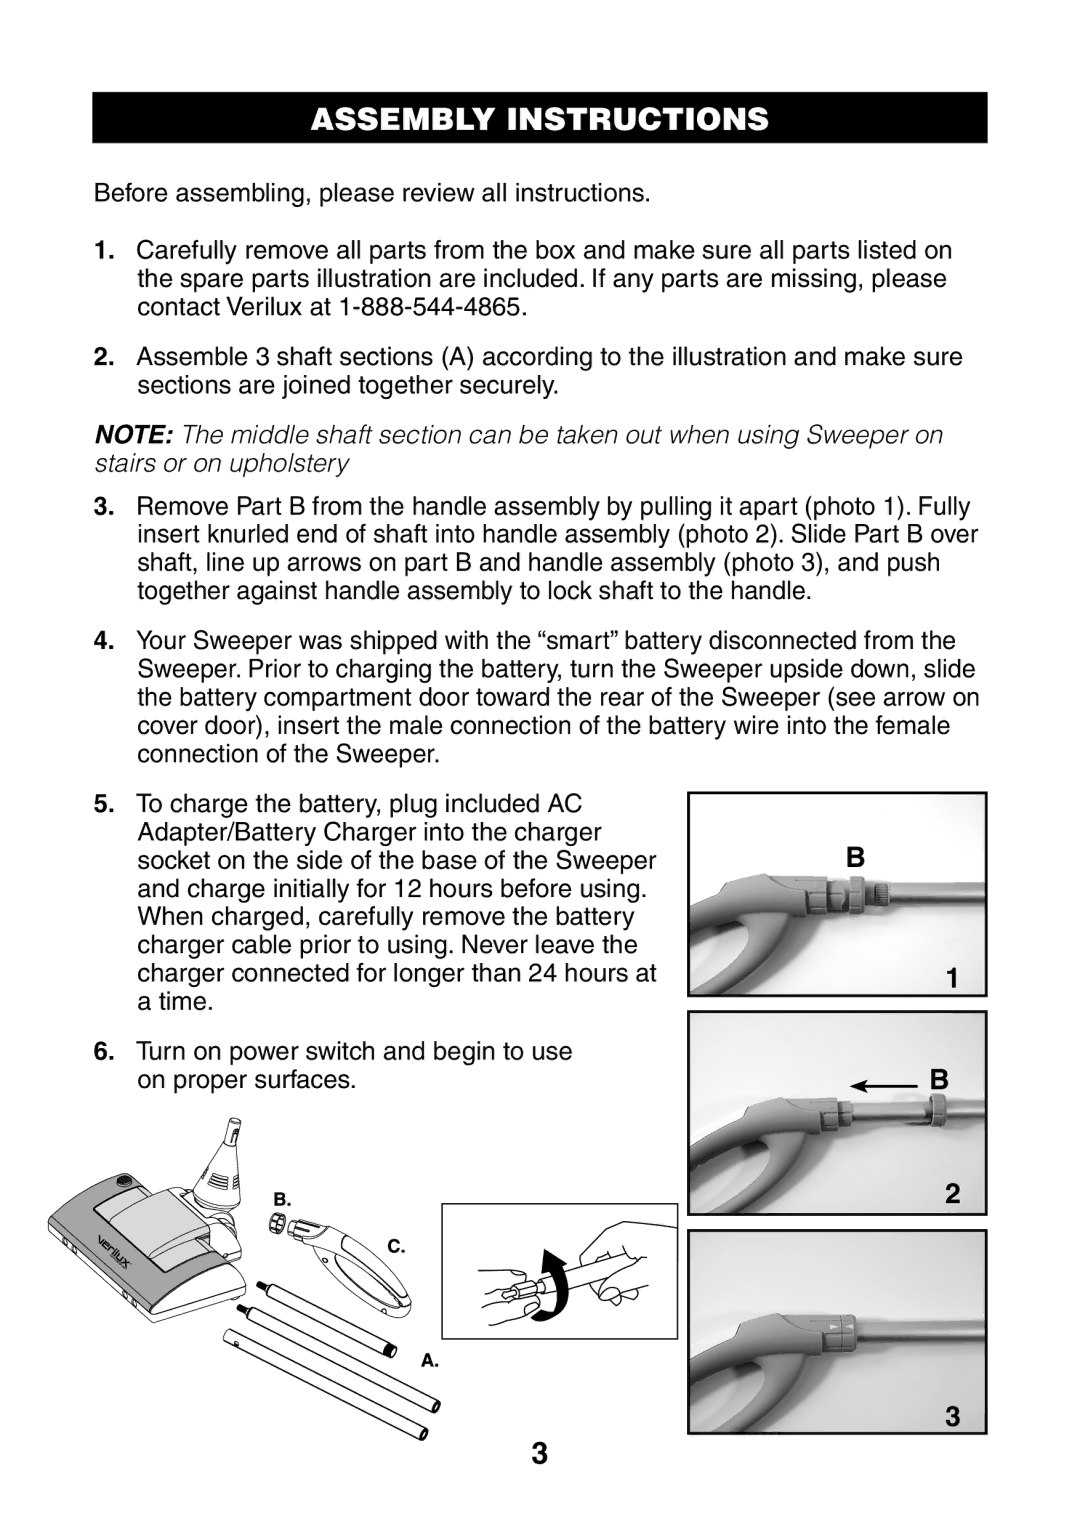
3.Remove Part B from the handle assembly by pulling it apart (photo 1). Fully insert knurled end of shaft into handle assembly (photo 2). Slide Part B over shaft, line up arrows on part B and handle assembly (photo 3), and push together against handle assembly to lock shaft to the handle.
4.Your Sweeper was shipped with the “smart” battery disconnected from the Sweeper. Prior to charging the battery, turn the Sweeper upside down, slide the battery compartment door toward the rear of the Sweeper (see arrow on cover door), insert the male connection of the battery wire into the female connection of the Sweeper.
5.To charge the battery, plug included AC Adapter/Battery Charger into the charger socket on the side of the base of the Sweeper and charge initially for 12 hours before using. When charged, carefully remove the battery charger cable prior to using. Never leave the charger connected for longer than 24 hours at a time.
6.Turn on power switch and begin to use on proper surfaces.
B
1
B
2
3
3