Leveling/Adjusting the Door
To enhance the appearance and maintain performance, the refrigerator should be level. To protect property and refrigerator from damage, observe the following:
•Protect vinyl or other flooring with cardboard, rugs, or other protective material.
•DO NOT use power tools when performing leveling procedure.
Materials Needed
•1/4” hex head driver
•Carpenter’s level
Note: Complete any required panel installation and/or water supply connection before leveling. Refrigerator should be in permanent location prior to leveling.
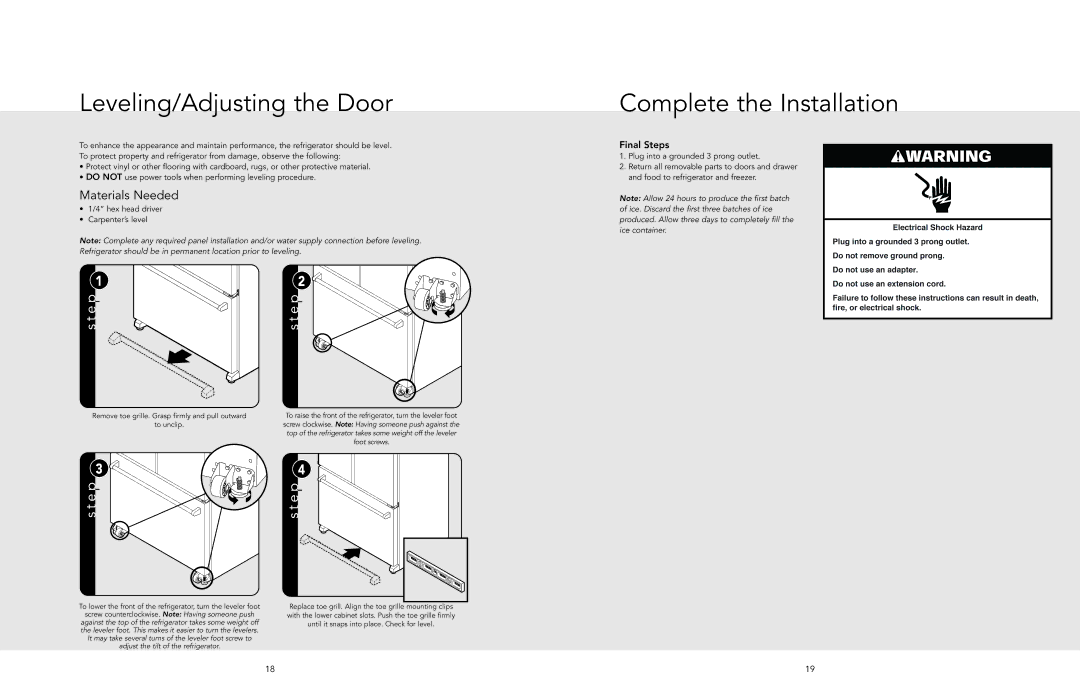
1 | 2 |
Remove toe grille. Grasp firmly and pull outward | To raise the front of the refrigerator,turn the leveler foot |
to unclip. | screw clockwise. Note: Having someone push against the |
| top of the refrigeratortakes some weight off the leveler |
| foot screws. |
3 | 4 |
To lower the front of the refrigerator, turn the leveler foot | Replace toe grill. Align the toe grille mounting clips |
screw counterclockwise. Note: Having someone push | with the lower cabinet slots. Push the toe grille firmly |
against the top of the refrigerator takes some weight off | until it snaps into place. Check for level. |
the leveler foot. This makes it easier to turn the levelers. |
|
It may take several turns of the leveler foot screw to |
|
adjust the tilt of the refrigerator. |
|
Complete the Installation
Final Steps
1.Plug into a grounded 3 prong outlet.
2.Return all removable parts to doors and drawer and food to refrigerator and freezer.
Note: Allow 24 hours to produce the first batch of ice. Discard the first three batches of ice produced. Allow three days to completely fill the ice container.
18 | 19 |
