8:(Optional): Speaker performance can be enhanced by insulating the cavity with fiberglass insulation. When installing speakers in a ceiling, it is best to install a sheet of fiberglass insulation behind and around the back of the speaker.

9:Pull the cable slack through the hole in the ceiling and strip off the outer jacket. Strip about ½” of insulation off the ends of the wires. Connect the positive wire from the amplifier to the red terminal on the speaker. Connect the negative wire to the black terminal on the speaker.

Note: Make sure the power is turned off on your amplifier or receiver before con- necting the speakers.

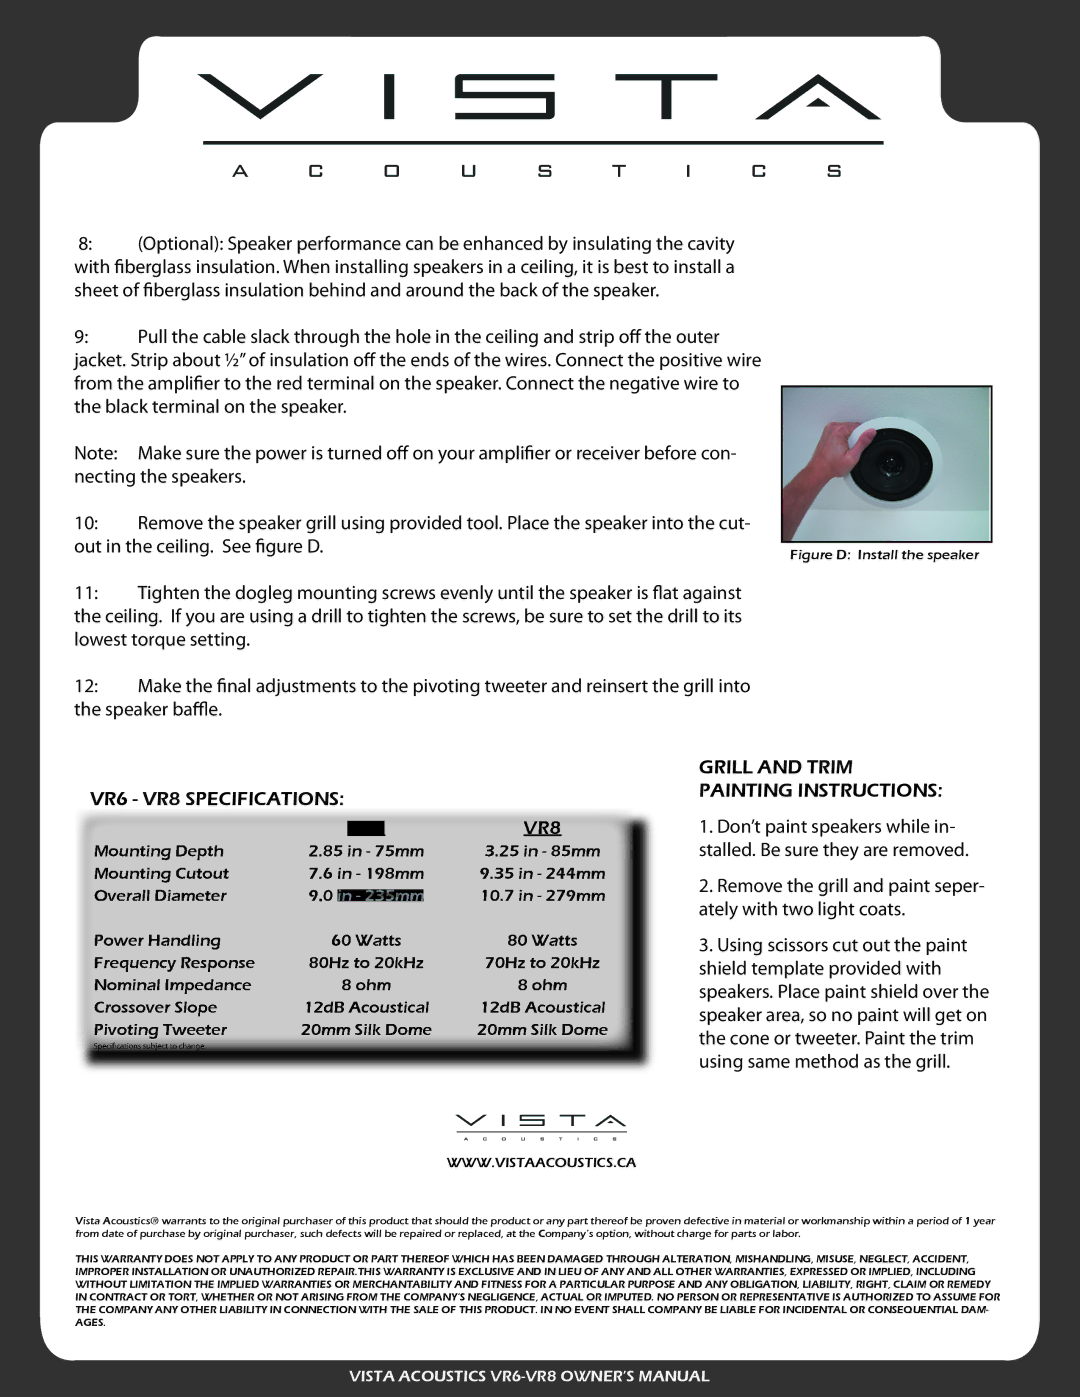
10:Remove the speaker grill using provided tool. Place the speaker into the cut-

out in the ceiling. See figure D.

Figure D: Install the speaker


11:Tighten the dogleg mounting screws evenly until the speaker is flat against the ceiling. If you are using a drill to tighten the screws, be sure to set the drill to its lowest torque setting.

1 2: Make the final adjustments to the pivoting tweeter and reinsert the grill into the speaker baffle.


GRILL AND TRIM

VR6 - VR8 SPECIFICATIONS:


PAINTING INSTRUCTIONS:


1. Don’t paint speakers while in-


stalled. Be sure they are removed.


2. Remove the grill and paint seper-


ately with two light coats.


3. Using scissors cut out the paint


shield template provided with


speakers. Place paint shield over the


speaker area, so no paint will get on


the cone or tweeter. Paint the trim


using same method as the grill.

WWWVISTAACOUSTICS.CA

Vista Acoustics® warrants to the original purchaser of this product that should the product or any part thereof be proven defective in material or workmanship within a period of 1 year from date of purchase by original purchaser, such defects will be repaired or replaced, at the Company’s option, without charge for parts or labor.

THIS WARRANTY DOES NOT APPLY TO ANY PRODUCT OR PART THEREOF WHICH HAS BEEN DAMAGED THROUGH ALTERATION, MISHANDLING, MISUSE, NEGLECT, ACCIDENT, IMPROPER INSTALLATION OR UNAUTHORIZED REPAIR.THIS WARRANTY IS EXCLUSIVE AND IN LIEU OF ANY AND ALL OTHER WARRANTIES, EXPRESSED OR IMPLIED, INCLUDING WITHOUT LIMITATION THE IMPLIED WARRANTIES OR MERCHANTABILITY AND FITNESS FOR A PARTICULAR PURPOSE AND ANY OBLIGATION, LIABILITY, RIGHT, CLAIM OR REMEDY IN CONTRACT OR TORT, WHETHER OR NOT ARISING FROM THE COMPANY’S NEGLIGENCE, ACTUAL OR IMPUTED. NO PERSON OR REPRESENTATIVE IS AUTHORIZED TO ASSUME FOR THE COMPANY ANY OTHER LIABILITY IN CONNECTION WITH THE SALE OF THIS PRODUCT. IN NO EVENT SHALL COMPANY BE LIABLE FOR INCIDENTAL OR CONSEQUENTIAL DAM- AGES.

VISTA ACOUSTICS VR6-VR8 OWNER’S MANUAL

Page 2
Image 2
Vista Imaging VR6, VR8 manual Grill and Trim, Painting Instructions

VR8, VR6 specifications

Vista Imaging has established itself as a leader in advanced imaging technology, and their VR6 and VR8 models exemplify this through a perfect blend of performance, design, and user-centric features. These high-resolution imaging systems are designed to cater to a variety of professional fields including healthcare, industrial applications, and research.

The VR6 and VR8 are equipped with cutting-edge imaging sensors, which significantly enhance image clarity and detail. These sensors enable users to capture images in both low-light and bright environments, ensuring optimal performance under various conditions. The VR8, with its higher resolution capabilities compared to the VR6, delivers images that are richer in detail and color accuracy, making it ideal for critical applications that require precision.

One of the standout features of both models is their user-friendly interface. The intuitive touchscreen displays allow users to navigate through settings and options with ease, minimizing the learning curve and maximizing efficiency. Additionally, the cameras are designed for quick adjustments, enabling users to switch between settings with minimal downtime.

Connectivity options in both the VR6 and VR8 are extensive, supporting wireless and wired connections. This flexibility allows for seamless integration with other devices, including computers, tablets, and cloud storage solutions. Users can easily transfer images, access software updates, and utilize remote control capabilities, fostering a more connected workflow.

The image processing capabilities of these models also set them apart. Utilizing advanced algorithms, the VR6 and VR8 effectively reduce noise and enhance image quality in real-time. Users can benefit from features such as image stabilization and dynamic range optimization, ensuring that every shot is of the highest standard.

Durability is another key characteristic of the VR6 and VR8. Built with robust materials, both models are designed to withstand the rigors of fieldwork while maintaining a lightweight and ergonomic design. This makes them both portable and dependable, appealing to professionals who require reliability on-the-go.

In conclusion, the Vista Imaging VR6 and VR8 are prime examples of modern imaging technology, featuring advanced sensors, user-friendly interfaces, extensive connectivity, superior image processing, and rugged construction. These attributes make them ideal choices for professionals seeking exceptional imaging performance across various industries.