Manuals
/
Vivitek
/
Computer Equipment
/
Projector
Vivitek
D7
user manual
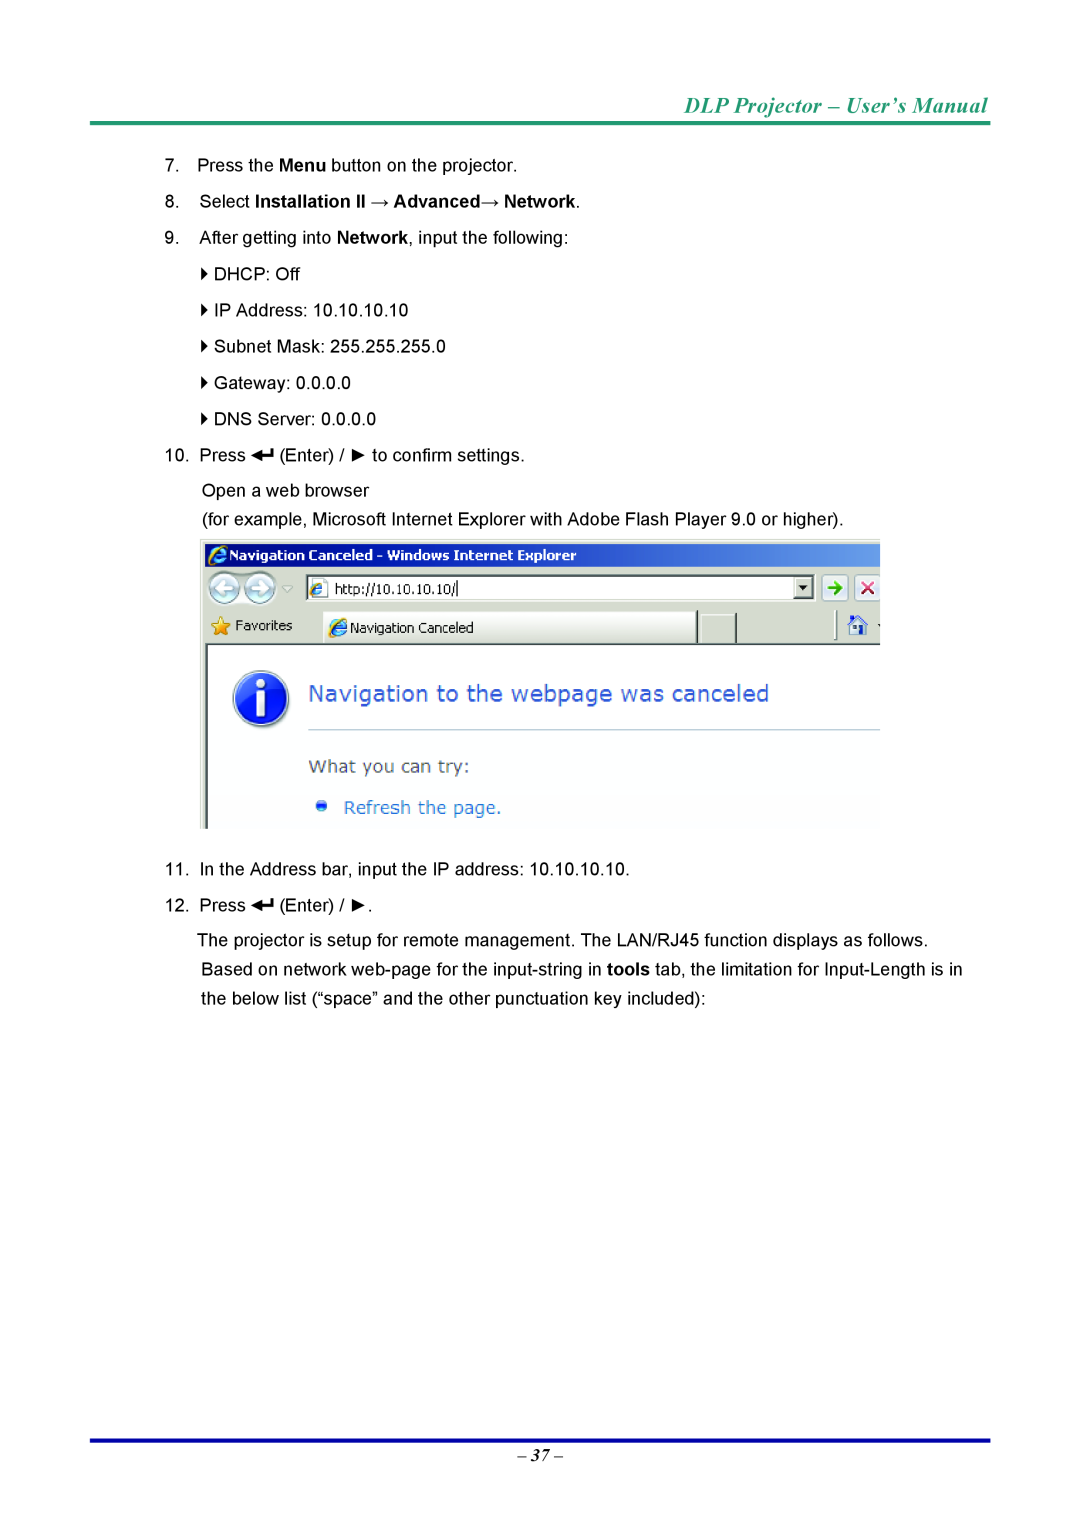
DLP Projector - User’s Manual, Select Installation II → Advanced→ Network
Models:
D7
1
45
63
63
Download
63 pages
56.47 Kb
42
43
44
45
46
47
48
49
Troubleshooting
Specification
Install
Error messages
Signal
Presentation Timer
Symbols Used
Connecting Input Devices
Dimension
Maintenance
Page 45
Image 45
Page 44
Page 46
Page 45
Image 45
Page 44
Page 46
Contents
用戶手冊
D7 Series
用户手册
사용자 설명서
Copyright
Disclaimer
Trademark Recognition
Symbols Used
Important Safety Information
General Safety Information
DLP Projector - User’s Manual
Preface
Projector Installation Notice
Cleaning the Projector
Power Safety
Symbol Explanations
Replacing the Lamp
About this Manual
Main Features
SETUP AND OPERATION
Table of Contents
ON-SCREEN DISPLAY OSD MENU SETTINGS
MAINTENANCE AND SECURITY
REGULATORY COMPLIANCE
SPECIFICATIONS
Packing Checklist
GETTING STARTED
Avoid using the projector in dusty environments
Views of Projector Parts
Front-right View
LABEL
DESCRIPTION
Rear view
When installing, ensure that you use only UL Listed ceiling mounts
Bottom view
56.00
146.00
Remote Control Parts
Changes settings in the OSD
Projector and Remote Control Buttons
Remote Control Operating Range
Inserting the Remote Control Batteries
SETUP AND OPERATION
1. Only use AAA batteries Alkaline batteries are recommended
2. Dispose of used batteries according to local ordinance regulations
Connecting Input Devices
A B C D E F G
L K J
!Warning
Starting and Shutting down the Projector
DLP Projector - User’s Manual
Security Lock
Setting an Access Password Security Lock
The service center will validate the owner and help reset the password
Adjusting the Projector Level
Volume
Adjusting the Keystone
1. Press the Volume +/- buttons on the remote control
Adjusting the Volume
ON-SCREEN DISPLAY OSD MENU SETTINGS
Navigating the OSD
OSD Menu Controls
2. Press the cursor button until Language is highlighted
Setting the OSD Language
4. Press the MENU button twice to close the OSD
Set the OSD language to your preference before continuing
OSD Menu Overview
OSD Sub-Menu Overview
Image Menu
Advanced Feature
Press Enter / to enter the Color Manager sub menu
Color Manager
Computer Menu
Video/Audio Menu
Press Enter / to enter the Audio sub menu
Audio
Installation I Menu
Presentation Timer
Installation II Menu
Advanced Feature
Peripheral Test
OSD Menu Setting
Lamp Hour Reset
Network
LANRJ45
5. Click Properties
3. Right-click on Local Area Connection, and select Properties
8. Select Installation II → Advanced→ Network
INPUT -LENGTH
CATEGORY
Status
Factory Reset
MAINTENANCE AND SECURITY
Replacing the Projection Lamp
b. Do not dispose this product with general household waste
Remove the two screws from the lamp module Lift the module handle up
Resetting the Lamp
Cleaning the Case
Cleaning the Lens
Cleaning the Projector
1. Do not use abrasive cleaners or solvents
Using the Kensington Lock
Using the Security Chain Lock
Using the Physical Lock
TROUBLESHOOTING
Common problems and solutions
Tips for Troubleshooting
Image Problems
LED Error Messages
Problem No image appears on the screen
Problem The image is blurred
Remote Control Problems
Lamp Problems
Audio Problems
Having the Projector Serviced
HDMITM Q & A
Q. How do I run HDMITM cables longer than 10 meters?
Q. How can I tell if a cable is an HDMITM certified cable?
Specifications
SPECIFICATIONS
Projection Distance vs. Projection Size
Projection Distance and Size Table
D795WT
WXGA
H-SYNC
Timing Mode Table
V-SYNC
HDMITM
O Frequency supported - Frequency not supported
411.00
Projector Dimensions
319.00
354.00
REGULATORY COMPLIANCE
Safety Certifications
FCC Warning
Canada
201009
Top
Page
Image
Contents