5878, 5882 specifications
The VTech 5882 and 5878 are innovative cordless phone models that blend advanced technology with user-friendly features to enhance communication in both home and office environments. These devices stand out due to their combination of functionality, style, and reliability.One of the key features of the VTech 5882 and 5878 is their DECT 6.0 technology. This technology not only provides excellent sound quality but also increases the range of the phone, allowing users to move freely without losing connection. The DECT 6.0 technology also ensures minimal interference from other wireless systems, making conversations clearer and more enjoyable.
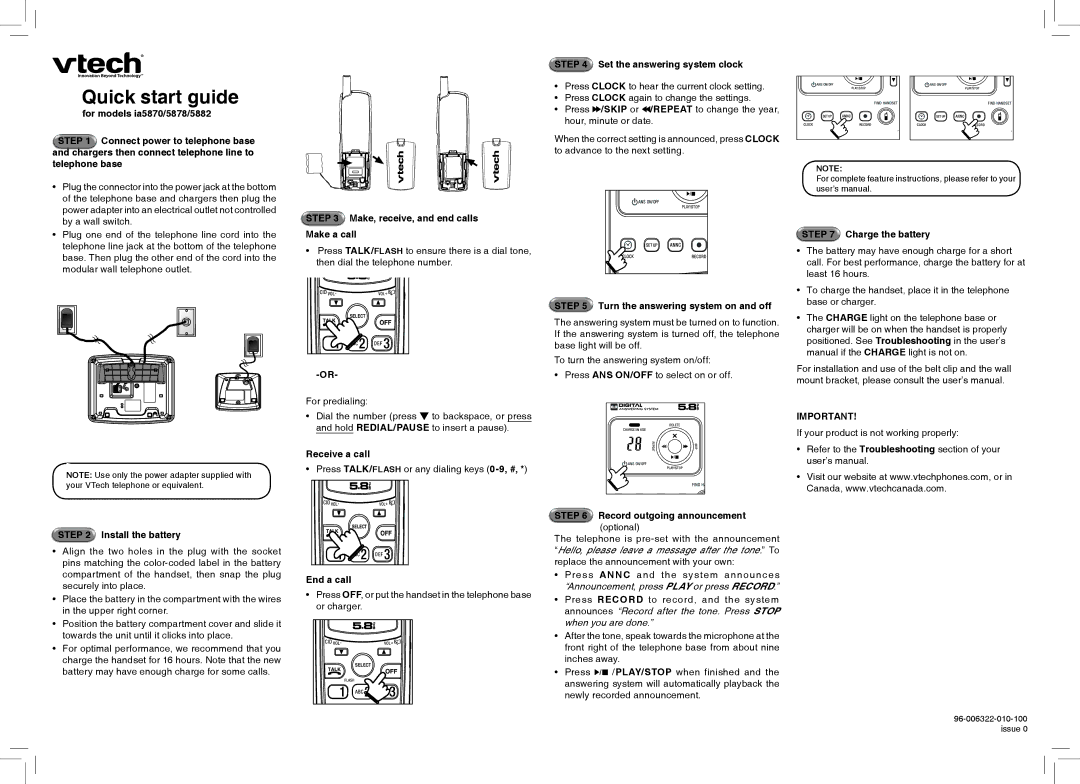
Another significant characteristic of these models is the Digital Answering System. With the ability to store up to 14 minutes of incoming messages, users can manage calls effectively even when they are not at home. The system features a user-friendly interface, enabling easy navigation and retrieval of messages. Furthermore, the ability to record personal greetings adds a customized touch to the communication experience.
The VTech 5882 and 5878 also come equipped with a large, backlit display that provides clear visibility even in low light conditions. The easy-to-read screen makes accessing contacts, call logs, and other functions simple. Additionally, these models support larger font sizes, which is particularly beneficial for older users or those with vision impairments.
The phones offer a robust call blocking feature, which allows users to block unwanted calls easily. This feature enhances the user experience by reducing the number of nuisance calls and providing greater peace of mind. Alongside this, the VIP sound technology ensures that important contacts can be recognized with a distinctive ringtone, making it easy to prioritize communications.
Both models boast a hands-free speakerphone option, allowing users to multitask while talking. This feature is especially useful for business calls or when users need to engage with others in the room. Moreover, the phones are designed for eco-friendliness, incorporating energy-saving technology that reduces power consumption without compromising performance.
With a stylish design and ergonomic handset, the VTech 5882 and 5878 provide comfort during long conversations. They are equipped with a reliable battery that offers extended talk time and standby time, making them ideal for everyday use.
In conclusion, the VTech 5882 and 5878 are exceptional cordless phones that combine modern technology with essential features, ensuring effective communication. With their impressive sound quality, advanced answering system, and user-centric design, they are excellent options for anyone seeking a reliable and stylish telephone solution.