Getting Started
Setup
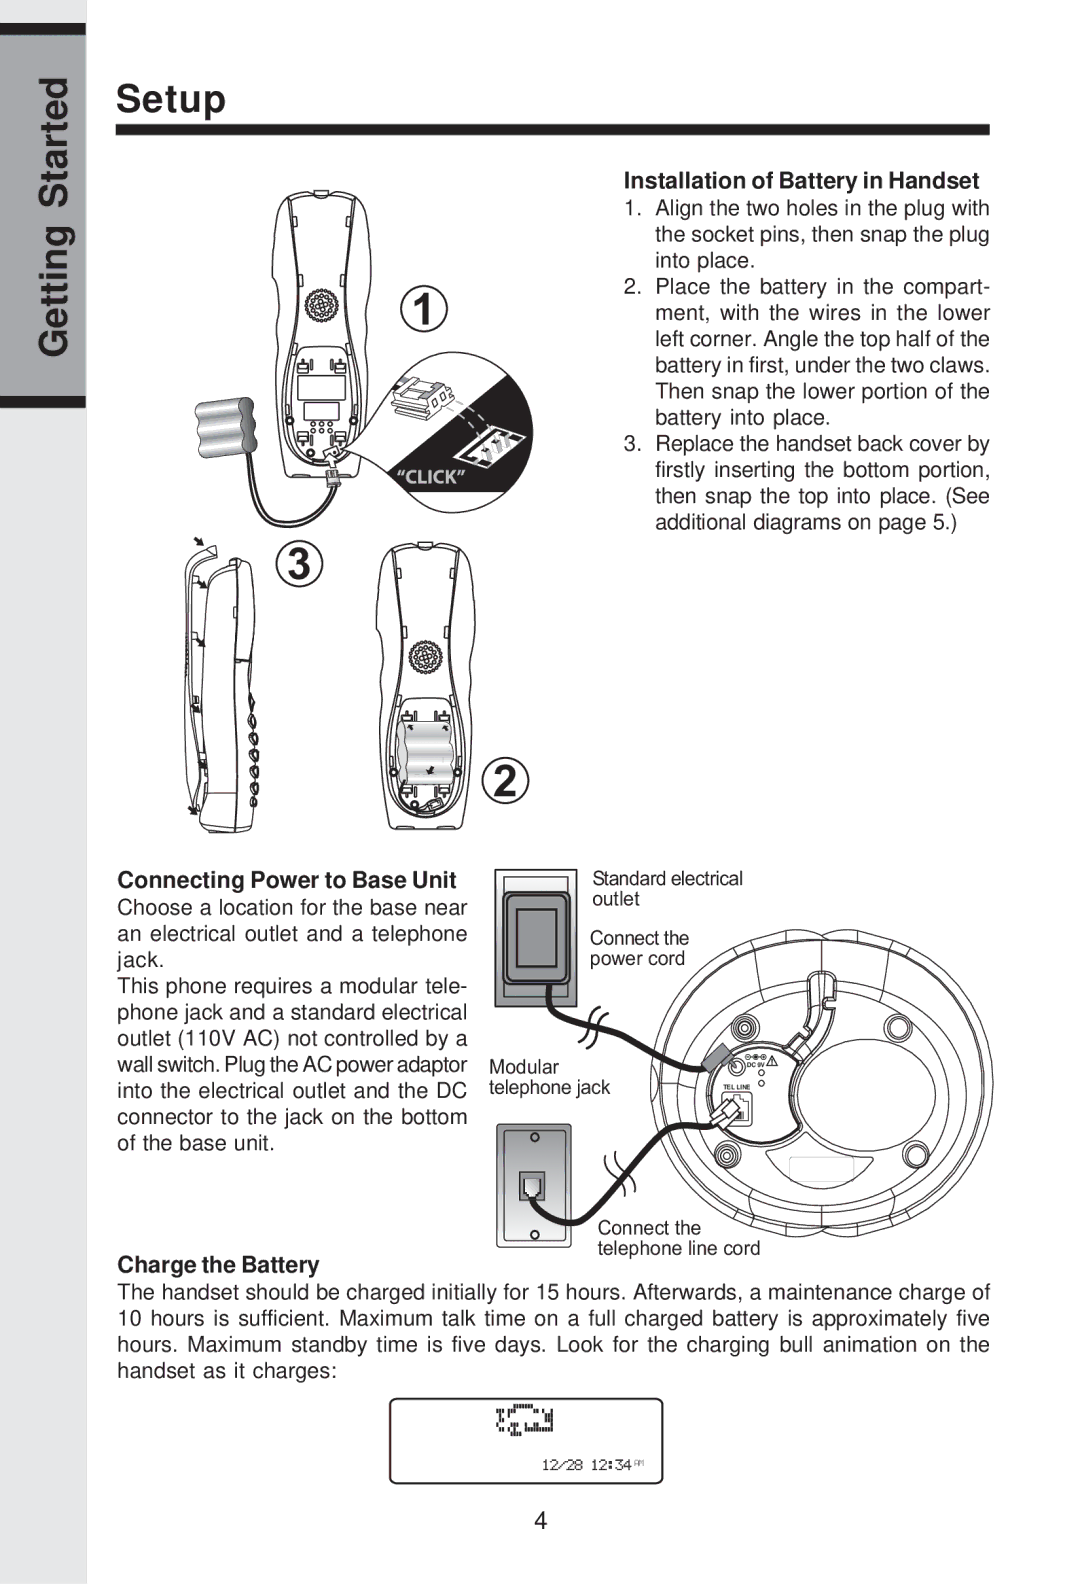
Installation of Battery in Handset
| 1. | Align the two holes in the plug with |
|
| the socket pins, then snap the plug |
|
| into place. |
1 | 2. | Place the battery in the compart- |
| ment, with the wires in the lower | |
|
| left corner. Angle the top half of the |
|
| battery in first, under the two claws. |
|
| Then snap the lower portion of the |
|
| battery into place. |
| 3. | Replace the handset back cover by |
|
| firstly inserting the bottom portion, |
|
| then snap the top into place. (See |
|
| additional diagrams on page 5.) |
3
2
Connecting Power to Base Unit
Choose a location for the base near an electrical outlet and a telephone jack.
This phone requires a modular tele- phone jack and a standard electrical outlet (110V AC) not controlled by a wall switch. Plug the AC power adaptor into the electrical outlet and the DC connector to the jack on the bottom of the base unit.
Charge the Battery
Standard electrical outlet
Connect the power cord
Modular | DC 9V |
telephone jack | TEL LINE |
Connect the telephone line cord
The handset should be charged initially for 15 hours. Afterwards, a maintenance charge of 10 hours is sufficient. Maximum talk time on a full charged battery is approximately five hours. Maximum standby time is five days. Look for the charging bull animation on the handset as it charges:
![]()
![]()
![]()
![]()
![]() AM
AM
4