Check for a dial tone. After the battery pack is charged, rotate the Base Unit antenna to an upright position. Pick up the Handset and presscPHONE) "PHONE ON" will appear on the LCD, and you will hear a dial tone. If not, see 'INCASE OF DIFFICULTY'on page 34.
Fill in the telephone number card on the base unit.
CAUTION:
1.Never install telephone wiring during a lightning storm.
2.Never install telephone jacks in wet locations unless the jack is specifically designed for wet locations.
3.Never touch uninsulatedtelephone wires or terminals unless the telephone line has been disconnected at the network interface.
4.Use caution when installing or modifying telephone lines.
USING i;JPS;;.pALLydAW>'M0 UN,T
s . t,, - J,, $
ADAPTOR , : , , ~ ? ; ' - ~ : ' ! ' ~ , fi 3~ , ~ ~ ~ ~ f ~ ~ ~ ~ ~ ~
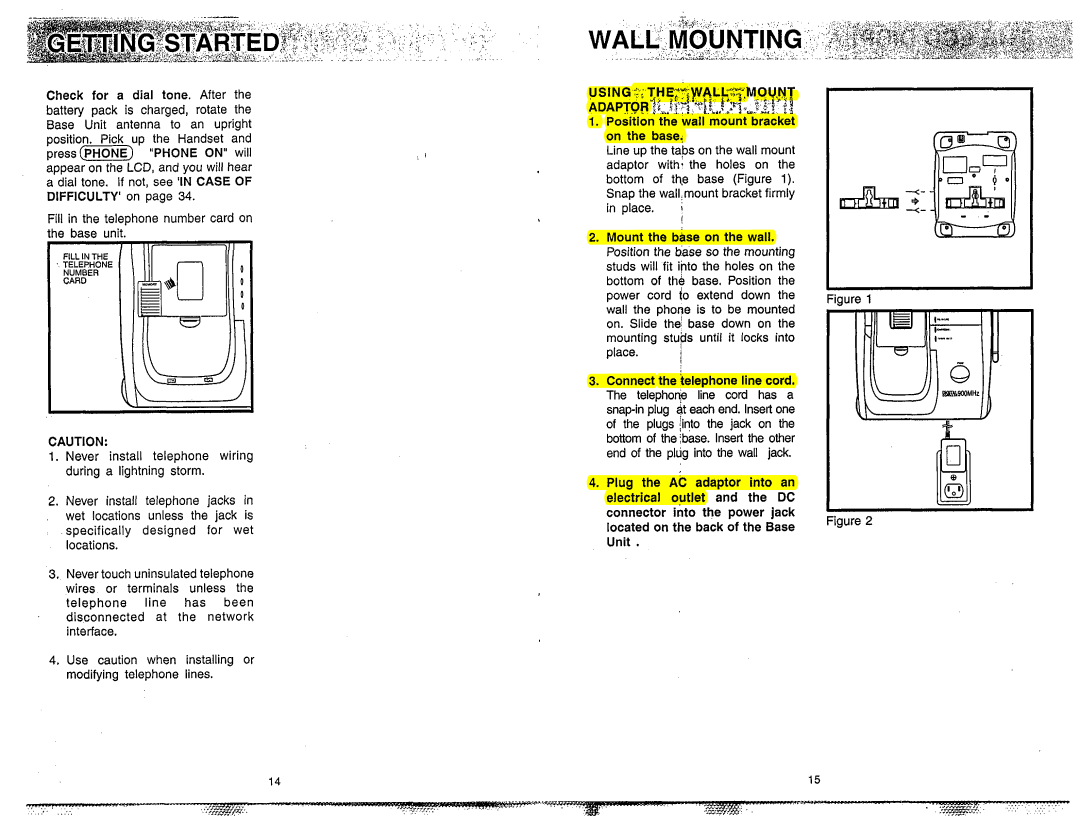
1.Position the wall mount bracket on the base,
Line up the tabs on the wall mount adaptor with. the holes on the bottom of the base (Figure 1).
Snap the wall,mountbracket firmly
in place. i
I
2.Mount the bhse on the wall. Position the base so the mounting studs will fit illto the holes on the bottom of the base. Position the
power cord to extend down the | igure 1 | ||
wall the pho?e is to be mounted | |||
| |||
on. Slide the: base down on the |
| ||
mounting stups until it locks into |
| ||
place. | I |
| |
| I |
| |
3. Connect the hephone line cord. |
| ||
The telephoqe line cord has a |
| ||
| |||
of the plugs !into the jack on the |
| ||
bottom of the Ibase. Insert the other |
| ||
end of the plug into the wall jack. |
| ||
4. Plug the AC adaptor into an |
| ||
electrical outlet and the DC |
| ||
connector into the power jack | Figure 2 | ||
located on the back of the Base | |||
Unit . |
|
| |