2.2Power Up the WWS800/850
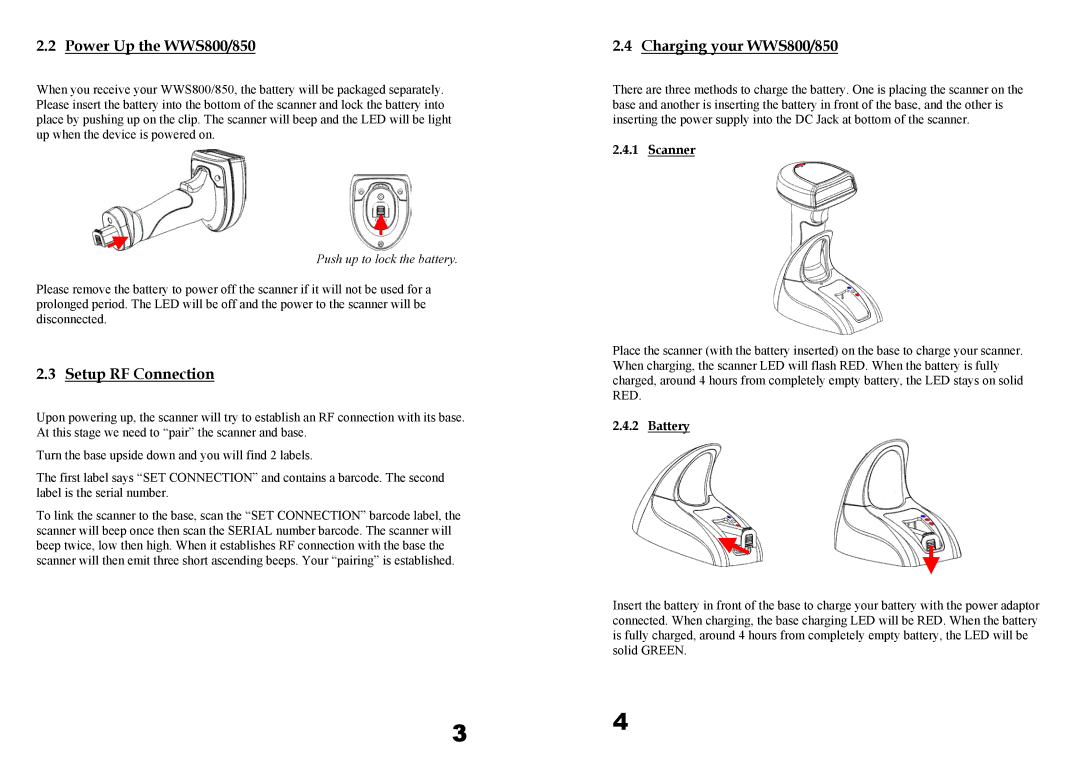
When you receive your WWS800/850, the battery will be packaged separately. Please insert the battery into the bottom of the scanner and lock the battery into place by pushing up on the clip. The scanner will beep and the LED will be light up when the device is powered on.
Push up to lock the battery.
Please remove the battery to power off the scanner if it will not be used for a prolonged period. The LED will be off and the power to the scanner will be disconnected.
2.3Setup RF Connection
Upon powering up, the scanner will try to establish an RF connection with its base. At this stage we need to “pair” the scanner and base.
Turn the base upside down and you will find 2 labels.
The first label says “SET CONNECTION” and contains a barcode. The second label is the serial number.
To link the scanner to the base, scan the “SET CONNECTION” barcode label, the scanner will beep once then scan the SERIAL number barcode. The scanner will beep twice, low then high. When it establishes RF connection with the base the scanner will then emit three short ascending beeps. Your “pairing” is established.
2.4Charging your WWS800/850
There are three methods to charge the battery. One is placing the scanner on the base and another is inserting the battery in front of the base, and the other is inserting the power supply into the DC Jack at bottom of the scanner.
2.4.1Scanner
Place the scanner (with the battery inserted) on the base to charge your scanner. When charging, the scanner LED will flash RED. When the battery is fully charged, around 4 hours from completely empty battery, the LED stays on solid RED.
2.4.2Battery
Insert the battery in front of the base to charge your battery with the power adaptor connected. When charging, the base charging LED will be RED. When the battery is fully charged, around 4 hours from completely empty battery, the LED will be solid GREEN.
3 4
