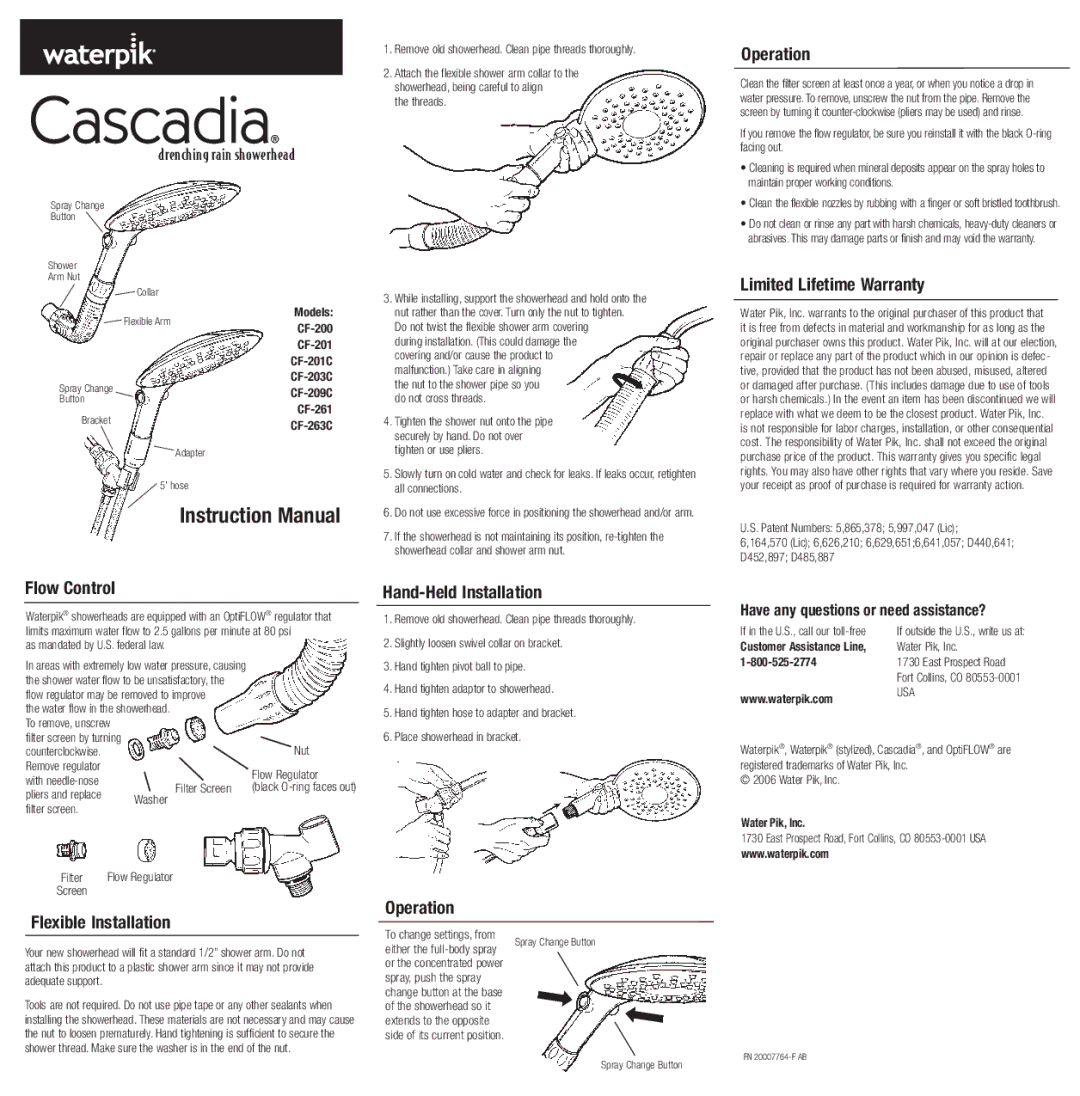
CF-209C, CF-263C, CF-261, CF-201C, CF-201 specifications
Waterpik Technologies is renowned for its innovative oral care products, with a range of water flossers that combine advanced technology with user-friendly design. Among the standout products in their lineup are the CF-263C, CF-200, CF-209C, CF-203C, and CF-201C models, all of which offer impressive features and cutting-edge technologies to enhance dental hygiene.The CF-263C is distinguished by its dual water pressure settings, allowing users to customize their flossing experience according to their specific needs. This model is equipped with a large water reservoir, ensuring a longer flossing session without the need for frequent refills. Additionally, it comes with multiple water flosser tips, each designed for different dental care requirements, including orthodontic and periodontal needs.
CF-200 is another popular choice among consumers. This model stands out for its compact design, making it ideal for users with limited counter space. Despite its size, it does not compromise on performance. The CF-200 features a high-velocity water stream that effectively removes plaque and debris from between teeth and along the gum line. Its portability makes it an excellent option for travel, allowing users to maintain their oral hygiene regimen on the go.
The CF-209C takes the water flosser experience to the next level with its innovative pulsating technology, which helps to stimulate gums and improve circulation. This model also includes multiple pressure settings and a rotating tip for optimal accessibility to hard-to-reach areas. The CF-209C is highly regarded for its ability to reduce gum disease and enhance overall gum health.
For those in need of a more versatile option, the CF-203C is designed with multiple attachments dedicated to overall oral care. This water flosser includes specialized tips for braces, bridges, and implants, making it an ideal choice for users with diverse dental needs. The CF-203C is user-friendly, featuring ergonomic controls for ease of operation.
Finally, the CF-201C is built around user comfort and efficiency. It has a sleek design complemented by quiet operation, which makes it suitable for use in shared living spaces. With its adjustable water pressure options and a comprehensive set of tips, the CF-201C ensures an effective cleaning routine tailored to individual preferences.
In summary, the Waterpik Technologies CF-263C, CF-200, CF-209C, CF-203C, and CF-201C models exemplify the brand's commitment to enhancing oral hygiene through advanced technology and user-centric features. Each model offers unique characteristics catering to various dental care needs, ensuring that users can find the perfect water flosser to maintain their oral health.