GAS INSTRUCTIONS | 9 |
|
|
REINSTALL CONTROL PANEL
Parts required: control panel, screws, and burner control knobs.
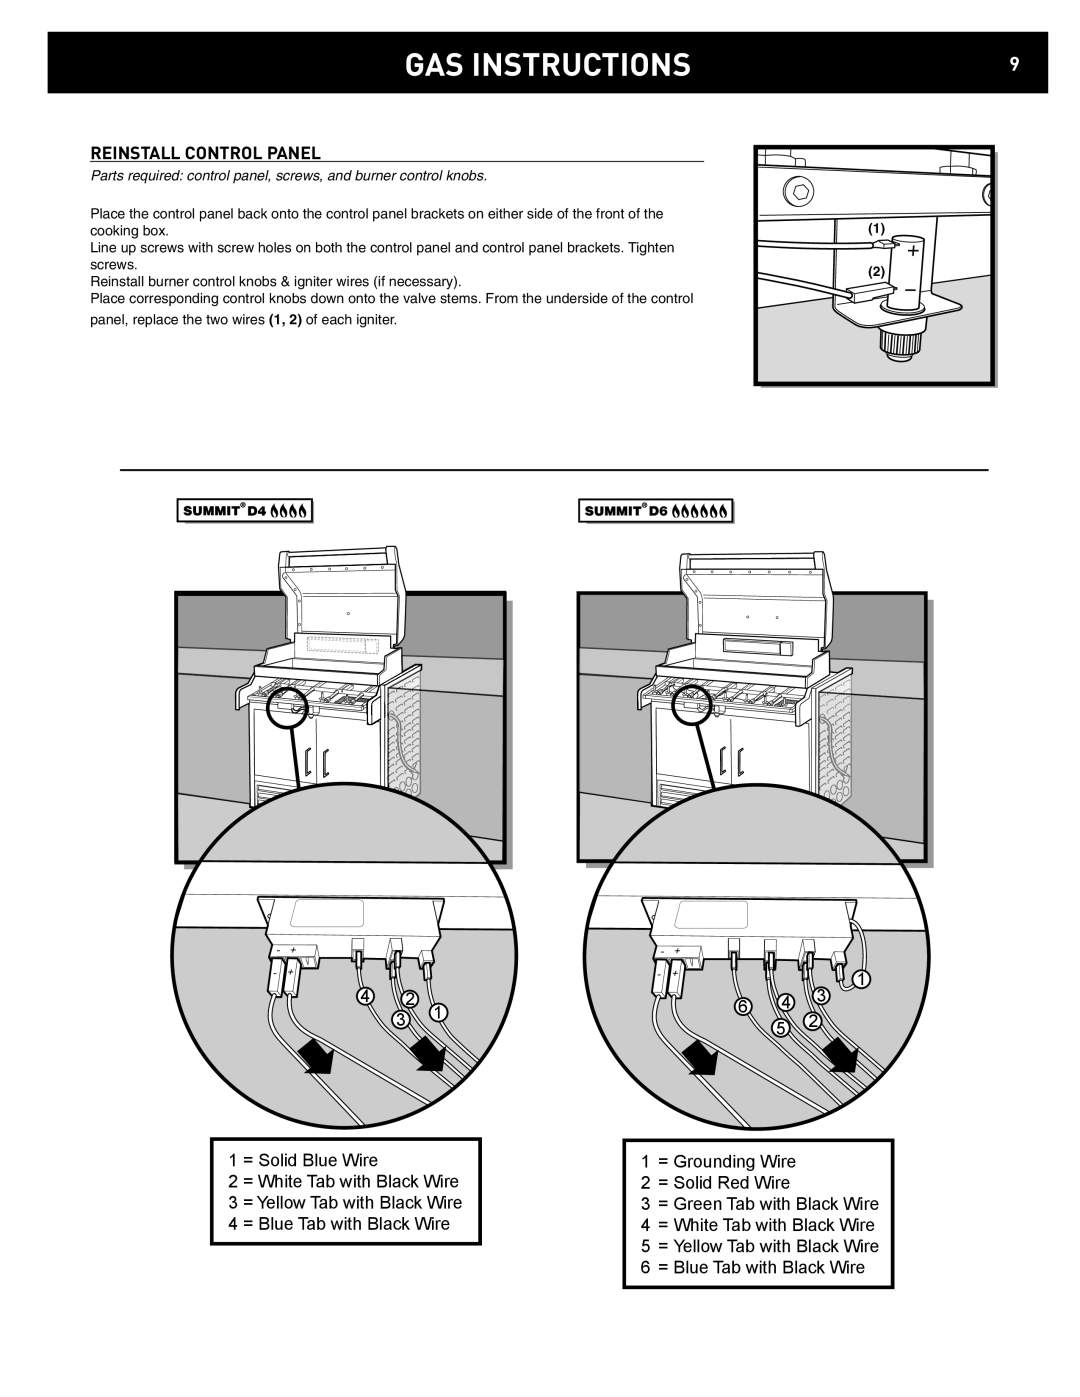
Place the control panel back onto the control panel brackets on either side of the front of the cooking box.
Line up screws with screw holes on both the control panel and control panel brackets. Tighten screws.
Reinstall burner control knobs & igniter wires (if necessary).
Place corresponding control knobs down onto the valve stems. From the underside of the control
panel, replace the two wires (1, 2) of each igniter.
(1) |
(2) |
|
| D4 |
|
|
| D6 |
| ||||
|
|
|
|
|
|
|
| ||||
|
|
|
|
|
|
|
|
| |||
|
|
|
|
|
|
|
|
|
|
|
|
|
|
|
|
|
|
|
|
|
|
|
|
|
|
|
|
|
|
|
|
|
|
|
|
|
|
|
|
|
|
|
|
|
|
|
|
|
|
|
|
|
|
|
|
|
|
|
|
|
|
|
|
|
|
|
|
|
|
|
|
|
|
|
|
|
|
|
|
|
|
|
|
- | + |
- | + |
4 | 2 | 1 |
| ||
| 3 |
|
1 = Solid Blue Wire
2 = White Tab with Black Wire
3 = Yellow Tab with Black Wire
4 = Blue Tab with Black Wire
- | + |
|
|
- | + |
| 1 |
|
|
| |
| 6 | 4 | 3 |
| 2 | ||
|
| 5 | |
|
|
|
1= Grounding Wire
2= Solid Red Wire
3= Green Tab with Black Wire
4= White Tab with Black Wire
5= Yellow Tab with Black Wire
6= Blue Tab with Black Wire
