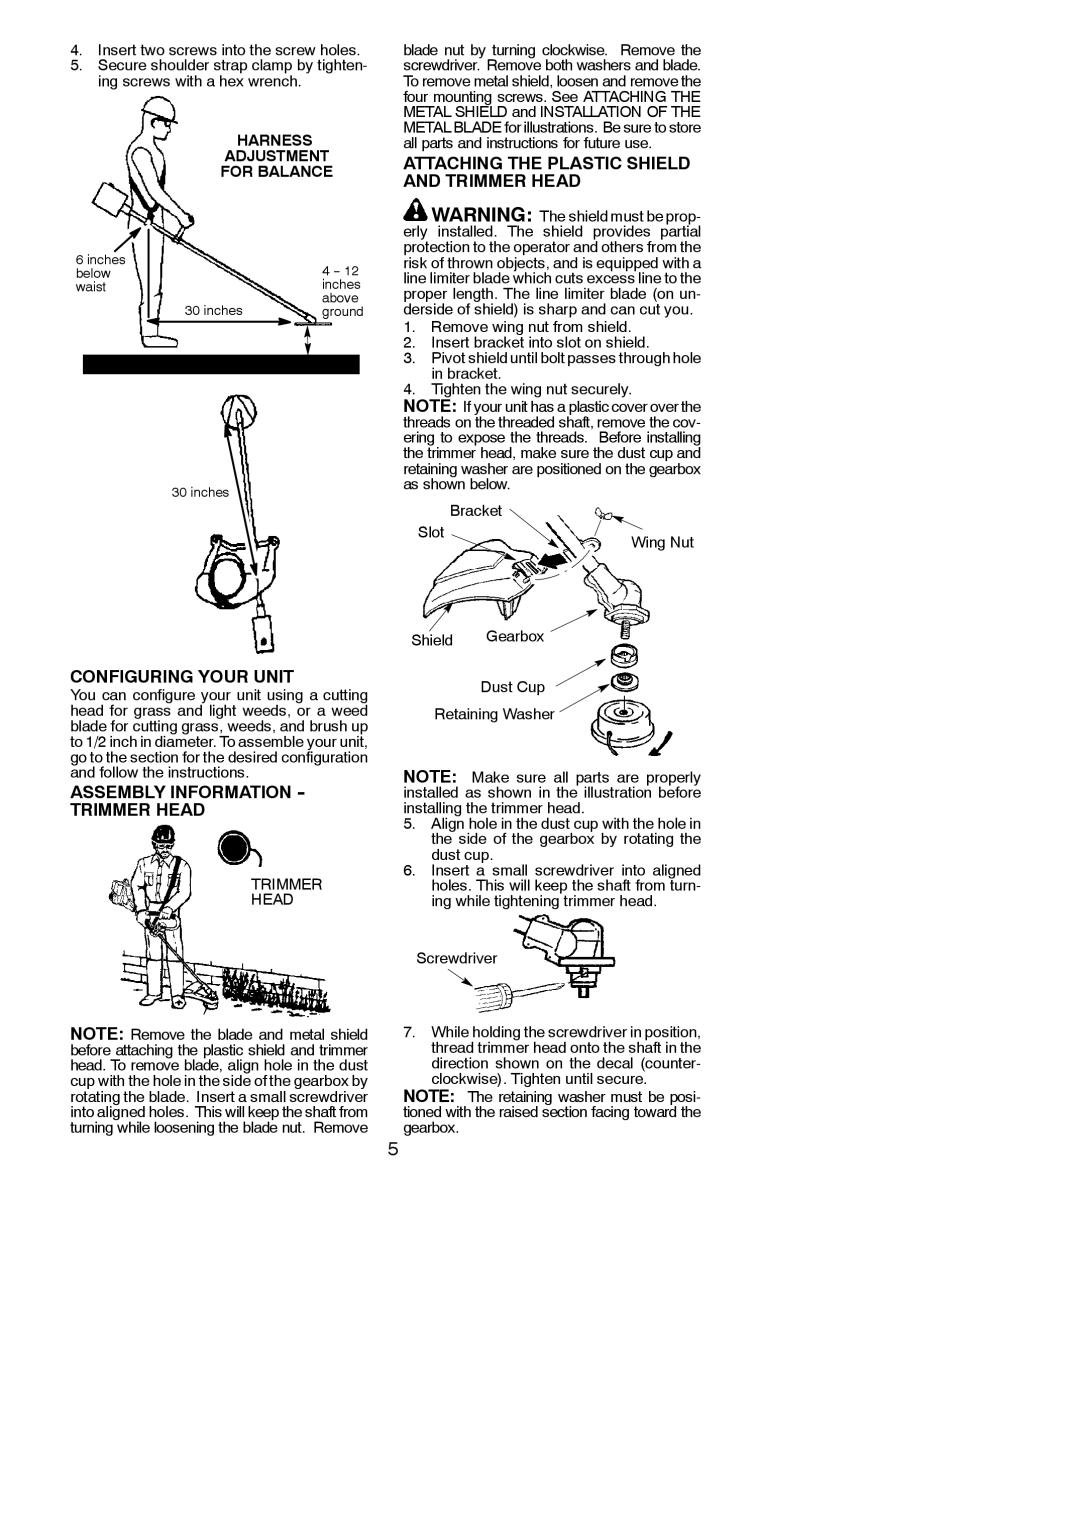
4.Insert two screws into the screw holes.

5.Secure shoulder strap clamp by tighten- ing screws with a hex wrench.

HARNESS

ADJUSTMENT

FOR BALANCE

6 inches


4 -- 12

below


waist


inches


30 inches

above


ground


30 inches

blade nut by turning clockwise. Remove the screwdriver. Remove both washers and blade. To remove metal shield, loosen and remove the four mounting screws. See ATTACHING THE METAL SHIELD and INSTALLATION OF THE METAL BLADE for illustrations. Be sure to store all parts and instructions for future use.

ATTACHING THE PLASTIC SHIELD AND TRIMMER HEAD

WARNING: The shield must be prop- erly installed. The shield provides partial protection to the operator and others from the risk of thrown objects, and is equipped with a line limiter blade which cuts excess line to the proper length. The line limiter blade (on un- derside of shield) is sharp and can cut you.

1.Remove wing nut from shield.

2.Insert bracket into slot on shield.

3.Pivot shield until bolt passes through hole in bracket.

4.Tighten the wing nut securely.

NOTE: If your unit has a plastic cover over the threads on the threaded shaft, remove the cov- ering to expose the threads. Before installing the trimmer head, make sure the dust cup and retaining washer are positioned on the gearbox as shown below.


Bracket

Slot

Wing Nut


CONFIGURING YOUR UNIT

You can configure your unit using a cutting head for grass and light weeds, or a weed blade for cutting grass, weeds, and brush up to 1/2 inch in diameter. To assemble your unit, go to the section for the desired configuration and follow the instructions.

ASSEMBLY INFORMATION - TRIMMER HEAD

TRIMMER

HEAD

NOTE: Remove the blade and metal shield before attaching the plastic shield and trimmer head. To remove blade, align hole in the dust cup with the hole in the side of the gearbox by rotating the blade. Insert a small screwdriver into aligned holes. This will keep the shaft from turning while loosening the blade nut. Remove

Shield Gearbox

Dust Cup

Retaining Washer

NOTE: Make sure all parts are properly installed as shown in the illustration before installing the trimmer head.

5.Align hole in the dust cup with the hole in the side of the gearbox by rotating the dust cup.

6.Insert a small screwdriver into aligned holes. This will keep the shaft from turn- ing while tightening trimmer head.

Screwdriver

7.While holding the screwdriver in position, thread trimmer head onto the shaft in the direction shown on the decal (counter- clockwise). Tighten until secure.

NOTE: The retaining washer must be posi- tioned with the raised section facing toward the gearbox.

5

Page 5
Image 5
Weed Eater 530164314 instruction manual Attaching the Plastic Shield and Trimmer Head, Configuring Your Unit

530164314 specifications

The Weed Eater 530164314 is a powerful and reliable string trimmer designed to make yard maintenance easier and more efficient. Engineered for both residential and light commercial use, this model stands out due to its combination of innovative features, user-friendly design, and robust performance.

One of the main features of the Weed Eater 530164314 is its lightweight and ergonomic design, which allows for comfortable handling during extended use. Weighing in at a manageable level, users can easily maneuver around shrubs, flower beds, and other landscaping obstacles without experiencing undue fatigue. The adjustable handle further enhances comfort, allowing users of different heights to maintain a natural grip while working.

The trimmer is equipped with a powerful engine that delivers impressive cutting power. This engine allows the Weed Eater to tackle dense grass, weeds, and overgrown vegetation with ease. Not only does it provide efficiency, but it also ensures that users can complete their tasks in a timely manner, ultimately saving both time and effort.

Another key characteristic of the Weed Eater 530164314 is its innovative dual-line cutting system. This feature allows for a wider cutting path than traditional single-line models, significantly increasing trimming efficiency. As the trimmer rotates, the two lines efficiently slice through grass and weeds, providing a clean and thorough cut while minimizing the need for multiple passes.

The automatic feed spool is another vital technology integrated into this trimmer. This system automatically feeds the cutting line as needed, eliminating the hassle of stopping work to manually adjust the line. Users can work continuously and focus on the task at hand, resulting in increased productivity.

Durability is also a highlight of the Weed Eater 530164314, with a sturdy construction designed to withstand the rigors of outdoor use. The robust materials used in its construction ensure that it remains functional and reliable over time, making it a worthwhile investment for homeowners and landscape professionals alike.

In conclusion, the Weed Eater 530164314 is a string trimmer that excels in design, performance, and ease of use. Its lightweight build, powerful engine, dual-line cutting system, automatic feed spool, and durable construction make it a top choice for anyone seeking an efficient and effective solution for maintaining their outdoor spaces. Whether you’re tackling a small garden or a larger lot, the Weed Eater 530164314 is equipped to handle various landscaping challenges.