MAINTENANCE

TO CLEAN BATTERY AND TERMINALS

Corrosion and dirt on the battery and terminals can cause the battery to “leak” power.

Disconnect BLACK battery cable first then RED bat- tery cable and remove battery from tractor.

Rinse the battery with plain water and dry.

Clean terminals and battery cable ends with wire brush until bright.

Coat terminals with grease or petroleum jelly.

Reinstall battery (See “REPLACING BATTERY” in the Service and Adjustment section of this manual).

V-BELTS

CheckV-belts for deterioration and wear after 100 hours and replace if necessary. The belts are not adjustable. Replace belts if they begin to slip from wear.

TRANSAXLE COOLING

Keep transaxle free from build-up of dirt and chaff which can restrict cooling.

ENGINE

LUBRICATION

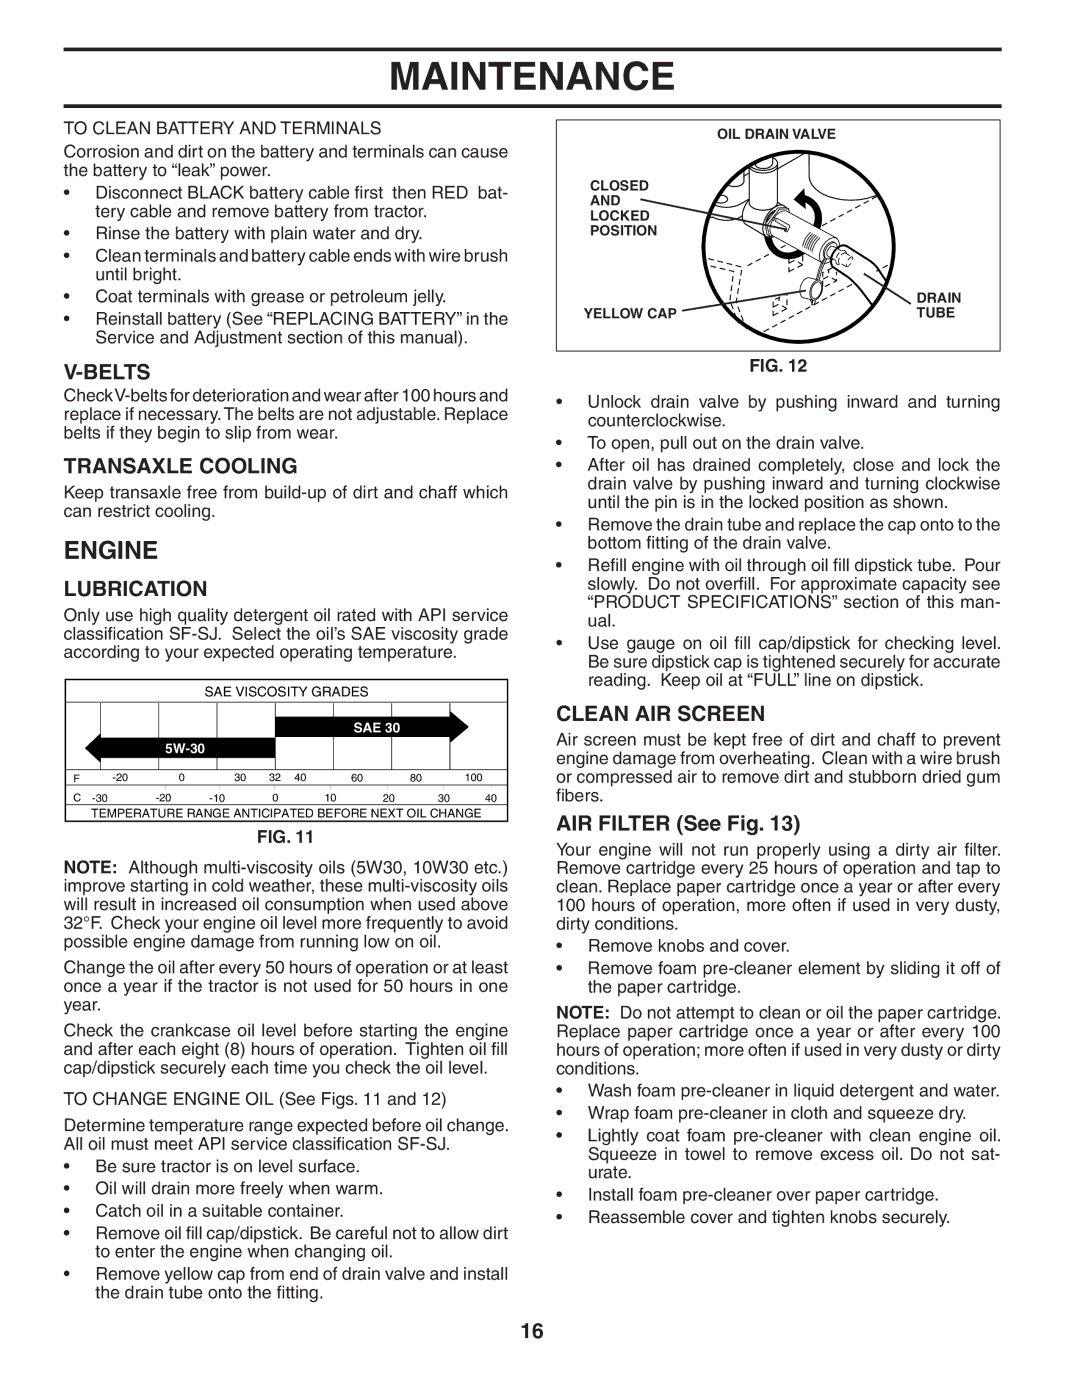
Only use high quality detergent oil rated with API service classification SF-SJ. Select the oil’s SAE viscosity grade according to your expected operating temperature.

SAE VISCOSITY GRADES


SAE 30


5W-30


F

-20

0


30 32 40


60

80

100

C

-30

-20

-10

0

10

20

30

40

TEMPERATURE RANGE ANTICIPATED BEFORE NEXT OIL CHANGE

FIG. 11

NOTE: Although multi-viscosity oils (5W30, 10W30 etc.) improve starting in cold weather, these multi-viscosity oils will result in increased oil consumption when used above 32°F. Check your engine oil level more frequently to avoid possible engine damage from running low on oil.

Change the oil after every 50 hours of operation or at least once a year if the tractor is not used for 50 hours in one year.

Check the crankcase oil level before starting the engine and after each eight (8) hours of operation. Tighten oil fill cap/dipstick securely each time you check the oil level.

TO CHANGE ENGINE OIL (See Figs. 11 and 12)

Determine temperature range expected before oil change. All oil must meet API service classification SF-SJ.

Be sure tractor is on level surface.

Oil will drain more freely when warm.

Catch oil in a suitable container.

Remove oil fill cap/dipstick. Be careful not to allow dirt to enter the engine when changing oil.

Remove yellow cap from end of drain valve and install the drain tube onto the fitting.


OIL DRAIN VALVE

CLOSED


AND


LOCKED


POSITION


DRAIN

YELLOW CAP

TUBE

FIG. 12

Unlock drain valve by pushing inward and turning counterclockwise.

To open, pull out on the drain valve.

After oil has drained completely, close and lock the drain valve by pushing inward and turning clockwise until the pin is in the locked position as shown.

Remove the drain tube and replace the cap onto to the bottom fitting of the drain valve.

Refill engine with oil through oil fill dipstick tube. Pour slowly. Do not overfill. For approximate capacity see “PRODUCT SPECIFICATIONS” section of this man- ual.

Use gauge on oil fill cap/dipstick for checking level. Be sure dipstick cap is tightened securely for accurate reading. Keep oil at “FULL” line on dipstick.

CLEAN AIR SCREEN

Air screen must be kept free of dirt and chaff to prevent engine damage from overheating. Clean with a wire brush or compressed air to remove dirt and stubborn dried gum fibers.

AIR FILTER (See Fig. 13)

Your engine will not run properly using a dirty air filter. Remove cartridge every 25 hours of operation and tap to clean. Replace paper cartridge once a year or after every 100 hours of operation, more often if used in very dusty, dirty conditions.

Remove knobs and cover.

Remove foam pre-cleaner element by sliding it off of the paper cartridge.

NOTE: Do not attempt to clean or oil the paper cartridge. Replace paper cartridge once a year or after every 100 hours of operation; more often if used in very dusty or dirty conditions.

Wash foam pre-cleaner in liquid detergent and water.

Wrap foam pre-cleaner in cloth and squeeze dry.

Lightly coat foam pre-cleaner with clean engine oil. Squeeze in towel to remove excess oil. Do not sat- urate.

Install foam pre-cleaner over paper cartridge.

Reassemble cover and tighten knobs securely.

16

Page 16
Image 16
Weed Eater WE165T42A manual Engine, Belts, Transaxle Cooling, Lubrication, Clean AIR Screen

WE165T42A specifications

The Weed Eater WE165T42A is a versatile and efficient lawn care tool designed to tackle various tasks in maintaining a tidy garden. This product is particularly favored by homeowners for its durability, ease of use, and impressive performance. One of its standout features is the powerful 16-inch cutting path, which ensures that users can cover large areas quickly. This makes it an ideal choice for those looking to maintain their lawns without spending excessive time on yard work.

A key feature of the WE165T42A is its gas-powered engine, which provides reliable power and performance. This engine allows the trimmer to easily cut through thick grass, weeds, and even light brush, ensuring that your garden remains well-maintained. The unit is designed with a robust build, ensuring it can withstand the rigors of regular use while also being lightweight enough for comfortable handling.

Ease of operation is another significant aspect of the Weed Eater WE165T42A. It includes a simple starting system that makes it easy for users to get the machine running with minimal effort. The adjustable handle adds comfort and flexibility, allowing users to find their ideal operating position, which can help reduce fatigue during extended use.

Another notable technology within the WE165T42A is its dual-line feed head. This feature not only provides improved cutting efficiency but also allows for a wider cutting path, reducing the time spent on each trimming session. The trimmer line automatically feeds out as needed, ensuring that users do not have to stop work to manually adjust the line length.

The Weed Eater WE165T42A is also designed with user safety in mind. It includes protective features such as a debris guard, which deflects all the debris away from the operator for a safer working environment. This is especially important when dealing with tougher growth, which can send rocks and other materials flying.

In conclusion, the Weed Eater WE165T42A stands out in the lawn care market for its combination of power, efficiency, and user-friendly features. Its durable construction, ease of operation, and advanced technologies make it an excellent choice for homeowners who value both performance and practicality in their lawn maintenance tools. Whether tackling a small patio garden or a larger yard, the WE165T42A is up to the task, making lawn care simpler and more efficient.