
WEBE06010 specifications
The Weider WEBE06010 is a versatile and compact home gym system designed to offer a comprehensive workout experience in a limited space. Ideal for individuals seeking to enhance their fitness journey without the need for bulky equipment, this multi-station gym caters to various exercise needs, providing a balanced routine for strength training and muscle toning.One of the standout features of the Weider WEBE06010 is its multi-functional design, which allows users to perform a wide array of exercises targeting different muscle groups. The gym includes a chest press, high pulleys, a low row, a leg extension, and a leg curl, facilitating targeted workouts for the upper body, lower body, and core. The adjustable arm press can be customized to suit individual fitness levels, enabling users to progressively increase resistance as they gain strength and confidence.
The technology behind the Weider WEBE06010 includes its heavy-duty steel frame construction, which ensures durability and stability during workouts. The gym’s compact design allows it to fit into smaller spaces, making it perfect for home use. Additionally, it features a comfortable padded seat and backrest, offering adequate support to maintain proper form during exercises while minimizing the risk of injury.
This home gym is equipped with a smooth pulley system that guarantees fluid movements during workouts, enhancing user experience. With its integrated aesthetic that mirrors professional gym equipment, the Weider WEBE06010 transcends the typical home gym look, making it a stylish addition to any room.
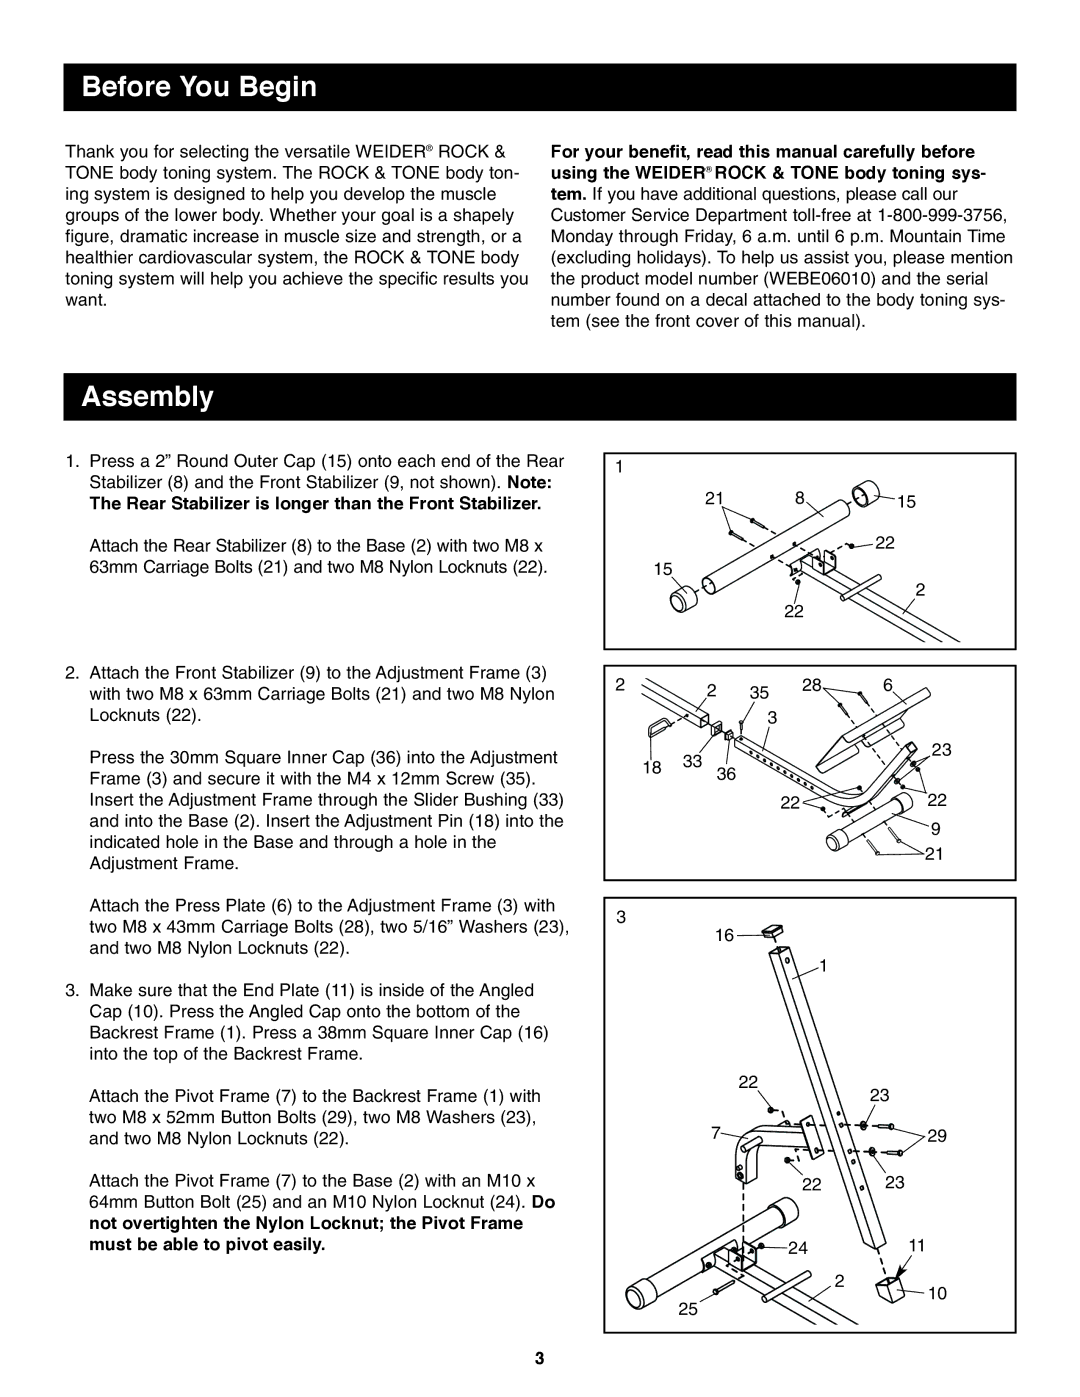
Another notable characteristic of the Weider WEBE06010 is the ease of assembly. Many users report that they can set it up within a short period, allowing them to dive directly into their workout routine without unnecessary delays. Additionally, the inclusion of a detailed instruction manual ensures that individuals, regardless of their fitness expertise, can confidently put together the equipment.
In conclusion, the Weider WEBE06010 is a fantastic investment for those who are serious about fitness and seek an all-in-one solution for at-home workouts. With its plethora of features, robust construction, and user-friendly design, it stands out as an excellent choice for fitness enthusiasts looking to build strength and maintain their health within the comfort of their own living spaces.