
WESY85100 specifications
The Weider WESY85100 is a versatile and compact home gym system designed for users looking to enhance their fitness routine without the need for bulky equipment. This machine is perfect for small spaces, making it an ideal choice for apartment dwellers or anyone seeking a dedicated workout area at home. With its sturdy construction and multiple exercise options, the WESY85100 provides an effective solution for a comprehensive full-body workout.One of the standout features of the Weider WESY85100 is its adjustable weight resistance system. This allows users to customize their workout intensity according to their fitness level. The machine is equipped with a weight stack that offers smooth transitions between different resistance levels, enabling both beginners and advanced users to find the right challenge for their strength training goals.
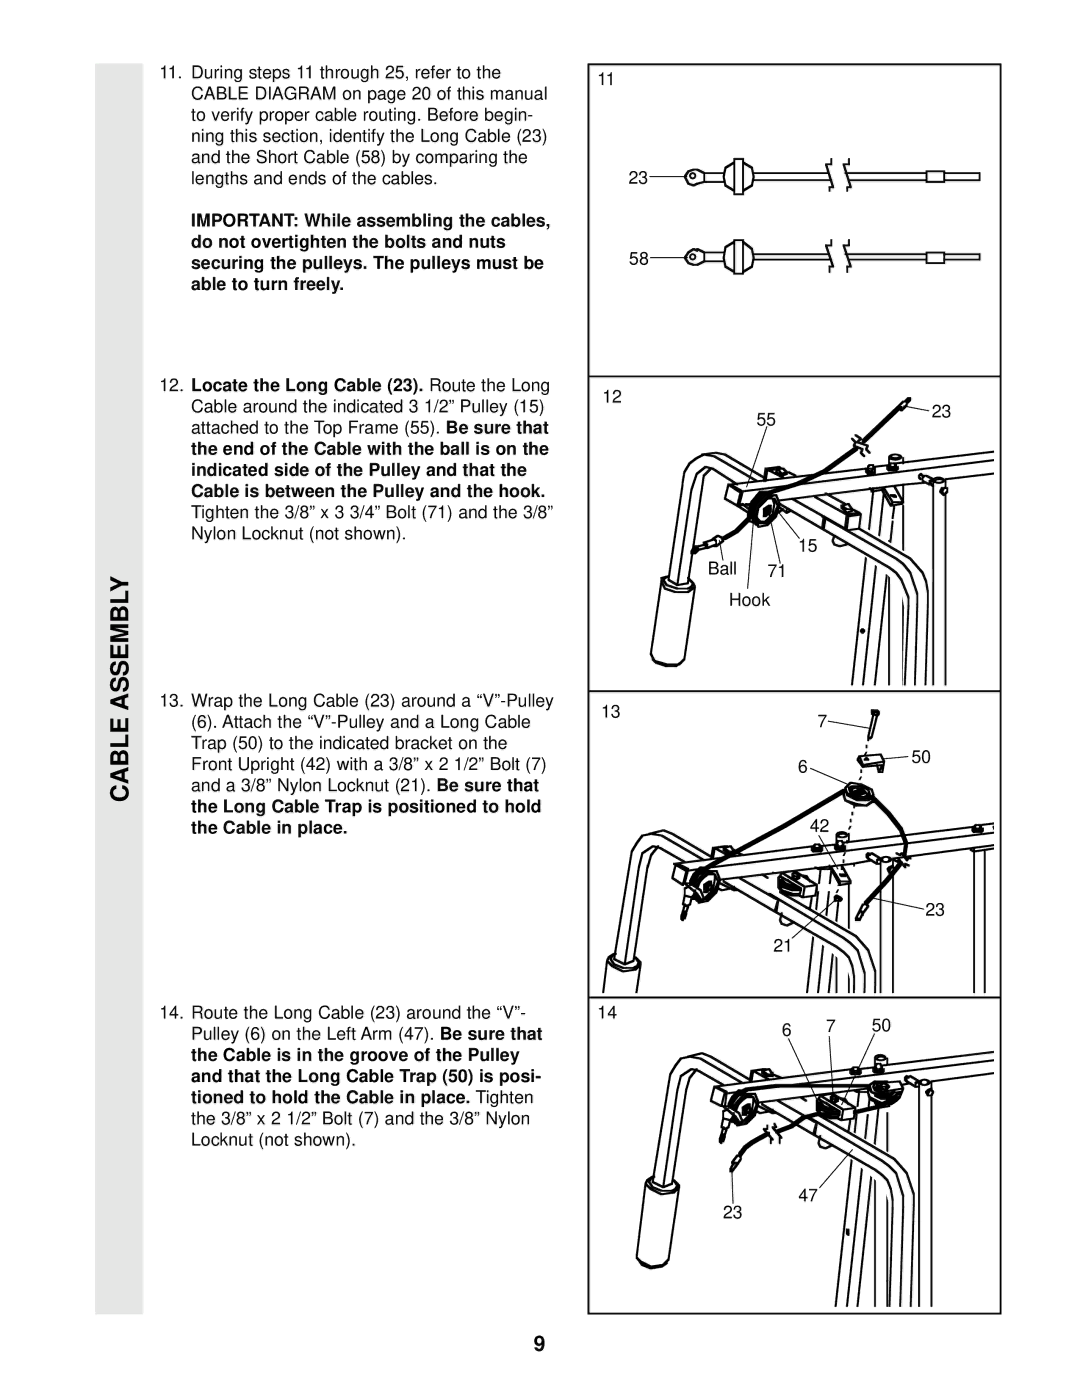
The WESY85100 incorporates innovative technologies to enhance the user experience. Its high-tension cables provide increased durability and ensure smooth, consistent movement during workouts. This technology not only enhances safety but also allows for a greater range of motion, making it easier to perform various exercises effectively.
The machine is designed with a variety of exercise stations, allowing users to engage multiple muscle groups in a single session. The Weider WESY85100 includes a chest press, lat pulldown, leg extension, and seated row, among others. This multifunctionality ensures that users can work on their upper and lower body strength, cardio conditioning, and endurance within one comprehensive system.
In addition, the Weider WESY85100 includes a comfortable padded bench that can be adjusted for various positions, promoting proper form and reducing the risk of injury. The ergonomic design of the bench allows users to isolate different muscle groups while providing the necessary support during intense workout sessions.
Overall, the Weider WESY85100 is an excellent choice for anyone looking to establish a home gym. Its combination of adjustable resistance, advanced technology, and multifunctional capabilities creates a powerful workout experience, making it suitable for individuals at any fitness level. Whether you are a beginner aiming to build strength or an experienced athlete seeking a convenient workout solution, the Weider WESY85100 delivers results while accommodating your space and fitness needs.