ASSEMBLY
Set the treadmill in a cleared area and remove all packing materials. Do not dispose of the packing materials until assembly is completed. Refer to the drawings below to identify small parts used in assembly. Assembly requires
an adjustable wrench  (not included).
|
| 3/8" x 1" Bolt (18)Ð1 |
3/8" x 1 1/2" Washer | 5/16" Washer (26)Ð2 | Flange Nut (48)Ð2 |
(28)Ð1 |
|
|
5/16" x 2 3/4" Bolt (49)Ð2 |
| |
|
| 3/8" x 1 3/4" Bolt (2)Ð2 |
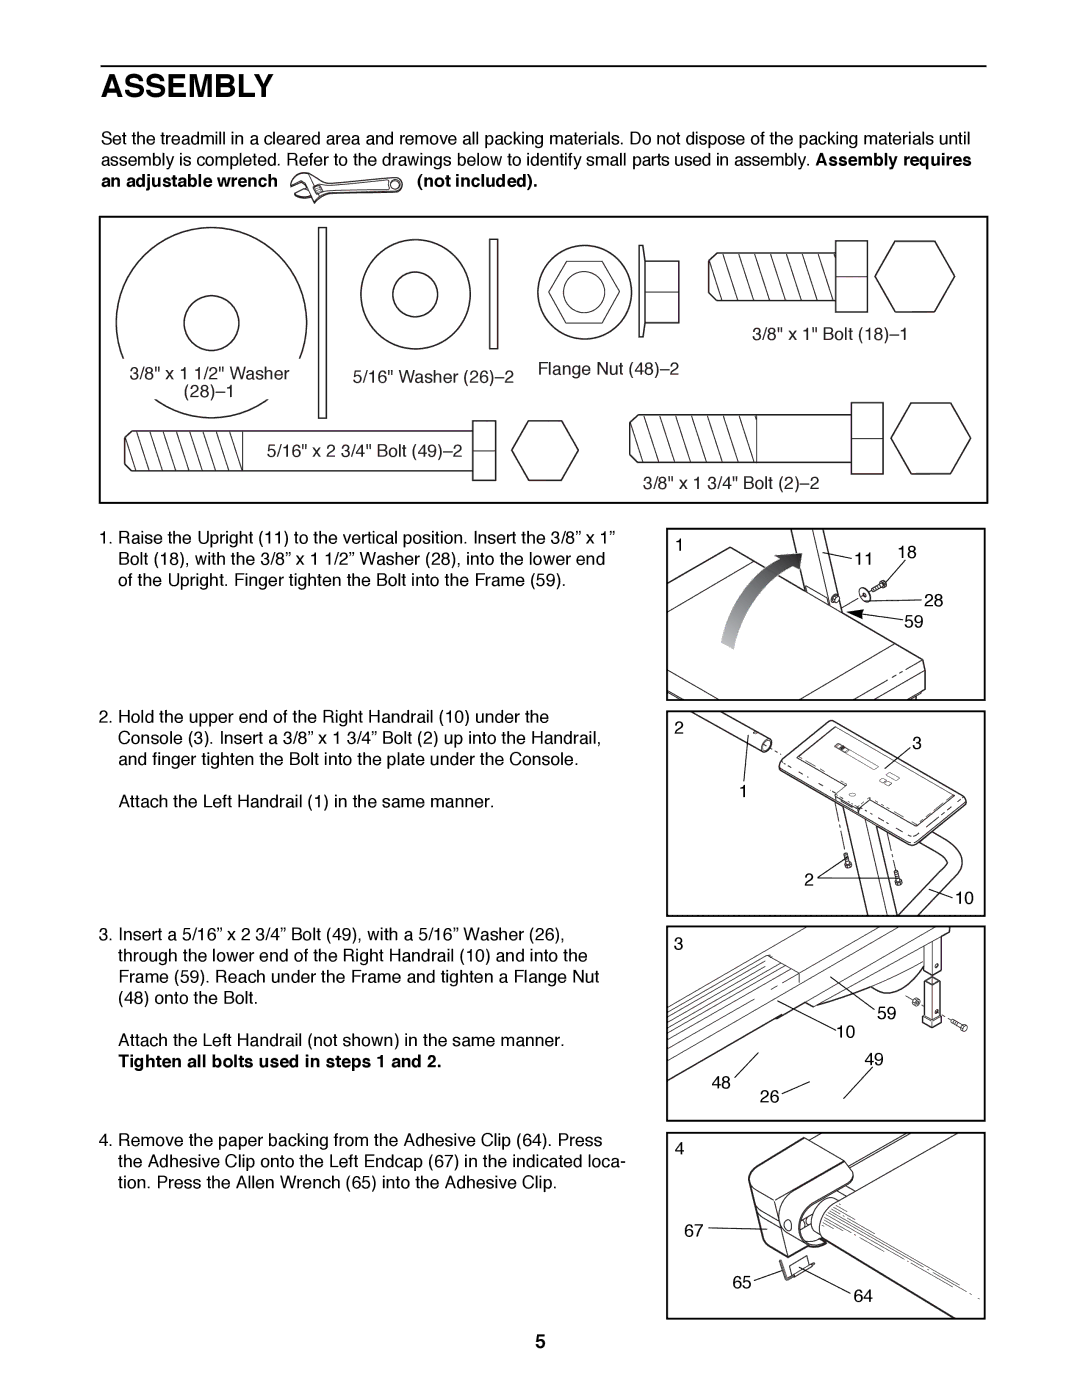
1.Raise the Upright (11) to the vertical position. Insert the 3/8Ó x 1Ó Bolt (18), with the 3/8Ó x 1 1/2Ó Washer (28), into the lower end of the Upright. Finger tighten the Bolt into the Frame (59).
2.Hold the upper end of the Right Handrail (10) under the Console (3). Insert a 3/8Ó x 1 3/4Ó Bolt (2) up into the Handrail, and finger tighten the Bolt into the plate under the Console.
Attach the Left Handrail (1) in the same manner.
3.Insert a 5/16Ó x 2 3/4Ó Bolt (49), with a 5/16Ó Washer (26), through the lower end of the Right Handrail (10) and into the Frame (59). Reach under the Frame and tighten a Flange Nut (48) onto the Bolt.
Attach the Left Handrail (not shown) in the same manner.
Tighten all bolts used in steps 1 and 2.
4.Remove the paper backing from the Adhesive Clip (64). Press the Adhesive Clip onto the Left Endcap (67) in the indicated loca- tion. Press the Allen Wrench (65) into the Adhesive Clip.
1 | 11 | 18 |
| ||
|
| |
|
| 28 |
|
| 59 |
2 |
| 3 |
|
| |
| 1 |
|
| 2 | 10 |
|
| |
3 |
|
|
| 59 |
|
| 10 |
|
| 49 |
|
| 48 |
|
| 26 |
|
4 |
|
|
67 |
|
|
| 65 |
|
| 64 |
|
5