ASSEMBLY
Assembly requires two persons. Set the treadmill in a cleared area and remove all packing materials; do not dispose of the packing materials until assembly is completed. Note: The underside of the treadmill walking belt is coated with
In addition to the included hex keys ![]()
![]() , assembly requires a Phillips screwdriver
, assembly requires a Phillips screwdriver ![]()
![]() , an
, an
adjustable wrench ![]()
![]()
![]() , and wire cutters
, and wire cutters ![]() .
.
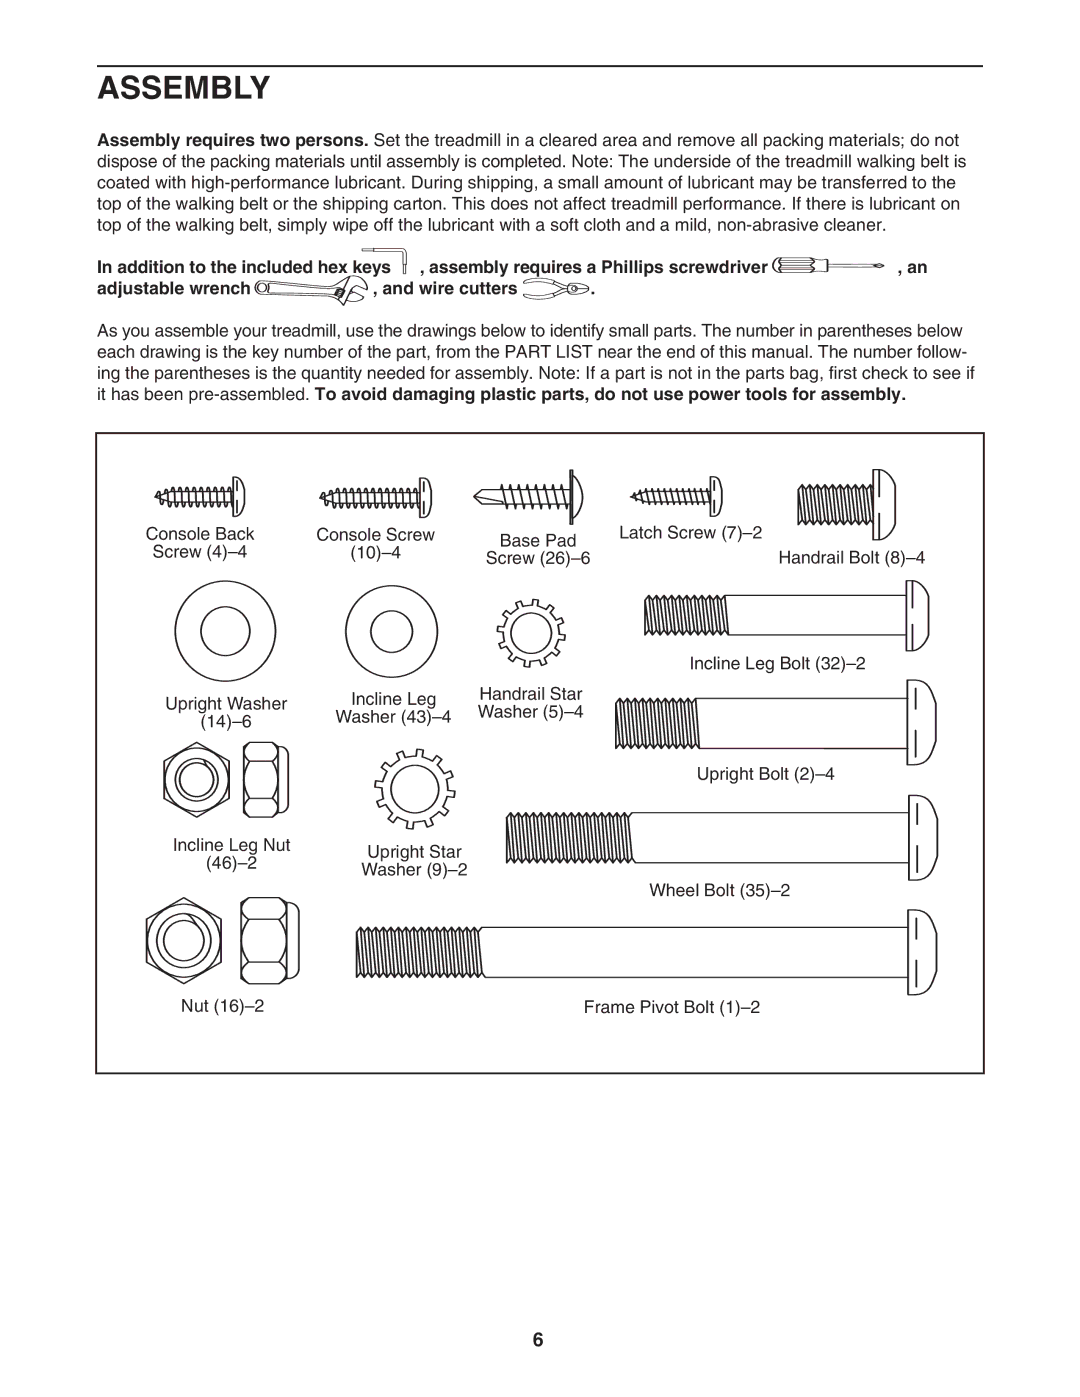
As you assemble your treadmill, use the drawings below to identify small parts. The number in parentheses below each drawing is the key number of the part, from the PART LIST near the end of this manual. The number follow- ing the parentheses is the quantity needed for assembly. Note: If a part is not in the parts bag, first check to see if it has been
Console Back | Console Screw | Base Pad | Latch Screw | |
Screw | Handrail Bolt | |||
Screw | ||||
|
| |||
|
|
| Incline Leg Bolt | |
Upright Washer | Incline Leg | Handrail Star |
| |
Washer |
| |||
Washer |
| |||
|
| |||
|
|
| Upright Bolt | |
Incline Leg Nut | Upright Star |
|
| |
|
| |||
Washer |
|
| ||
|
|
| ||
|
|
| Wheel Bolt | |
Nut |
| Frame Pivot Bolt | ||
6