MAINTENANCE AND TROUBLE-SHOOTING
Inspect and tighten all parts of the exercise cycle reg- ularly. Replace any worn parts immediately.
The exercise cycle can be cleaned with a soft, damp cloth. Avoid spilling liquid on the console. Keep the console out of direct sunlight or the display may be damaged. Remove the batteries when storing the exercise cycle.
BATTERY REPLACEMENT
If the console does not function properly, the batteries should be replaced. See assembly step 4 on page 5. In addition, make sure that the reed switch wire is plugged fully into the console.
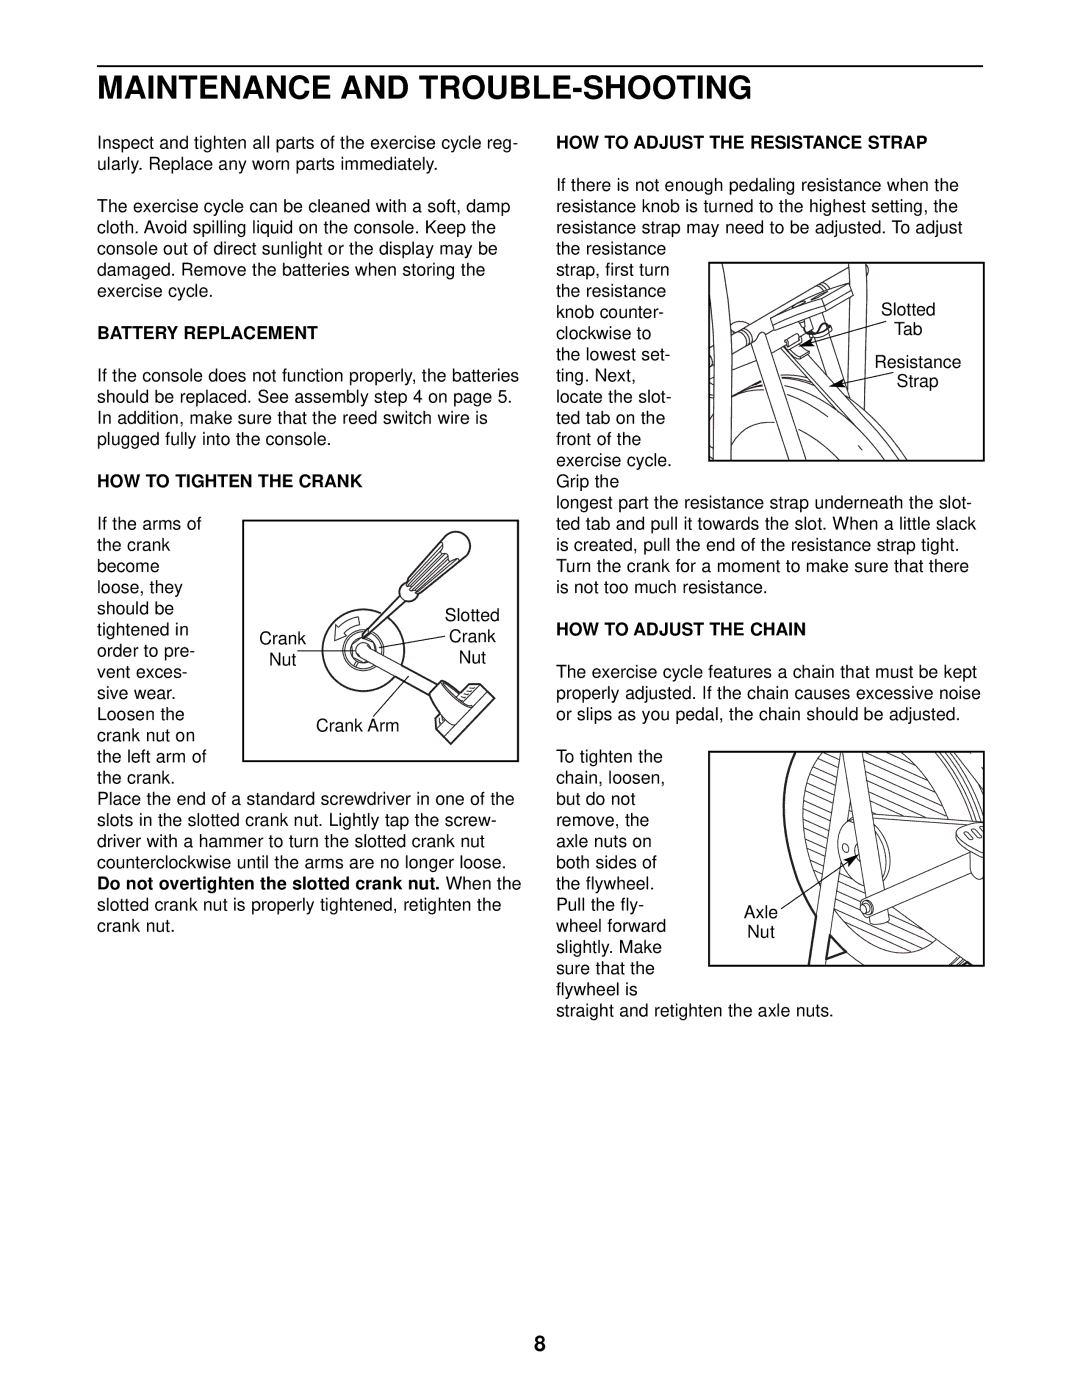
HOW TO TIGHTEN THE CRANK
If the arms of the crank become loose, they should be tightened in order to pre-
vent exces- sive wear. Loosen the crank nut on
the left arm of the crank.
Place the end of a standard screwdriver in one of the slots in the slotted crank nut. Lightly tap the screw- driver with a hammer to turn the slotted crank nut counterclockwise until the arms are no longer loose. Do not overtighten the slotted crank nut. When the slotted crank nut is properly tightened, retighten the crank nut.
HOW TO ADJUST THE RESISTANCE STRAP
If there is not enough pedaling resistance when the resistance knob is turned to the highest setting, the resistance strap may need to be adjusted. To adjust the resistance
strap, first turn the resistance
knob counter-
clockwise to the lowest set-
ting. Next, locate the slot-
ted tab on the front of the exercise cycle. Grip the
longest part the resistance strap underneath the slot- ted tab and pull it towards the slot. When a little slack is created, pull the end of the resistance strap tight.
Turn the crank for a moment to make sure that there is not too much resistance.
HOW TO ADJUST THE CHAIN
The exercise cycle features a chain that must be kept properly adjusted. If the chain causes excessive noise or slips as you pedal, the chain should be adjusted.
To tighten the |
| |
chain, loosen, |
| |
but do not |
| |
remove, the |
| |
axle nuts on |
| |
both sides of |
| |
the flywheel. |
| |
Pull the fly- | Axle | |
wheel forward | ||
Nut | ||
slightly. Make | ||
| ||
sure that the |
| |
flywheel is |
|
straight and retighten the axle nuts.
8
