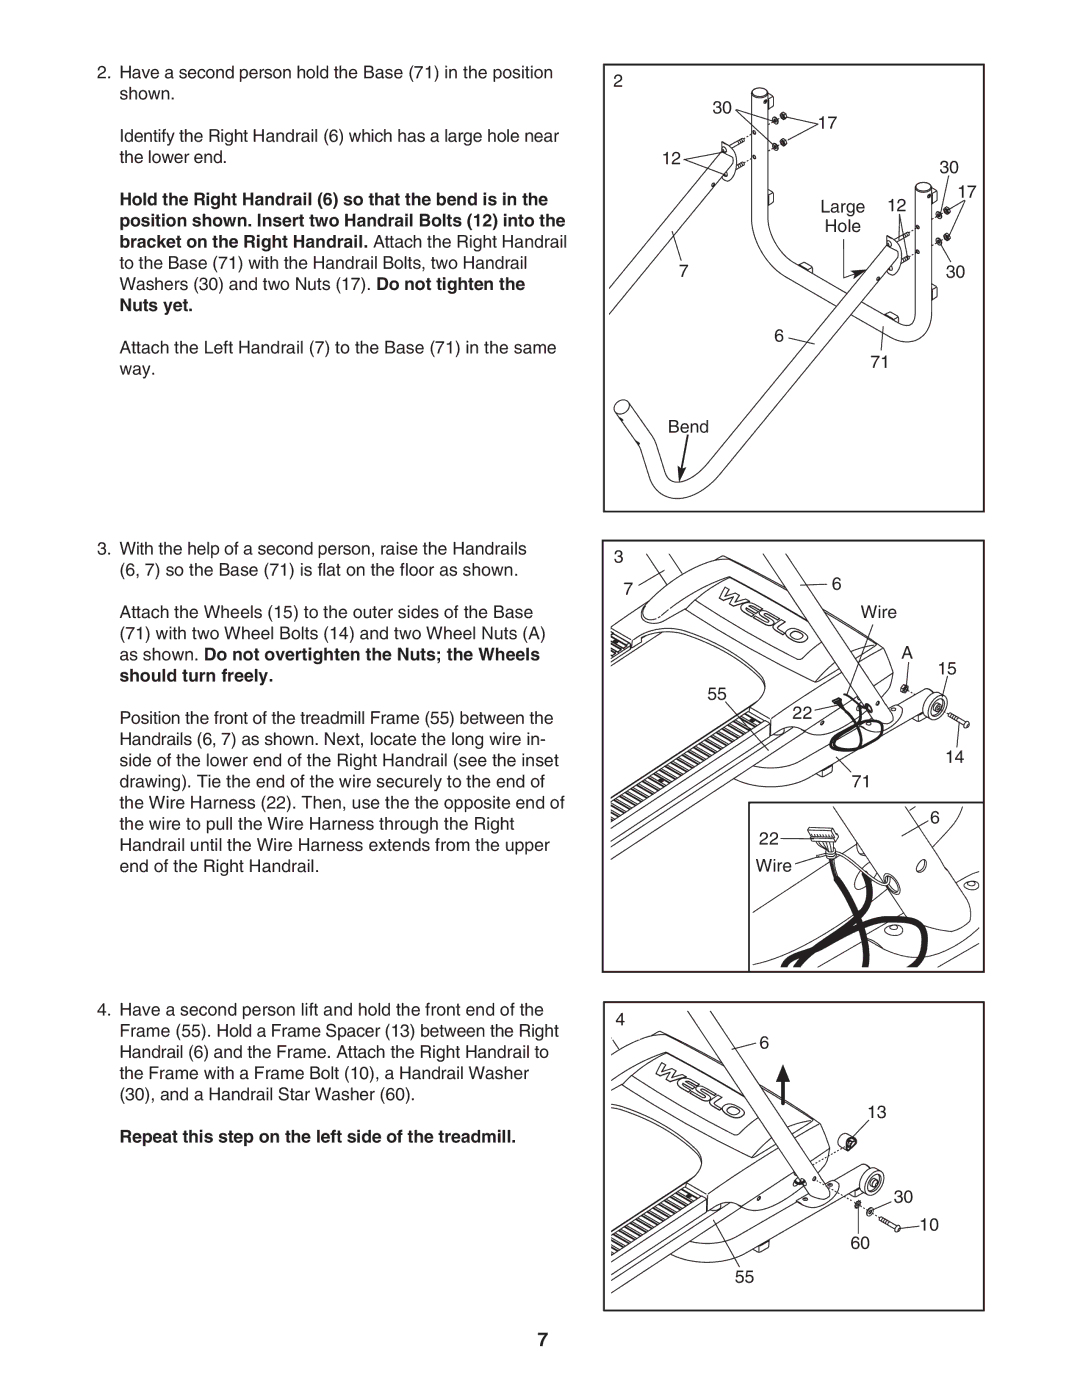
2.Have a second person hold the Base (71) in the position shown.
Identify the Right Handrail (6) which has a large hole near the lower end.
Hold the Right Handrail (6) so that the bend is in the position shown. Insert two Handrail Bolts (12) into the bracket on the Right Handrail. Attach the Right Handrail to the Base (71) with the Handrail Bolts, two Handrail Washers (30) and two Nuts (17). Do not tighten the
Nuts yet.
Attach the Left Handrail (7) to the Base (71) in the same way.
3.With the help of a second person, raise the Handrails (6, 7) so the Base (71) is flat on the floor as shown.
Attach the Wheels (15) to the outer sides of the Base (71) with two Wheel Bolts (14) and two Wheel Nuts (A) as shown. Do not overtighten the Nuts; the Wheels should turn freely.
Position the front of the treadmill Frame (55) between the Handrails (6, 7) as shown. Next, locate the long wire in- side of the lower end of the Right Handrail (see the inset drawing). Tie the end of the wire securely to the end of the Wire Harness (22). Then, use the the opposite end of the wire to pull the Wire Harness through the Right Handrail until the Wire Harness extends from the upper end of the Right Handrail.
4.Have a second person lift and hold the front end of the Frame (55). Hold a Frame Spacer (13) between the Right Handrail (6) and the Frame. Attach the Right Handrail to the Frame with a Frame Bolt (10), a Handrail Washer (30), and a Handrail Star Washer (60).
Repeat this step on the left side of the treadmill.
2 |
|
|
| 30 |
|
| 17 |
|
| 12 | 30 |
|
| |
| Large | 17 |
| 12 | |
| Hole |
|
| 7 | 30 |
| 6 |
|
|
| 71 |
| Bend |
|
3 |
|
|
7 | 6 |
|
|
| |
| Wire | |
|
| A |
|
| 15 |
| 55 |
|
| 22 |
|
|
| 14 |
| 71 | |
|
| 6 |
22![]()
![]()
![]()
![]()
![]()
![]()
![]()
![]()
![]() Wire
Wire ![]()
![]()
4 |
6 |
13 |
30 |
10 |
60 |
55 |
7