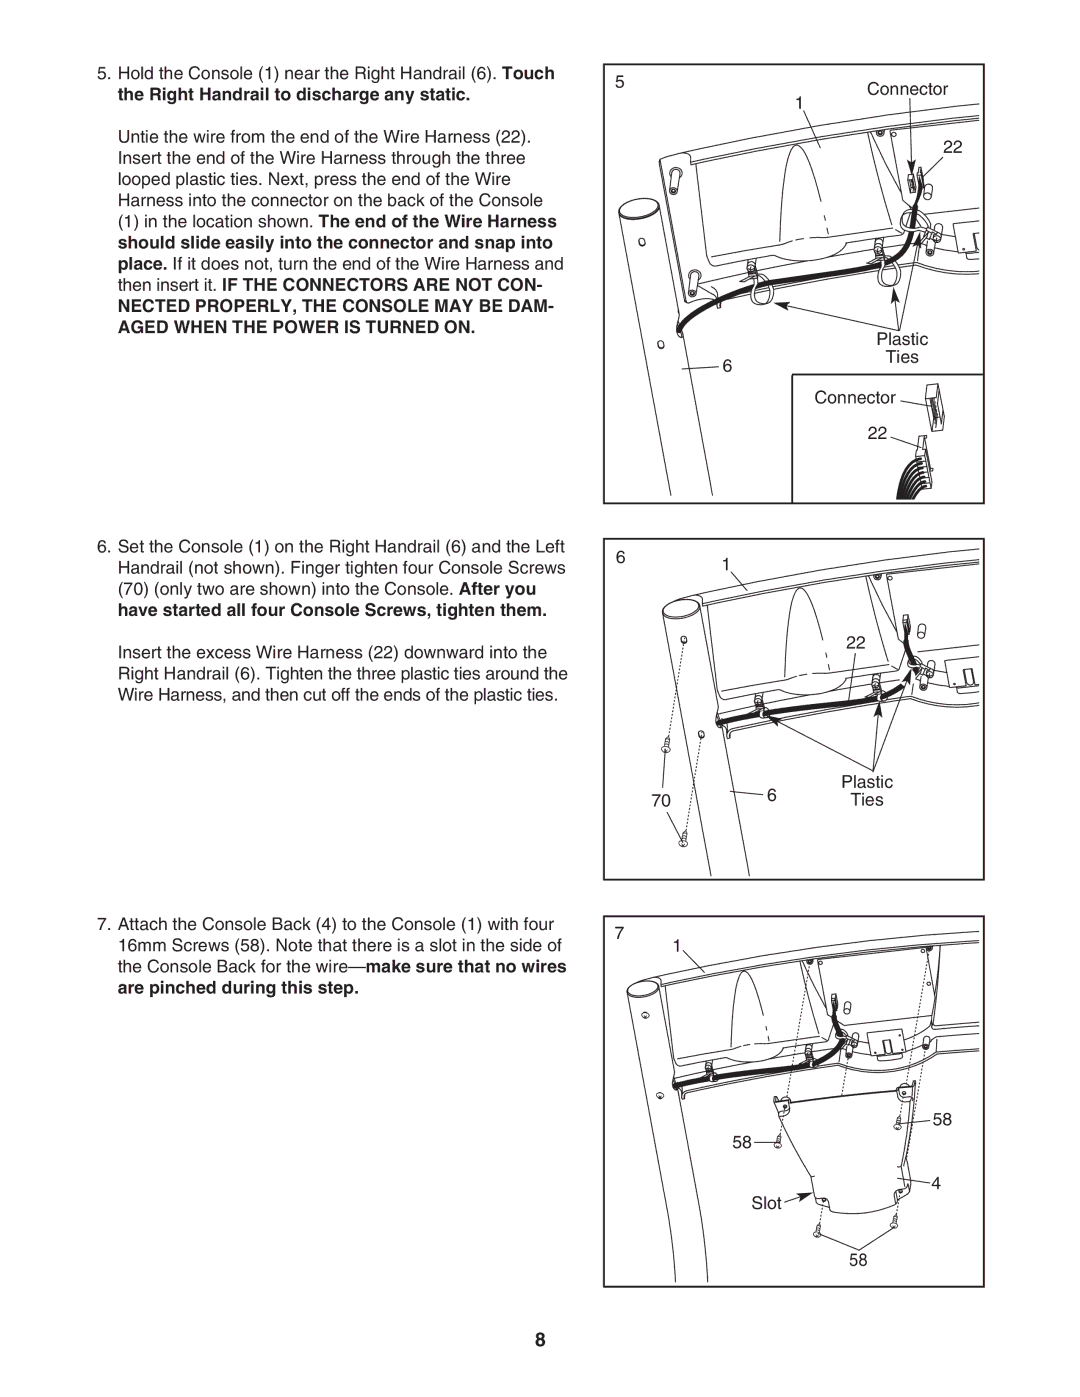
5.Hold the Console (1) near the Right Handrail (6). Touch the Right Handrail to discharge any static.
Untie the wire from the end of the Wire Harness (22). Insert the end of the Wire Harness through the three looped plastic ties. Next, press the end of the Wire Harness into the connector on the back of the Console
(1) in the location shown. The end of the Wire Harness should slide easily into the connector and snap into place. If it does not, turn the end of the Wire Harness and then insert it. IF THE CONNECTORS ARE NOT CON-
NECTED PROPERLY, THE CONSOLE MAY BE DAM- AGED WHEN THE POWER IS TURNED ON.
6.Set the Console (1) on the Right Handrail (6) and the Left Handrail (not shown). Finger tighten four Console Screws (70) (only two are shown) into the Console. After you have started all four Console Screws, tighten them.
Insert the excess Wire Harness (22) downward into the Right Handrail (6). Tighten the three plastic ties around the Wire Harness, and then cut off the ends of the plastic ties.
7.Attach the Console Back (4) to the Console (1) with four 16mm Screws (58). Note that there is a slot in the side of the Console Back for the
8
5 |
| Connector |
|
| 1 |
|
| 22 |
|
| Plastic |
| 6 | Ties |
|
| |
|
| Connector |
|
| 22 |
6 | 1 |
|
|
| |
|
| 22 |
| 6 | Plastic |
70 | Ties | |
7 | 1 |
|
|
| |
|
| 58 |
| 58 |
|
|
| 4 |
Slot![]()
58
