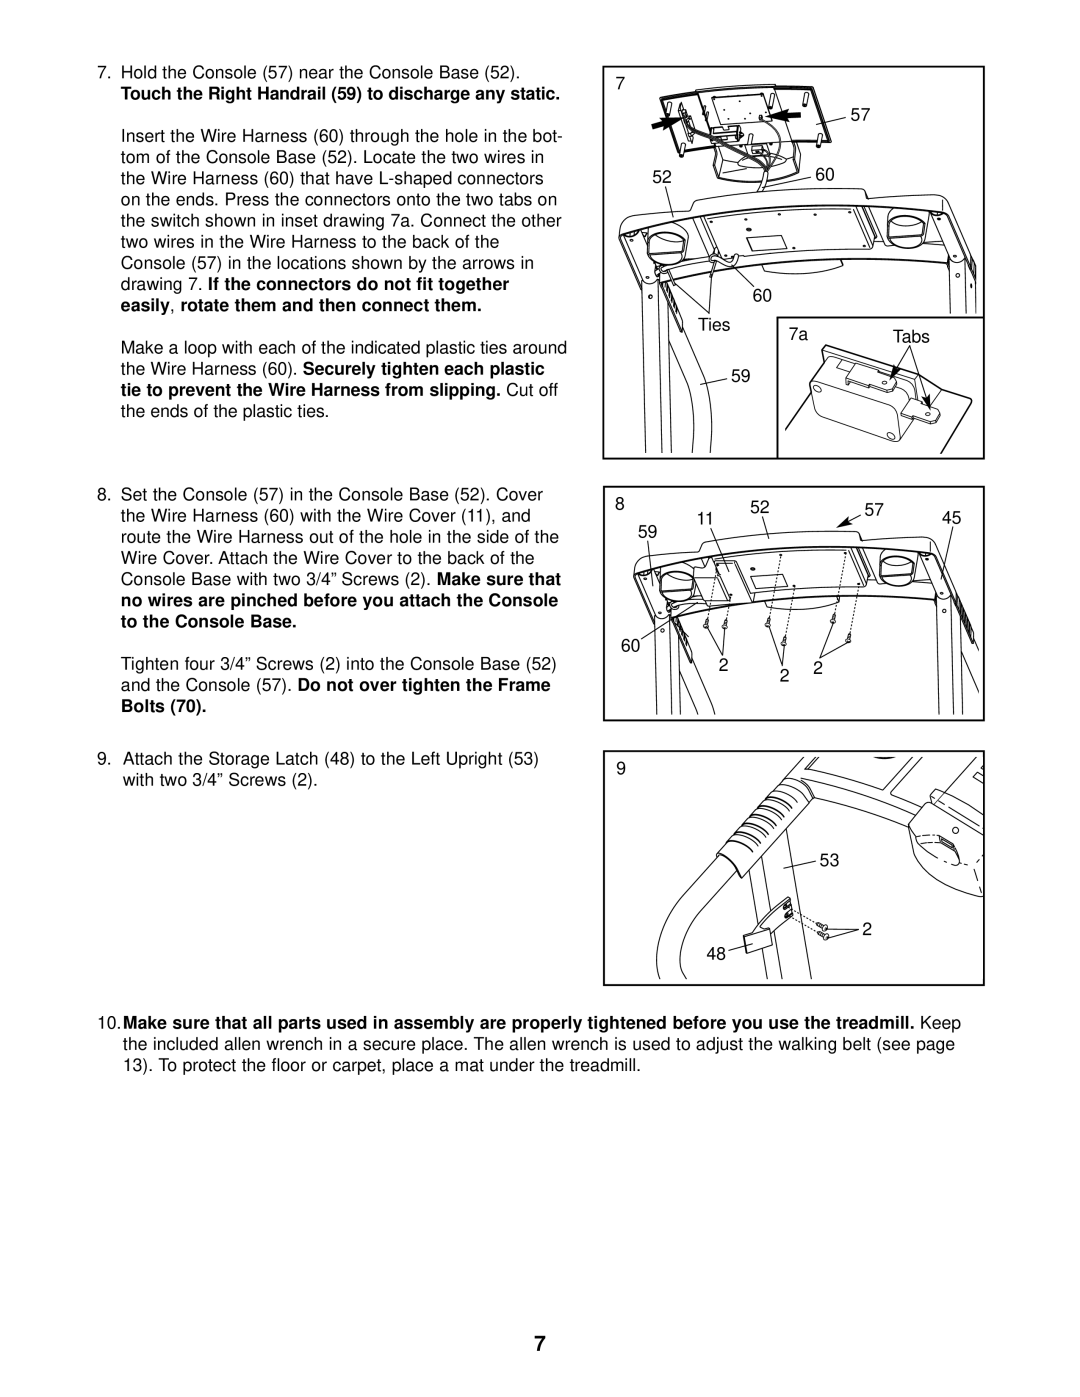
7.Hold the Console (57) near the Console Base (52).
Touch the Right Handrail (59) to discharge any static.
Insert the Wire Harness (60) through the hole in the bot- tom of the Console Base (52). Locate the two wires in the Wire Harness (60) that have
Make a loop with each of the indicated plastic ties around the Wire Harness (60). Securely tighten each plastic tie to prevent the Wire Harness from slipping. Cut off the ends of the plastic ties.
8.Set the Console (57) in the Console Base (52). Cover the Wire Harness (60) with the Wire Cover (11), and route the Wire Harness out of the hole in the side of the Wire Cover. Attach the Wire Cover to the back of the Console Base with two 3/4” Screws (2). Make sure that no wires are pinched before you attach the Console to the Console Base.
Tighten four 3/4” Screws (2) into the Console Base (52) and the Console (57). Do not over tighten the Frame
Bolts (70).
9.Attach the Storage Latch (48) to the Left Upright (53) with two 3/4” Screws (2).
7 |
|
|
|
|
|
|
| 57 |
|
52 |
|
| 60 |
|
|
| 60 |
|
|
| Ties | 7a |
| Tabs |
|
|
| ||
|
| 59 |
|
|
8 | 11 | 52 | 57 | 45 |
59 |
|
| ||
|
|
|
| |
60 | 2 |
|
|
|
| 2 | 2 |
| |
|
|
|
| |
9 |
|
|
|
|
|
|
| 53 |
|
|
|
| 2 |
|
| 48 |
|
|
|
10.Make sure that all parts used in assembly are properly tightened before you use the treadmill. Keep the included allen wrench in a secure place. The allen wrench is used to adjust the walking belt (see page 13). To protect the floor or carpet, place a mat under the treadmill.
7
