liGHt fiXture installatiOn instalaCión del artefaCtO luMinOsO
20
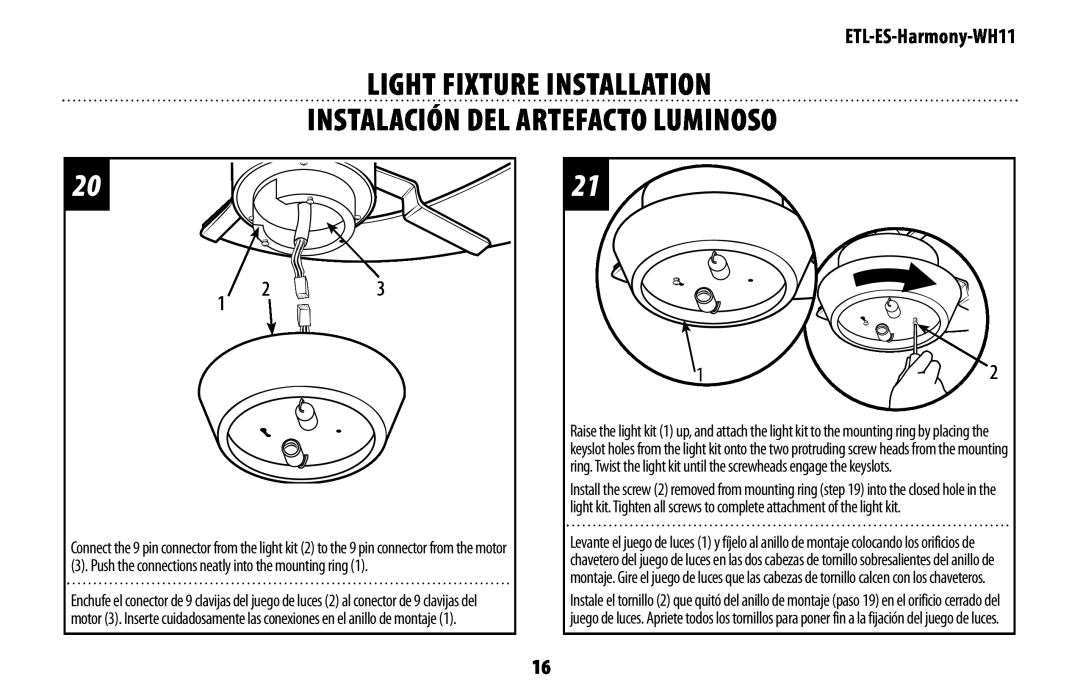
1 | 2 | 3 |
|
|
Connect the 9 pin connector from the light kit (2) to the 9 pin connector from the motor
(3). Push the connections neatly into the mounting ring (1).
Enchufe el conector de 9 clavijas del juego de luces (2) al conector de 9 clavijas del motor (3). Inserte cuidadosamente las conexiones en el anillo de montaje (1).
21![]()
1 | 2 |
Raise the light kit (1) up, and attach the light kit to the mounting ring by placing the keyslot holes from the light kit onto the two protruding screw heads from the mounting ring. Twist the light kit until the screwheads engage the keyslots.
Install the screw (2) removed from mounting ring (step 19) into the closed hole in the light kit. Tighten all screws to complete attachment of the light kit.
Levante el juego de luces (1) y fíjelo al anillo de montaje colocando los orificios de chavetero del juego de luces en las dos cabezas de tornillo sobresalientes del anillo de montaje. Gire el juego de luces que las cabezas de tornillo calcen con los chaveteros.
Instale el tornillo (2) que quitó del anillo de montaje (paso 19) en el orificio cerrado del juego de luces. Apriete todos los tornillos para poner fin a la fijación del juego de luces.
16