Installing Adapter Brackets
2 | To prevent scratching the screen, set a cloth on a flat, level surface that will support the weight of the screen. Place |
screen face side down. If screen has knobs on the back, remove them to allow the adapter brackets to be attached. |
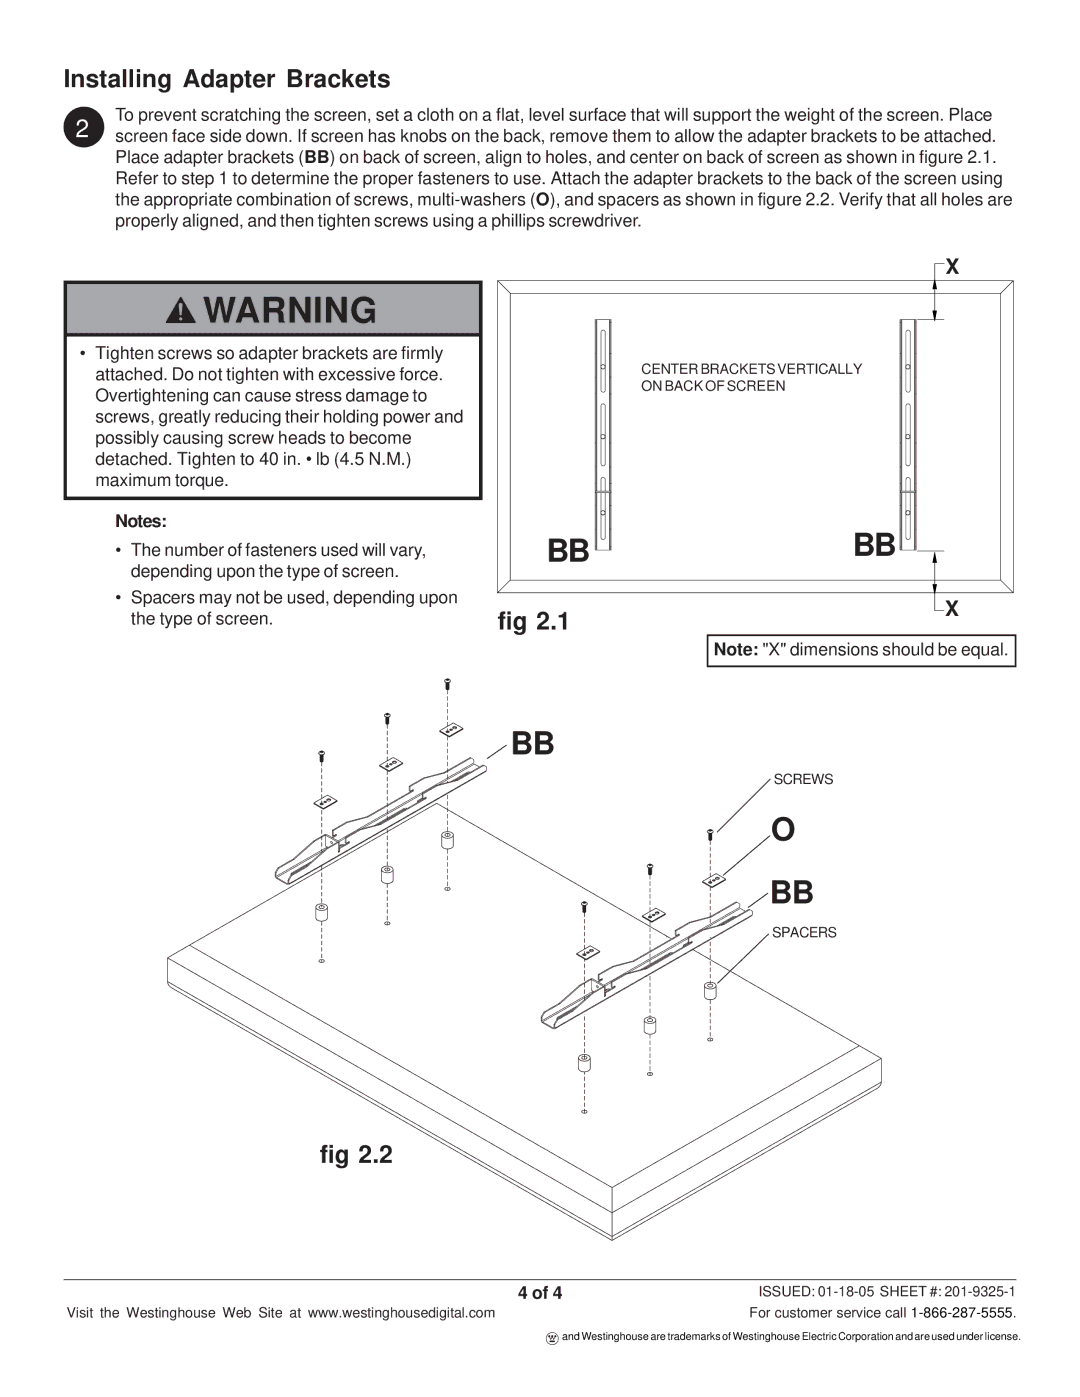
Place adapter brackets (BB) on back of screen, align to holes, and center on back of screen as shown in figure 2.1. Refer to step 1 to determine the proper fasteners to use. Attach the adapter brackets to the back of the screen using the appropriate combination of screws,
![]() WARNING
WARNING
•Tighten screws so adapter brackets are firmly attached. Do not tighten with excessive force. Overtightening can cause stress damage to screws, greatly reducing their holding power and possibly causing screw heads to become detached. Tighten to 40 in. • lb (4.5 N.M.) maximum torque.
Notes:
•The number of fasteners used will vary, depending upon the type of screen.
•Spacers may not be used, depending upon the type of screen.
BB ![]()
![]()
fig 2.1
CENTER BRACKETS VERTICALLY ON BACK OF SCREEN
BB![]()
![]()
![]()
![]() X
X
![]() X
X
Note: "X" dimensions should be equal.
BB
SCREWS
O
BB
SPACERS
fig 2.2
4 of 4 | ISSUED: |
Visit the Westinghouse Web Site at www.westinghousedigital.com | For customer service call |
![]() and Westinghouse are trademarks of Westinghouse Electric Corporation and are used under license.
and Westinghouse are trademarks of Westinghouse Electric Corporation and are used under license.