LIGHT FIXTURE INSTALLATION
INSTALACIÓN DEL ARTEFACTO LUMINOSO
UL-ES-PrincessAmbiance-WH04
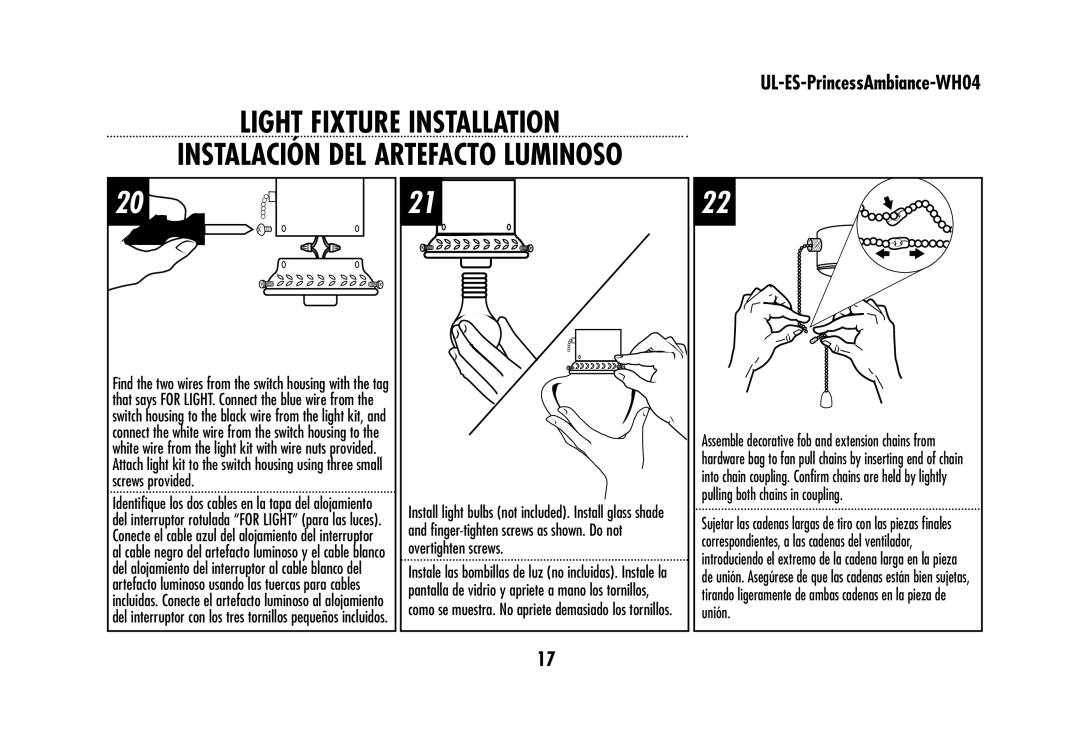
20
Find the two wires from the switch housing with the tag that says FOR LIGHT. Connect the blue wire from the switch housing to the black wire from the light kit, and connect the white wire from the switch housing to the white wire from the light kit with wire nuts provided. Attach light kit to the switch housing using three small screws provided.
Identifique los dos cables en la tapa del alojamiento del interruptor rotulada “FOR LIGHT” (para las luces). Conecte el cable azul del alojamiento del interruptor al cable negro del artefacto luminoso y el cable blanco del alojamiento del interruptor al cable blanco del artefacto luminoso usando las tuercas para cables incluidas. Conecte el artefacto luminoso al alojamiento del interruptor con los tres tornillos pequeños incluidos.
21![]()
Install light bulbs (not included). Install glass shade and
Instale las bombillas de luz (no incluidas). Instale la pantalla de vidrio y apriete a mano los tornillos, como se muestra. No apriete demasiado los tornillos.
22
Assemble decorative fob and extension chains from hardware bag to fan pull chains by inserting end of chain into chain coupling. Confirm chains are held by lightly pulling both chains in coupling.
Sujetar las cadenas largas de tiro con las piezas finales correspondientes, a las cadenas del ventilador, introduciendo el extremo de la cadena larga en la pieza de unión. Asegúrese de que las cadenas están bien sujetas, tirando ligeramente de ambas cadenas en la pieza de unión.
17