Now start...
with dishwasher in kitchen.
1~cabinet | wall | water | |
SUPPlY | |||
Ii |
| ||
| pipe |
v +5’*+
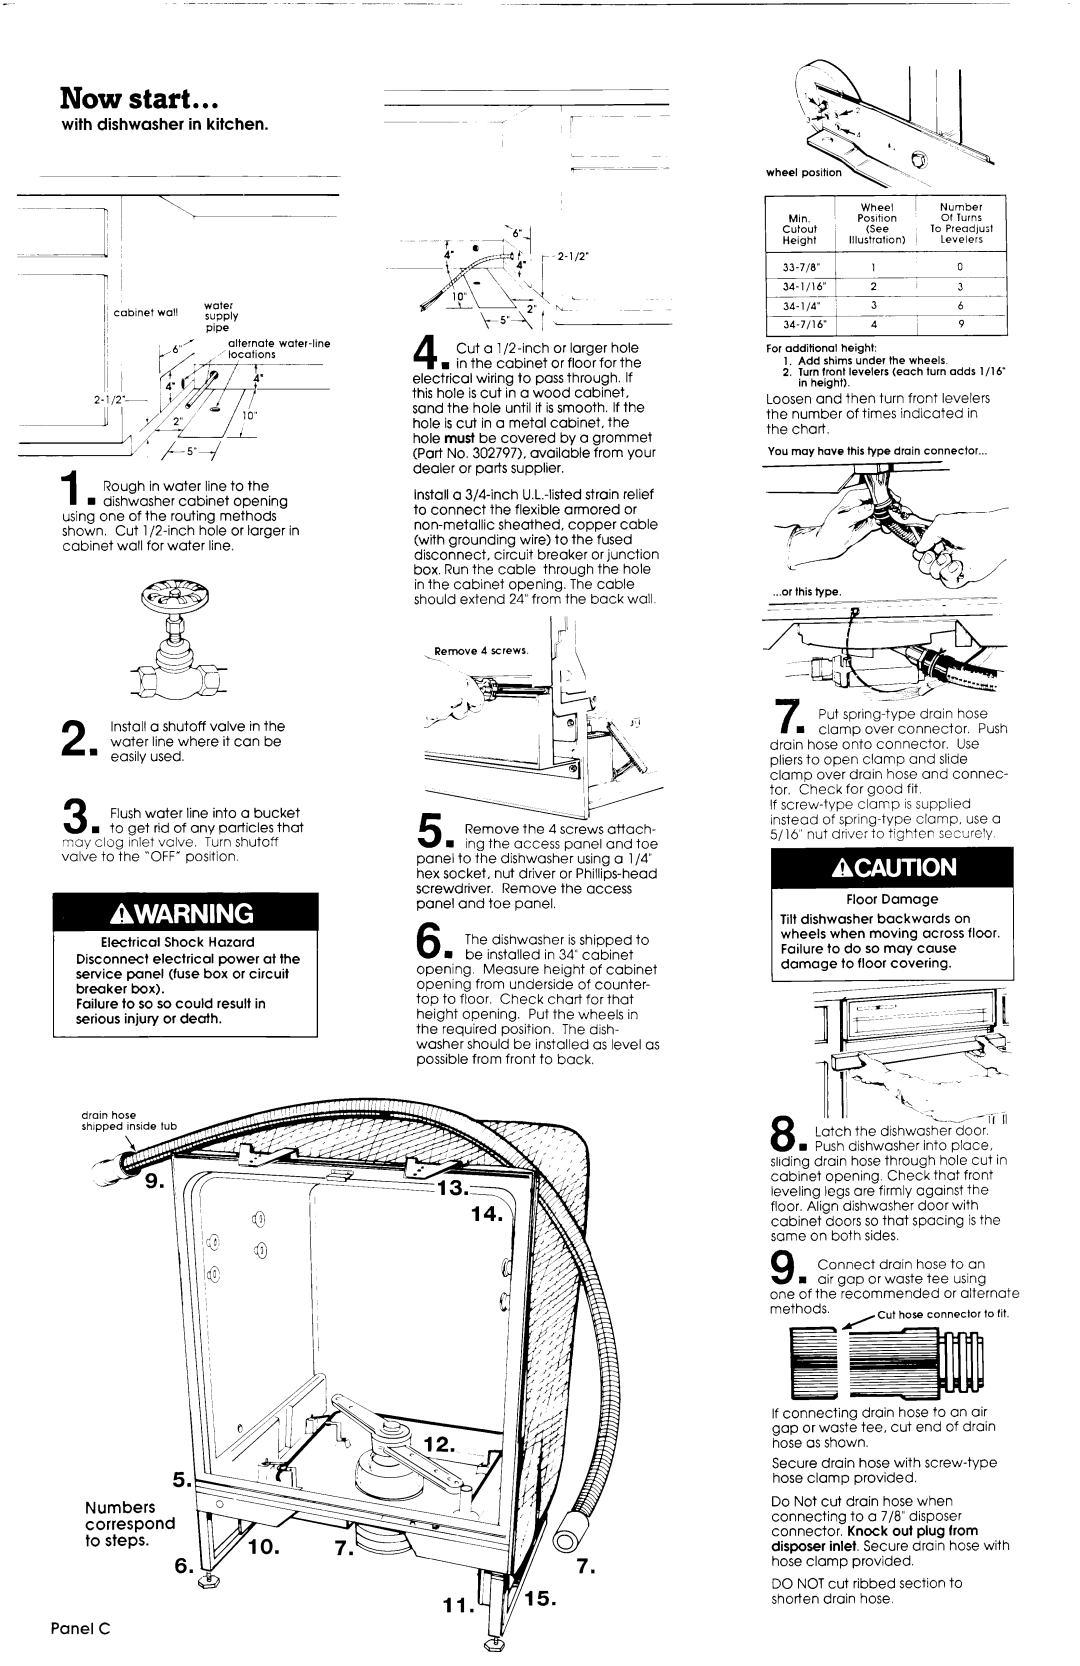
1 Rough in water line to the n dishwasher cabinet opening
using one of the routing methods shown. Cut
Install a shutoff valve in the
2 water line where it can be g easily used.
9Flush water line into a bucket d w to get rid of any particles that may clog inlet valve. Turn shutoff valve to the “OFF”position
Electrical Shock Hazard Disconnect electrical power at the service panel (fuse box or circuit breaker box).
Failure to so so could result in serious injury or death.
drain hose
shipped inside tub
Numbers correspond to steps.
,’
T
- - ‘64
4 Cut a
this hole is cut in a wood cabinet, sand the hole until it issmooth. If the hole is cut in a metal cabinet, the hole must be covered by a grommet (Part No. 3027971, available from your dealer or parts supplier.
Install a
up
GzRemove the 4 screws attach- u n ing the access panel and toe panel to the dishwasher using a l/4” hex socket, nut driver or
6 The dishwasher is shipped to H be installed in 34” cabinet opening. Measure height of cabinet opening from underside of counter-
top to floor. Check chart for that height opening. Put the wheels in the required position. The dish- washer should be installed as level as possible from front to back.
III For additional height:
1.Add shims under the wheels.
2.Turn front levelers (each turn adds 1/16 in height).
Loosen and then turn front levelers the number of times indicated in the chart.
You may have this type drain connector...
...or this tvae.
Put
/ n clamp over connector. Push drain hose onto connector. Use pliers to open clamp and slide clamp over drain hose and connec- tor. Check for good fit.
If
Floor Damage
Tilt dishwasher backwards on wheels when moving across floor. Failure to do so may cause damage to floor covering.
8 Latch the dishwasher door, w Push dishwasher into place,
sliding drain hose through hole cut in cabinet opening. Check that front leveling legs are firmly against the floor. Align dishwasher door with cabinet doors so that spacing isthe same on both sides.
9 Connect drain hose to an n air gap or waste tee using
one of the recommended or alternate
methods. | , Cut hose connector to fit. |
|
If connecting drain hose to an air gap or waste tee, cut end of drain hose as shown.
Secure drain hose with
Do Not cut drain hose when connecting to a 7/8” disposer connector. Knock out plug from disposer inlet. Secure drain hose with hose clamp provided.
DO NOT cut ribbed section to shorten drain hose.