25 n Determine the length of
exhaust duct that is needed
requirements,” Panel B.
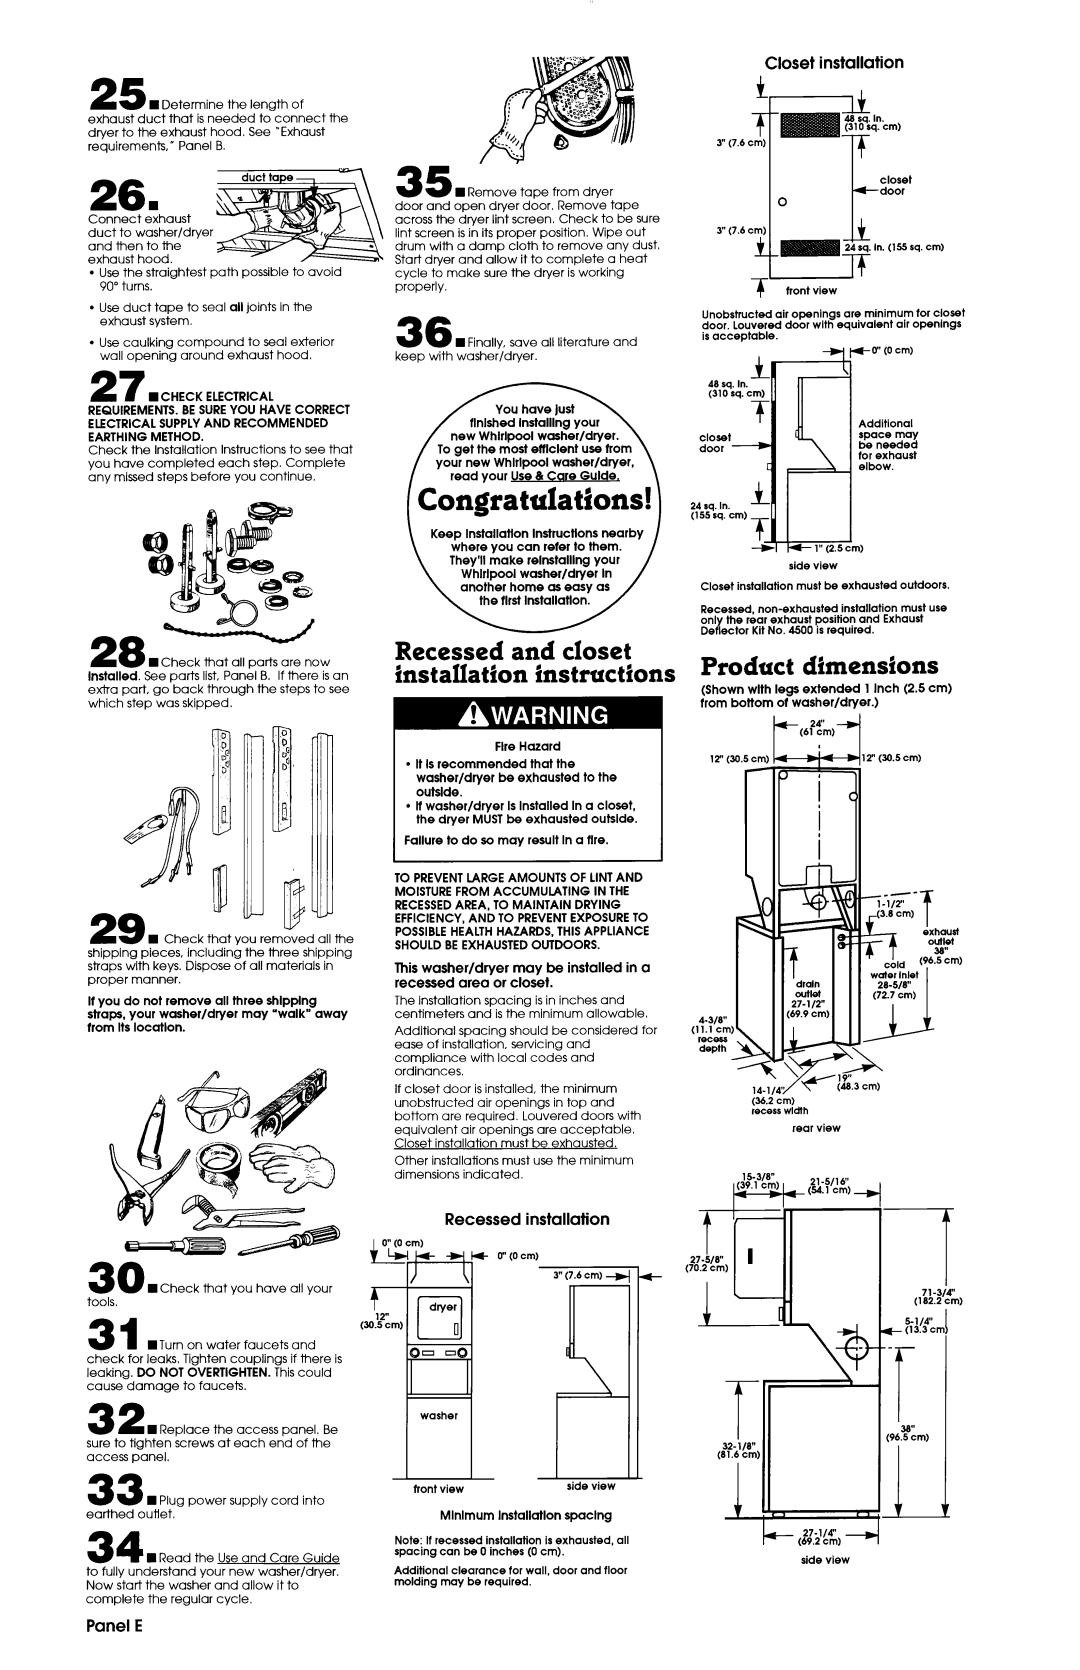
Closet installation
26.
Connz Ghaust ’ duct to washer/dryer and then to the exhaust hood.
l Use the straightest path possible to avoid 90” turns.
l Use duct tape to seal all joints in the exhaust system.
l Use caulking compound to seal exterior wall opening around exhaust hood.
27 n CHECK ELECTRICAL REQUIREMENTS.BESUREYOU HAVE CORRECT ELECTRICALSUPPLYAND RECOMMENDED EARTHING METHOD.
Check the Installation Instructions to see that you have completed each step. Complete any missed steps before you continue.
-
n Remove tape from dryer door and open dryer door. Remove tape across the dryer lint screen. Check to be sure lint screen is in its proper position. Wipe out drum with a damp cloth to remove any dust. Start drver and allow it to complete a heat cycle t6 make sure the dryer is working properly.
36 n Finally, save all literature and keep with washer)dryer.
To get the most efflclent use from your new Whlrlpool washer/dryer,
closet door
24 sq. In. (155 sq. cm)
I’ -IT
T front view
Unobstructed air openings are minimum for closet door. Louvered door with equivalent air openings is acceptable.
48 sq. In. 1 | *(r’ | (0 | cm) | ||
|
|
| |||
(310 | sq. cm) |
|
|
| |
| T | Additional | |||
|
| ||||
closet |
| space | may | ||
door | - | be | needed | ||
for | exhaust | ||||
|
| ||||
elbow.
(Congratulations! 1
24 sq. In.
Keep lnstallatlon lnstructlons nearby
~~~~
(155 sq. cm)
f4 I 1" (2.5 I ‘I) side view
2U.~- ~ Check that all parts are now Irlstalled. See parts list, Panel 8. If there is an extra part, go back through the steps to see which step was skipped.
r
29 H Check that you removed all the shipping pieces, including the three shipping straps with keys. Dispose of all materials in proper manner.
It you do not remove all three shlpplng straps, your washer/dryer may “walk” away from Its locatlon.
Recessed and closet installation instructions
Fire Hazard
l It Is recommended that the washer/dryer be exhausted to the outslde.
lIt washer/dryer Is Installed In a closet, the dryer MUSTbe exhausted outslde.
Failure to do so may result In a tire.
TO PREVENTLARGEAMOUNTS OF LINTAND MOISTUREFROM ACCUMULATING IN THE RECESSEDAREA, TO MAINTAIN DRYING EFFICIENCY,AND TO PREVENTEXPOSURETO POSSIBLEHEALTHHAZARDS,THISAPPLIANCE SHOULDBEEXHAUSTEDOUTDOORS.
This washer/dryer may be installed in a recessed area or closet.
The installation spacing is in inches and centimeters and is the minimum allowable.
Additional spacing should be considered for ease of installation, servicing and
compliance with local codes and ordinances.
If closet door is installed, the minimum unobstructed air openings in top and bottom are reauired. Louvered doors with equivalent air dpenings are acceptable. Closet installation must be exhausted.
Other installations must use the minimum dimensions indicated.
Closet installation must be exhausted outdoors.
Recessed,
Product dimensions
(Shown with legs extended 1 Inch (2.5 cm) tram bottom of washer/dryer.)
lY'(30.5 cm | lT(30.5 cm) |
(36.2 cm)
recess width
rear view
| I |
| Recessed | installation | |
|
| * |
|
| |
| O;(O cm) |
|
|
| |
| 4I |
| (r’ (0 | cm) | |
|
| 3” (7.6 cm) j | |||
31 |
| n | |||
12" |
|
|
|
| |
(30.5 cm) |
|
|
| ||
WTum on water faucets and |
|
|
|
| |
check for leaks. Tighten couplings if there is leaking. DO NOT OVERTIGHTEN.This could cause damage to faucets.
washer
sure to | tighten icrews at each | of the |
access | panel. |
|
33 H Plug power supply cord into earthed outlet.
34 n Read the Use and Care Guide to fully understand your new washer/dryer. Now start the washer and allow it to complete the regular cycle.
I | I | I |
front | view | side view |
| ||
| Mlnlmum | lnstallatlon spacing |
Note: If recessed installation is exhausted, all spacing can be 0 inches (0 cm).
Additional clearance for wall, door and floor molding may be required.
(69.2 cm)
side view