5.Fasten
6.Slip compression sleeve and compression nut on copper tubing as shown in diagram. Insert end of tubing into outlet end squarely as far as it will go.
Screw compression nut onto outlet end with adjust- able wrench. Do not overtighten. Turn ON main water supply and flush out tubing until water is clear. Turn OFF
Connecting to refrigerator
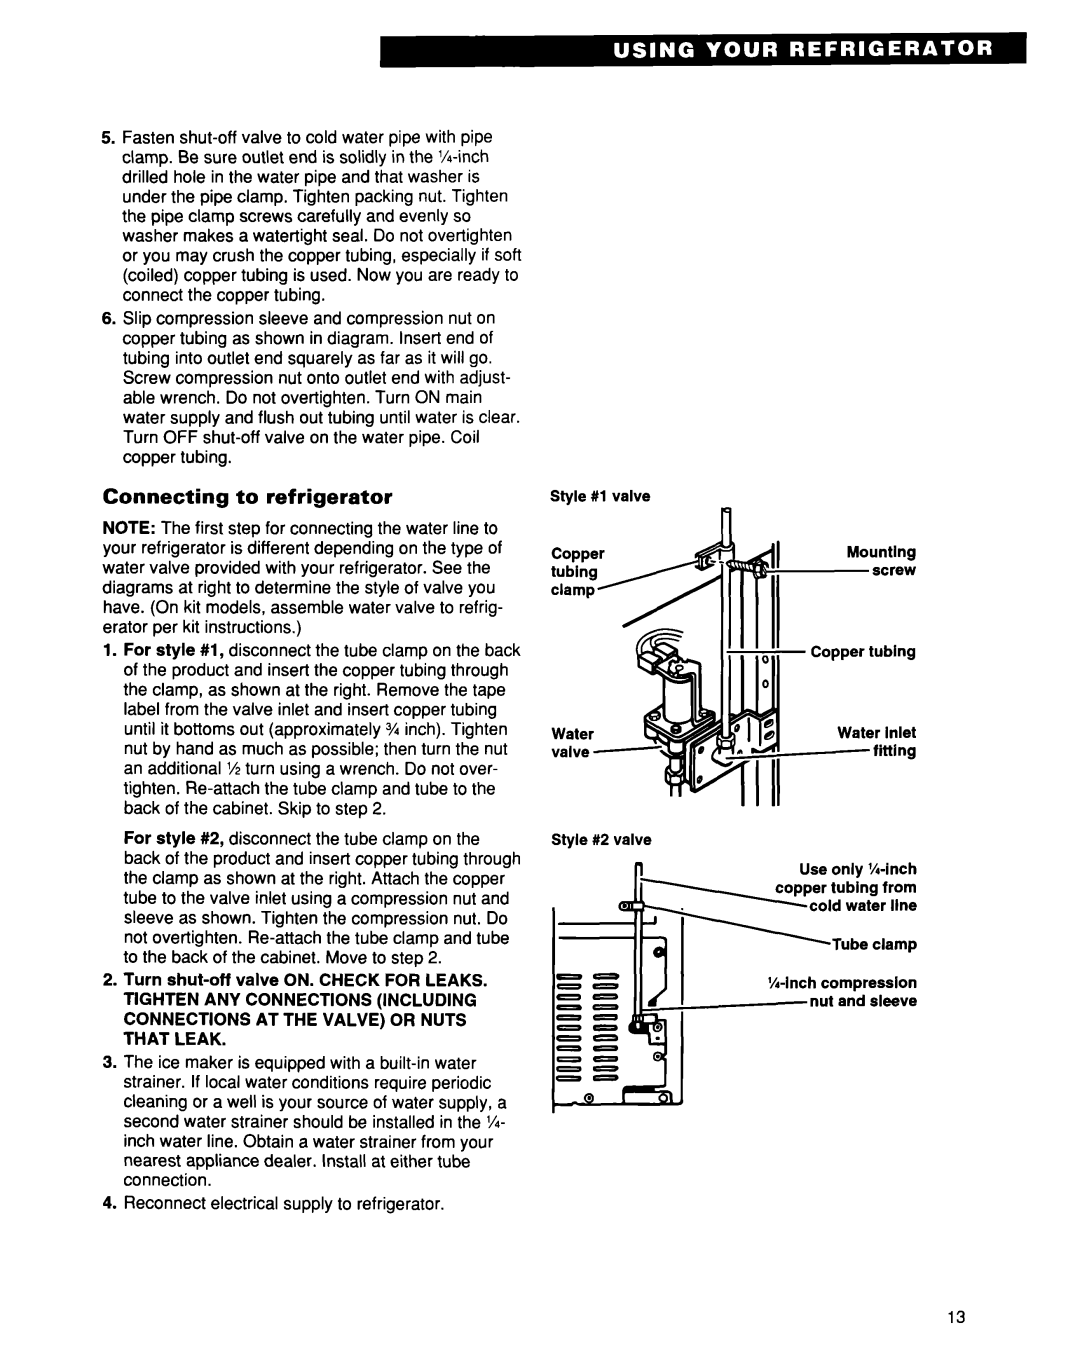
NOTE: The first step for connecting the water line to your refrigerator is different depending on the type of water valve provided with your refrigerator. See the diagrams at right to determine the style of valve you have. (On kit models, assemble water valve to refrig- erator per kit instructions.)
1.For style #l, disconnect the tube clamp on the back of the product and insert the copper tubing through the clamp, as shown at the right. Remove the tape label from the valve inlet and insert copper tubing until it bottoms out (approximately % inch). Tighten nut by hand as much as possible; then turn the nut an additional l/2turn using a wrench. Do not over- tighten.
For style #2, disconnect the tube clamp on the back of the product and insert copper tubing through the clamp as shown at the right. Attach the copper tube to the valve inlet using a compression nut and sleeve as shown. Tighten the compression nut. Do not overtighten.
2.Turn
3.The ice maker is equipped with a
4.Reconnect electrical supply to refrigerator.
Style #l valve
II
Mounting screw
Water c valve
Style #2 valve
1 | Use only |
cold water line
I
13