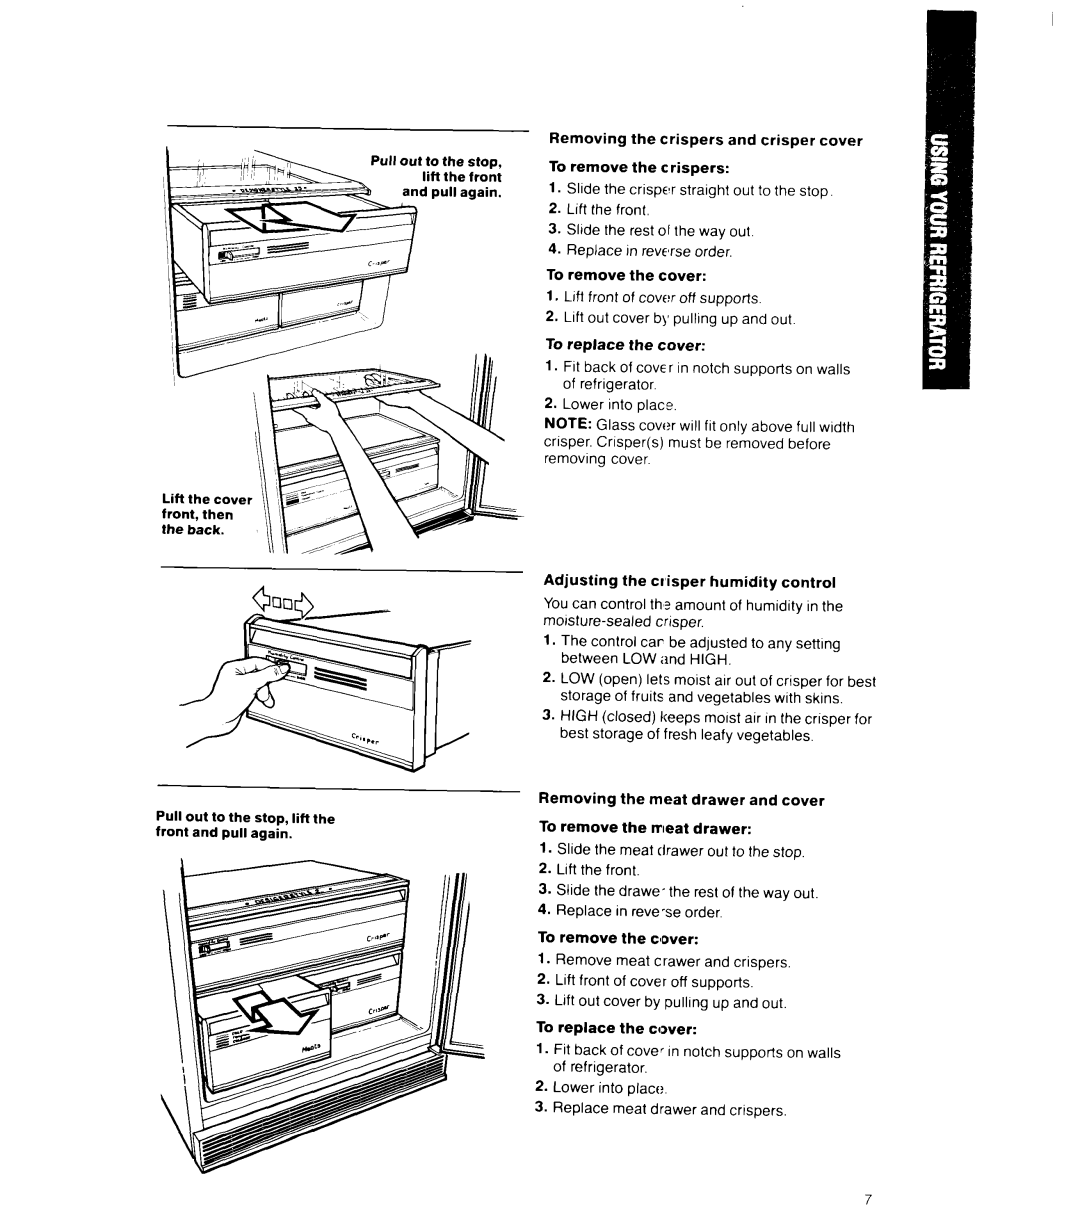
Pull out to the stop, lif-l the front d pull again.
Lift the cover front, then the back.
Removing the crispers and crisper cover To remove the crispers:
1.Slide the crispcar straight out to the stop.
2.Lift the front.
3.Slide the rest 01 the way out.
4.Replace in reve’rse order.
To remove the cover:
1.Lift front of cover off supports.
2.Lift out cover b\, pulling up and out.
To replace the cover:
1.Fit back of COVEr in notch supports on walls of refrigerator.
2.Lower into place.
NOTE: Glass cover will fit only above full width crisper. Crisper(s) must be removed before removing cover.
Adjusting the cl’isper humidity control
You can control thm?amount of humidity in the
1.The control car be adjusted to any setting between LOW and HIGH.
2.LOW (open) lets moist air out of crisper for best storage of fruits and vegetables with skins.
3.HIGH (closed) keeps moist air in the crisper for best storage of fresh leafy vegetables.
Pull out to the stop, lift the front and pull again.
Removing the meat drawer and cover To remove the meat drawer:
1.Slide the meat drawer out to the stop.
2.Loftthe front.
3.Slide the drawe* the rest of the way out.
4.Replace in
To remove the cover:
1.Remove meat crawer and crispers.
2.Lift front of cover off supports.
3.Lift out cover by pulling up and out
To replace the cover:
1.Fit back of cover In notch supports on walls of refrigerator.
2.Lower into place
3.Replace meat drawer and crispers.
