
W10407342A1, ED5FVGXWS specifications
The Whirlpool ED5FVGXWS, model number W10407342A1, is a reliable and efficient side-by-side refrigerator that stands out in the kitchen appliance market. Designed with user convenience and modern family lifestyles in mind, this refrigerator offers impressive features that enhance food storage and accessibility while maintaining a sleek appearance.One of the key characteristics of the ED5FVGXWS is its spacious interior, providing ample storage space to accommodate various food items and beverages. The refrigerator features adjustable glass shelves that allow users to customize the layout based on their storage needs, while the crisper drawers help keep fruits and vegetables fresh for extended periods. Additionally, the door bins provide extra space for condiments, jars, and other smaller items, ensuring everything is easily accessible.
In terms of energy efficiency, this model is designed to minimize energy consumption, helping homeowners reduce their utility bills while being environmentally conscious. The ED5FVGXWS is equipped with Whirlpool’s Accu-Chill Temperature Management System, which uses sensors to monitor internal temperatures and adjust the cooling accordingly. This technology ensures that your food stays fresh while maximizing efficiency.
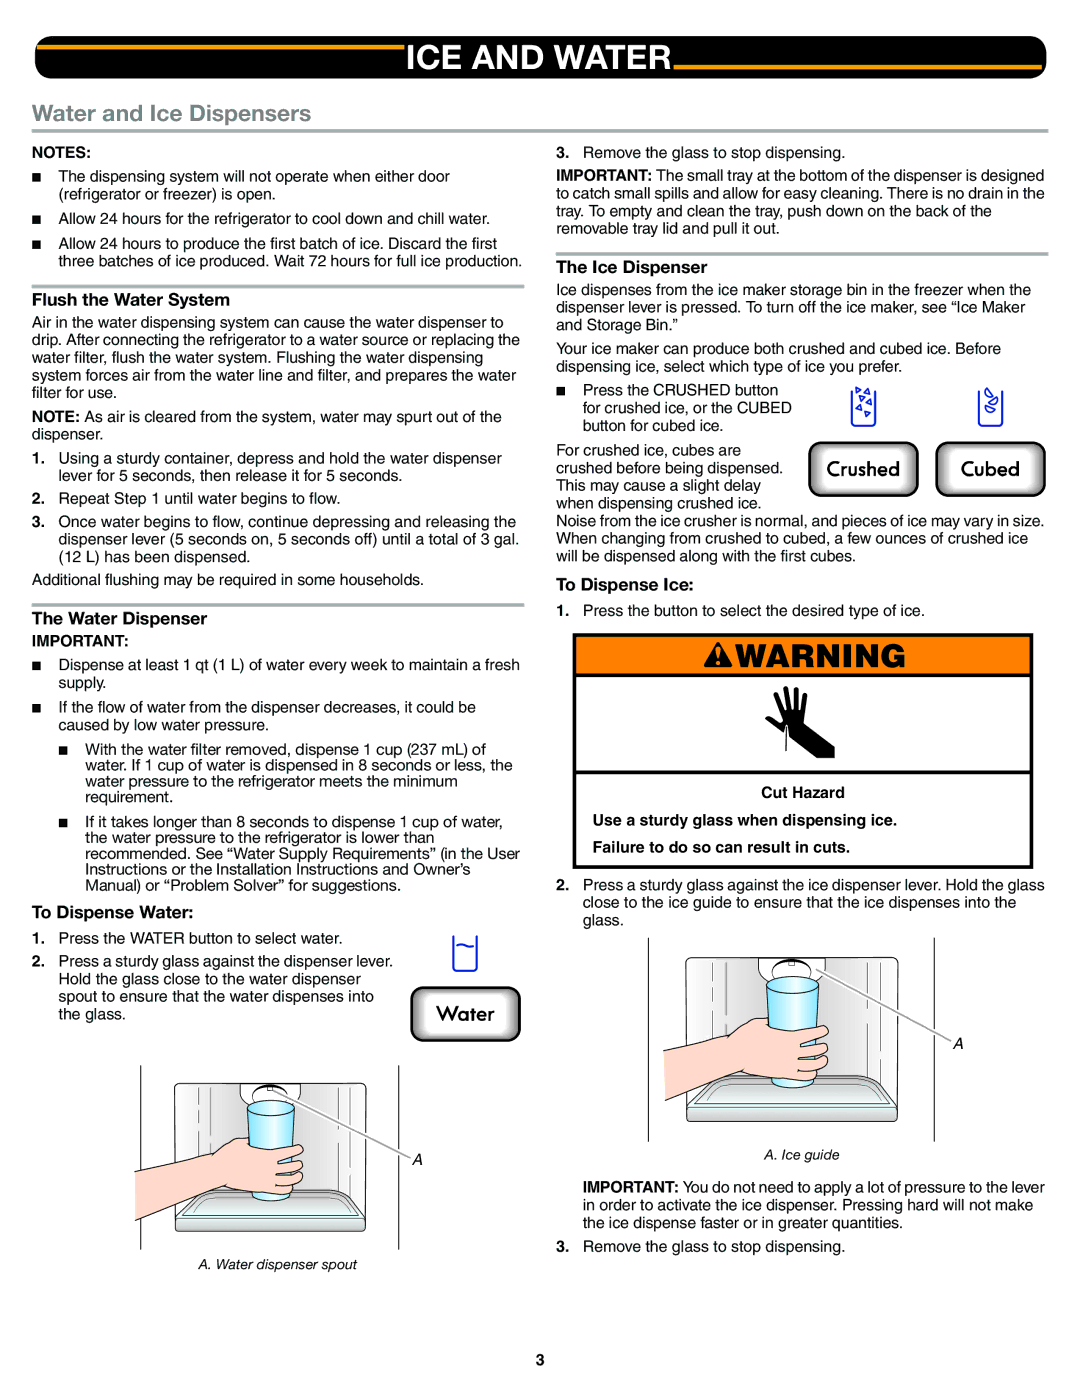
Another standout feature of the ED5FVGXWS is its built-in ice and water dispenser located on the front door. This easy-to-access compartment not only delivers fresh ice cubes on demand but also provides filtered water, encouraging families to stay hydrated. The water filtration system is designed to reduce contaminants, ensuring that every glass of water is clean and refreshing.
The exterior of the Whirlpool ED5FVGXWS is available in a variety of sleek finishes, allowing it to seamlessly blend into various kitchen designs. The smooth surface is easy to clean, and its fingerprint-resistant coating helps maintain a pristine look.
Furthermore, the model includes an audible door alarm that alerts homeowners if the refrigerator door is left ajar, preventing food spoilage and promoting energy conservation. This is particularly useful for busy families who may forget to close the refrigerator door.
Overall, the Whirlpool ED5FVGXWS, W10407342A1 model combines functionality, style, and advanced technology to meet the needs of modern households. With its spacious design, energy-efficient features, and user-friendly options, this refrigerator is a prime choice for anyone looking to upgrade their kitchen appliance lineup.