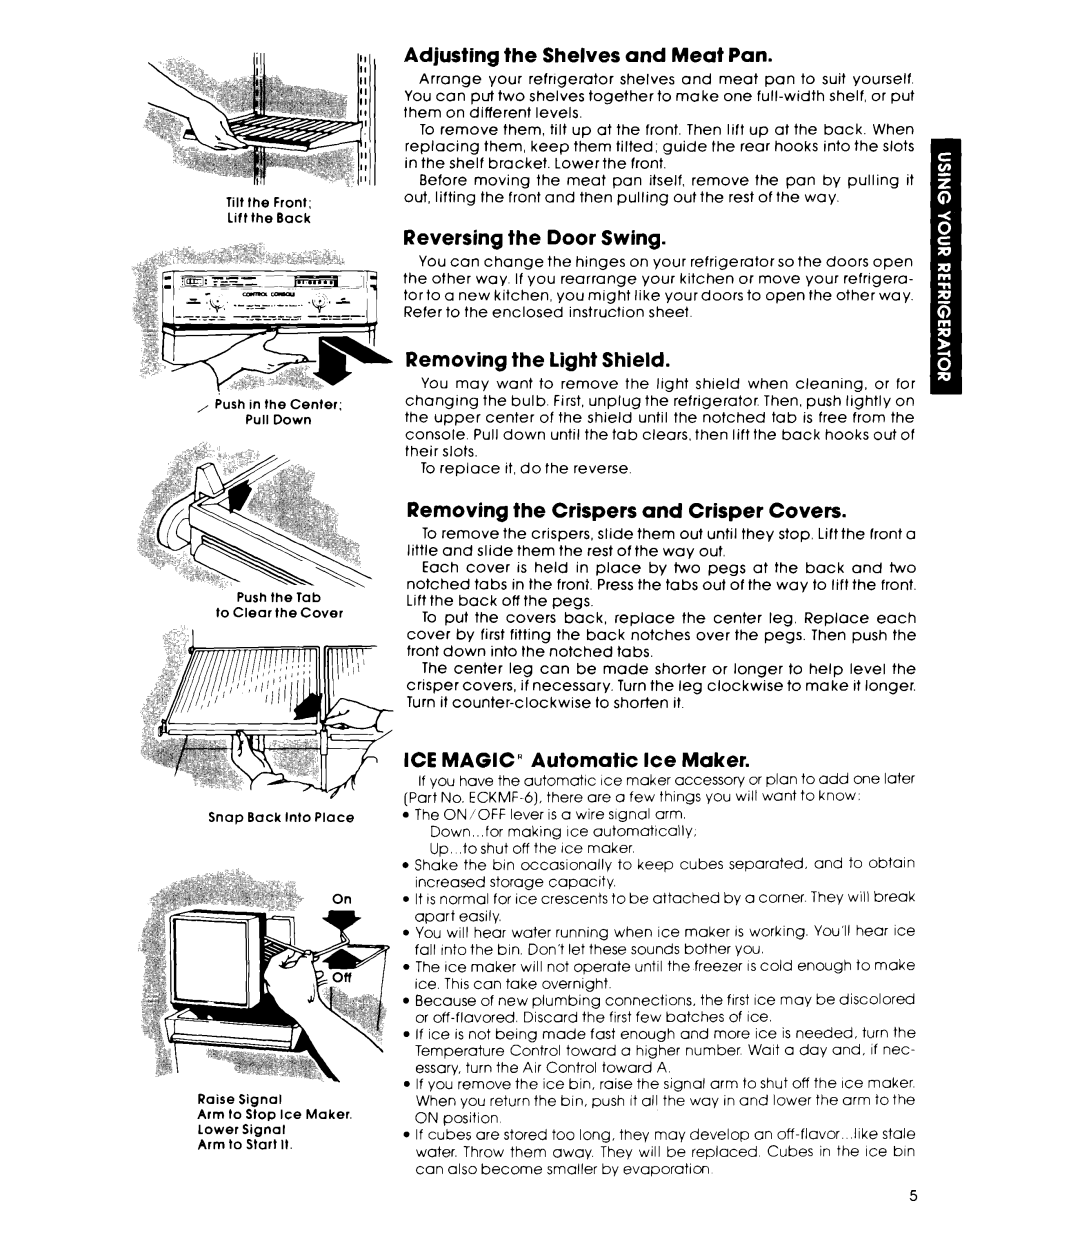
Tilt the Front;
Lift the Back
,Push in the Ceder; Pull Down
Push the lab to Clear the Cover
Adjusting the Shelves and Meat Pan.
Arrange your refngerator shelves and meat pan to suit yourself.
You can put two shelves together to make one
them on different levels.
To remove them, tilt up at the front. Then lift up at the back. When
replacing them, keep them tilted; guide the rear hooks into the slots
in the shelf bracket. Lower the front.
Before moving the meat pan itself, remove the pan by pulling it out, lifting the front and then pulling out the rest of the way.
Reversing the Door Swing.
You can change the hinges on your refrigerator so the doors open
the other way. If you rearrange your kitchen or move your refrigera- tor to a new kitchen, you might like your doors to open the other way.
Refer to the enclosed instruction sheet.
Removing | the |
| light | Shield. |
|
|
|
|
|
|
| |||||
You | may | want | to | remove | the | light | shield | when | cleaning, | or | for | |||||
changing |
| the | bulb. |
| First, | unplug |
| the | refrigerator. | Then, | push | lightly | on | |||
the | upper | center | of | the | shield | until | the | notched | tab | is | free | from | the | |||
console. | Pull | down |
| until | the tab | clears, | then lift | the back | hooks out | of | ||||||
their | slots. |
|
|
|
|
|
|
|
|
|
|
|
|
|
| |
To | replace |
| it, do | the reverse. |
|
|
|
|
|
|
|
|
| |||
Removing | the | Crispers | and | Crisper | Covers. |
|
|
| ||||||||||||
To | remove | the | crispers, |
| slide | them | out | until | they | stop. | Lift the | front a | ||||||||
little | and | slide |
| them | the | rest | of | the | way | out. |
|
|
|
|
|
| ||||
Each | cover |
| is | held | in | place | by | two | pegs | at | the | back | and | two | ||||||
notched |
| tabs | in | the | front. | Press | the | tabs | out of the | way | to lift | the | front. | |||||||
Lift the | back | off | the | pegs. |
|
|
|
|
|
|
|
|
|
|
|
| ||||
To | put | the | covers | back, |
| replace |
| the center | leg. | Replace |
| each | ||||||||
cover |
| by | first | fitting | the | back | notches |
| over | the pegs. | Then | push | the | |||||||
front | down | into | the | notched |
| tabs. |
|
|
|
|
|
|
|
|
| |||||
The | center | leg | can | be | made |
| shorter | or | longer | to | help | level | the | |||||||
crisper |
| covers, |
| if | necessary. |
| Turn the | leg | clockwise | to | make | it | longer. | |||||||
Turn | it |
|
| to | shorten |
| it. |
|
|
|
|
|
|
| ||||||
|
|
| ICE MAGIC” |
| Automatic |
| Ice | Maker. |
|
|
|
|
|
|
|
| ||||||||||||||
|
|
|
| If you | have | the | automattc |
| Ice | maker | accessory | or plan | to add | one | later | |||||||||||||||
|
|
| (Part No. | there |
| are a few things you will want to know: |
|
| ||||||||||||||||||||||
Snap | Back | Into Place | l | The | ON/OFF |
| lever | is a | wire | signal | arm. |
|
|
|
|
|
|
|
|
|
| |||||||||
|
|
|
|
| Down...for |
| making | Ice | automattcally, |
|
|
|
|
|
|
|
|
|
|
| ||||||||||
|
|
|
|
| Up. .toshut off the Ice maker. |
|
|
|
|
|
|
|
|
|
|
|
|
| ||||||||||||
|
|
| l | Shake | the | bin |
| occasionally |
|
| to | keep |
| cubes | separated. |
| and | to | obtain | |||||||||||
|
|
|
| increased | storage | capacity. |
|
|
|
|
|
|
|
|
|
|
|
|
|
|
| |||||||||
|
|
| l | It IS normal | for | ice | crescents | to | be attached | by | a corner. |
| They | will | break | |||||||||||||||
|
|
|
| apart |
| easily. |
|
|
|
|
|
|
|
|
|
|
|
|
|
|
|
|
|
|
|
|
|
| ||
|
|
| l | You | will | hear | water |
| running | when | ice | maker | IS working. |
| You’ll | hear | ice | |||||||||||||
|
|
|
| fall Into the bin Don’t let these sounds bother you. |
|
|
|
|
|
|
| |||||||||||||||||||
|
|
| l | The | Ice | maker |
| will | not | operate |
| until | the freezer | IS cold | enough | to | make | |||||||||||||
|
|
|
| ice. This can take overnight. |
|
|
|
|
|
|
|
|
|
|
|
|
|
|
| |||||||||||
|
|
| l | Because | of | new | plumbing |
| connections, | the | first | Ice | may | be | discolored | |||||||||||||||
|
|
|
| or |
|
| Discard | the | first | few | batches | of | ice. |
|
|
|
|
|
|
| ||||||||||
|
|
| l | If | ice |
| is not | being | made |
| fast | enough |
| and more | ice | is needed, | turn | the | ||||||||||||
|
|
|
| Temperature |
| Control | toward |
| a | higher | number. | Walt | a | day | and, | if | nec- | |||||||||||||
|
|
|
| essary, | turn | the | Air | Control |
| toward | A. |
|
|
|
|
|
|
|
|
|
| |||||||||
Raise | Signal |
| l If you remove the ice bin, raise the signal arm to shut off the ice maker. | |||||||||||||||||||||||||||
|
| When | you return | the | bin, | push |
| It all | the | way | in and | lower | the |
| arm | to the | ||||||||||||||
Arm to Stop Ice Maker |
| ON | position |
|
|
|
|
|
|
|
|
|
|
|
|
|
|
|
|
|
|
|
|
|
| |||||
lower | Signal |
|
|
|
|
|
|
|
|
|
|
|
|
|
|
|
|
|
|
|
|
|
|
|
| |||||
| l | If | cubes | are | stored |
| too | long, | they | may | develop | on |
| stale | ||||||||||||||||
Arm to | Start | II. |
|
| ||||||||||||||||||||||||||
| water. | Throw | them |
| away. |
| They | will |
| be | replaced. | Cubes | in | the | ice | bin | ||||||||||||||
|
|
|
|
|
|
| ||||||||||||||||||||||||
|
|
|
| can | also | become | smaller |
| by | evaporation |
|
|
|
|
|
|
|
|
| |||||||||||