CrisperHumidityControl

(onsomemodels)

You can control the amount of humidity in the moisture-sealed crisper. Adjust the control to any setting between LOW and HIGH.

LOW (open) for best storage of fruits and vegetables with skins. HIGH (closed) for best storage of fresh, leafy vegetables.

IceMaker

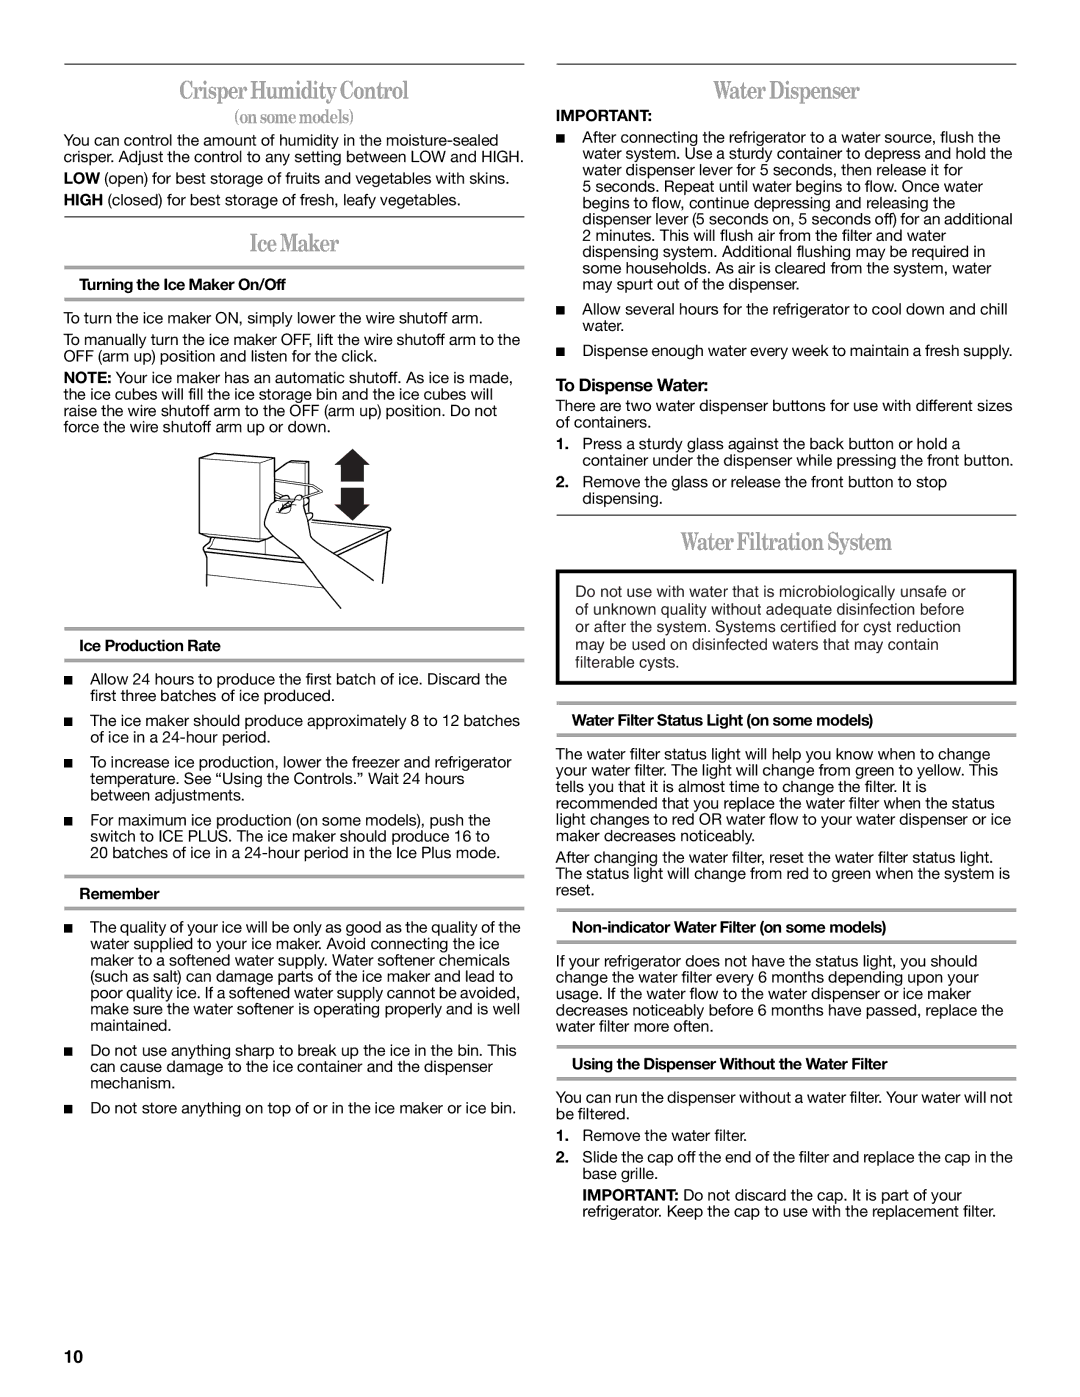
Turning the Ice Maker On/Off

To turn the ice maker ON, simply lower the wire shutoff arm.

To manually turn the ice maker OFF, lift the wire shutoff arm to the OFF (arm up) position and listen for the click.

NOTE: Your ice maker has an automatic shutoff. As ice is made, the ice cubes will fill the ice storage bin and the ice cubes will raise the wire shutoff arm to the OFF (arm up) position. Do not force the wire shutoff arm up or down.

Ice Production Rate

Allow 24 hours to produce the first batch of ice. Discard the first three batches of ice produced.

The ice maker should produce approximately 8 to 12 batches of ice in a 24-hour period.

To increase ice production, lower the freezer and refrigerator temperature. See “Using the Controls.” Wait 24 hours between adjustments.

For maximum ice production (on some models), push the switch to ICE PLUS. The ice maker should produce 16 to 20 batches of ice in a 24-hour period in the Ice Plus mode.

Remember

The quality of your ice will be only as good as the quality of the water supplied to your ice maker. Avoid connecting the ice maker to a softened water supply. Water softener chemicals (such as salt) can damage parts of the ice maker and lead to poor quality ice. If a softened water supply cannot be avoided, make sure the water softener is operating properly and is well maintained.

Do not use anything sharp to break up the ice in the bin. This can cause damage to the ice container and the dispenser mechanism.

Do not store anything on top of or in the ice maker or ice bin.

Water Dispenser

IMPORTANT:

After connecting the refrigerator to a water source, flush the water system. Use a sturdy container to depress and hold the water dispenser lever for 5 seconds, then release it for

5 seconds. Repeat until water begins to flow. Once water begins to flow, continue depressing and releasing the dispenser lever (5 seconds on, 5 seconds off) for an additional 2 minutes. This will flush air from the filter and water dispensing system. Additional flushing may be required in some households. As air is cleared from the system, water may spurt out of the dispenser.

Allow several hours for the refrigerator to cool down and chill water.

Dispense enough water every week to maintain a fresh supply.

To Dispense Water:

There are two water dispenser buttons for use with different sizes of containers.

1.Press a sturdy glass against the back button or hold a container under the dispenser while pressing the front button.

2.Remove the glass or release the front button to stop dispensing.

WaterFiltrationSystem

Do not use with water that is microbiologically unsafe or of unknown quality without adequate disinfection before or after the system. Systems certified for cyst reduction may be used on disinfected waters that may contain filterable cysts.

Water Filter Status Light (on some models)

The water filter status light will help you know when to change your water filter. The light will change from green to yellow. This tells you that it is almost time to change the filter. It is recommended that you replace the water filter when the status light changes to red OR water flow to your water dispenser or ice maker decreases noticeably.

After changing the water filter, reset the water filter status light. The status light will change from red to green when the system is reset.

Non-indicator Water Filter (on some models)

If your refrigerator does not have the status light, you should change the water filter every 6 months depending upon your usage. If the water flow to the water dispenser or ice maker decreases noticeably before 6 months have passed, replace the water filter more often.

Using the Dispenser Without the Water Filter

You can run the dispenser without a water filter. Your water will not be filtered.

1.Remove the water filter.

2.Slide the cap off the end of the filter and replace the cap in the base grille.

IMPORTANT: Do not discard the cap. It is part of your refrigerator. Keep the cap to use with the replacement filter.

10

Page 10
Image 10
Whirlpool ET1FHTXMB04 warranty CrisperHumidityControl, IceMaker, Water Dispenser, WaterFiltrationSystem, To Dispense Water

ET1FHTXMB04 specifications

The Whirlpool ET1FHTXMB04 refrigerator stands out in the realm of home appliances, delivering a blend of efficiency, design, and functionality to meet the diverse needs of modern households. A key feature of this refrigerator is its spacious interior, designed to accommodate a wide range of food items, from everyday groceries to larger items. With a total capacity of approximately 18 cubic feet, it provides ample storage space while maintaining a compact footprint suitable for various kitchen layouts.

One notable feature of the ET1FHTXMB04 is its adjustable shelves. These customizable shelves allow users to configure the interior layout according to their storage needs, accommodating taller items or facilitating a more organized arrangement for smaller goods. The easy-to-clean glass shelves also help prevent spills from spreading, ensuring a hygienic environment for food storage.

In terms of refrigeration technology, the ET1FHTXMB04 is equipped with a mechanical temperature control system that ensures consistent cooling. This system allows users to easily adjust the temperature settings to their preference, ensuring food items remain fresh for extended periods. The refrigerator's energy efficiency is also commendable, as it is designed to operate at optimal levels while consuming minimal energy, contributing to lower utility bills and a smaller carbon footprint.

The Whirlpool ET1FHTXMB04 refrigerator features a fresh food compartment that includes crisper drawers, ideal for storing fruits and vegetables while preserving their texture and flavor. These bins are designed to regulate humidity, creating an optimal environment for produce storage. Additionally, the separate freezer compartment, with its dedicated space for frozen items, employs a good seal to help maintain freezing temperatures.

Aesthetically, the Whirlpool ET1FHTXMB04 boasts a sleek design with a fingerprint-resistant finish that enhances its modern look while minimizing the visibility of smudges. The integrated handle offers convenience without compromising on style, making it a seamless fit for any kitchen decor.

Moreover, this refrigerator incorporates Whirlpool’s commitment to quality and durability, ensuring that customers receive a reliable product backed by a respected brand. Overall, the Whirlpool ET1FHTXMB04 refrigerator combines thoughtful features, practical technologies, and stylish design, making it an excellent choice for those seeking a dependable appliance for their kitchen needs.