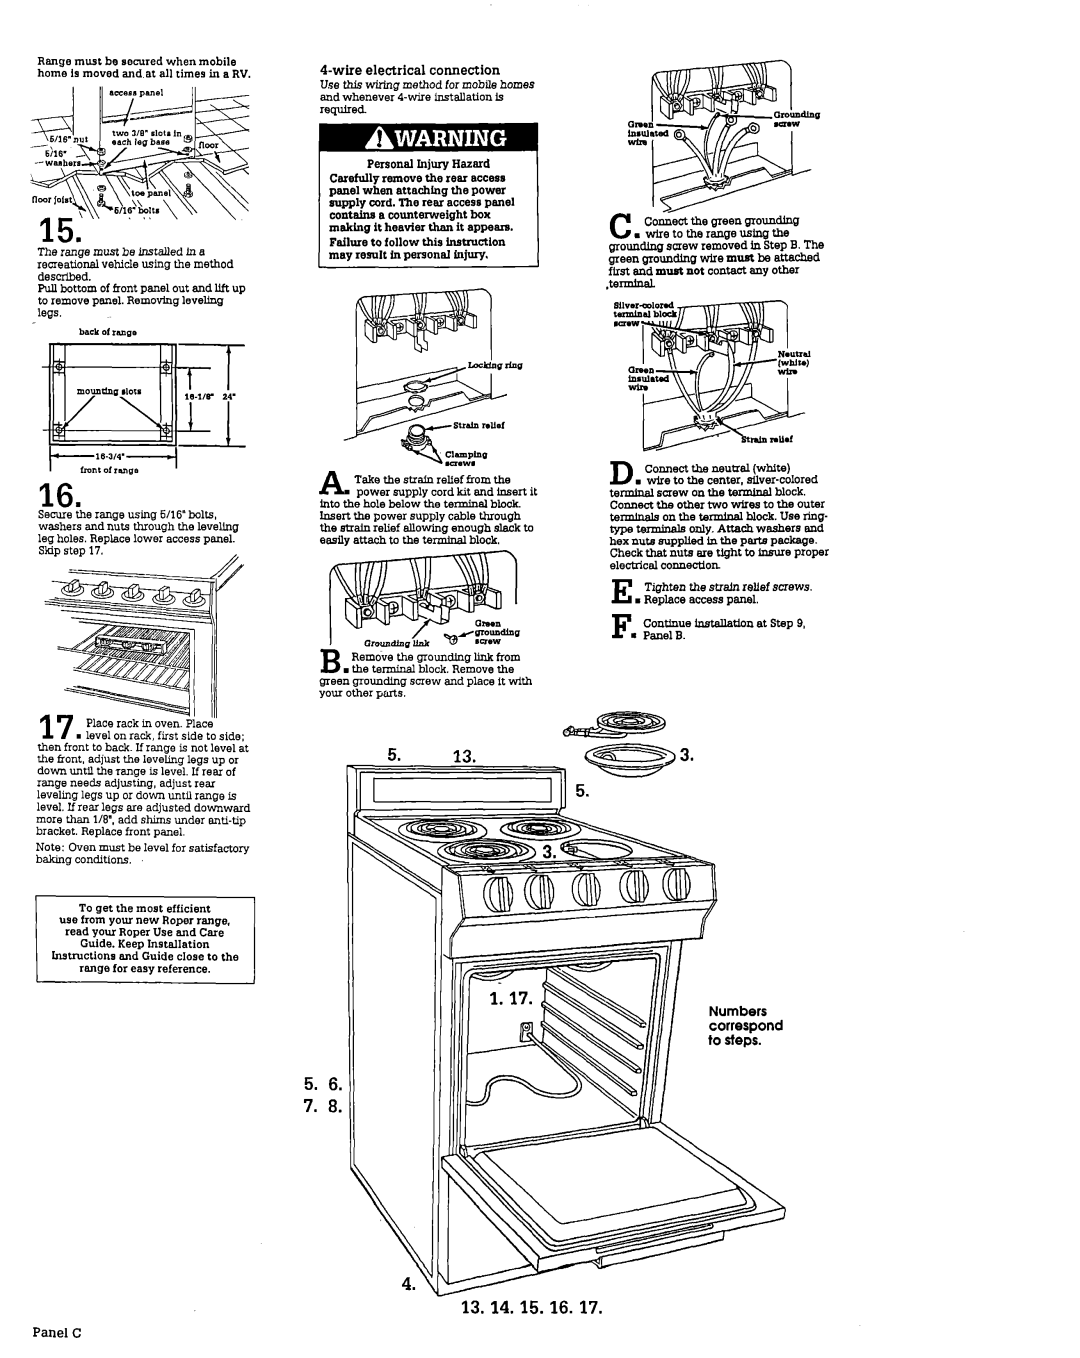
Range must be secured when mobile home is moved and at all times in a RV.
recreational vehicle using the method descrlhed.
Pull bottom of front Dane1out end lift UD to remove panel. Removing levehng - legs.
16
Securebe range using 6/16” bolts, washers and nuts through the leveling leg holes. Replace lower access panel. Skip step 17.
Place rack in oven. Place
nlevel on rack, first side to side; then front to back If range is not level at the tiont, adjust the leveling legs up or down until the range is level. If reer of range needs adjusting, adjust rear leveling legs up or down until range is level. If rear legs sre adjusted downward more than l/8”. add shims under
Note: Oven must be level for satisfactory baking conchtlons.
To get the most efficient use from your new Roper range, read your Roper Use and Care
Guide. Keep Installation lnatrucrione and Guide close to the range for easy reference.
4-wire electrical connection
Use this wirhg method for mobile homes and whenever
Personal Injury Hazard
Carefully remove the rear access panel when attaching the power supply cord. The rear access panel contains a counterweight box making it heavier than it appears.
Failure to follow this h~truction may result in penonal Lniury.
Take the strain relfef from the power supply cord kit end insert it
into the hole below the terminal block. Insert the power supply cable through the strah relief ellowhg enough slack to easily attach to the terminal block.
B Remove the grounding link from
. the terminal block. Remove the green grounding screw and place it with your other parts.
C Connect the green grounding
nwiretotherangeusfngthe
grounding screw removed in Step B. The green growding wire must be attached first and must not contact any other
D connecttheneutral(white)
. wire to the center,
hex nuts aUDDlied in the PUtS Packaee.
Check that dirts ere
E Tighten the strain relief screws. mReplace access panel.
Fm ContluuePanelB. hstallatIon at Step 9,
Numbers correspond to steps.
5.6.
7.8.
13. 14. 15. 16. 17.