BaseGrille
To Remove the Base Grille:
1.Open the refrigerator and freezer doors 90°.
2.Using a Phillips screwdriver, remove the screws attaching the base grille to the refrigerator cabinet.
3.Pull the base grille toward you.
NOTE: Do not remove the Tech Sheet that is fastened behind the base grille.
A
A. Screws
To Replace the Base Grille:
1.Open the refrigerator and freezer doors to 90°.
2.Position the base grille so that the holes are aligned and replace the screws.
LevelingRefrigerator
Your refrigerator has a front and rear roller at the base of the product on each side. All four rollers can be adjusted from the front of the product. If your refrigerator seems unsteady or you want the doors to close easier, adjust the refrigerator's tilt using the instructions below:
1.Check the installation location to be sure that you have the proper clearance for the refrigerator. See the “Location Requirements” section.
2.Plug into a grounded 3 prong outlet.
3.Move the refrigerator into its final position.
4.Open the refrigerator and freezer doors to locate the leveling bolts at the left and right of the refrigerator base. If your refrigerator has a base grille, remove it. See “Base Grille” earlier in this section.
A
B
A. Rear leveling bolt
B. Front leveling bolt
NOTE: The top bolt will adjust the rear of the refrigerator, and the bottom bolt will adjust the front of the refrigerator.
5.Use a ¹⁄₂" (12.70 mm) socket wrench to adjust the leveling bolts. Turn the leveling bolt to the right to raise that side of the refrigerator or turn the leveling bolt to the left to lower that side. It may take several turns of the leveling bolts to adjust the tilt of the refrigerator.
NOTE: Be careful not to unscrew the leveling bolts too much when lowering the refrigerator. The bolt head will start to come away from the refrigerator when in the lowest position. If the screw does come out of the rear roller bracket, the compartment access cover on the back of the refrigerator will have to be removed to reinstall the bolt.
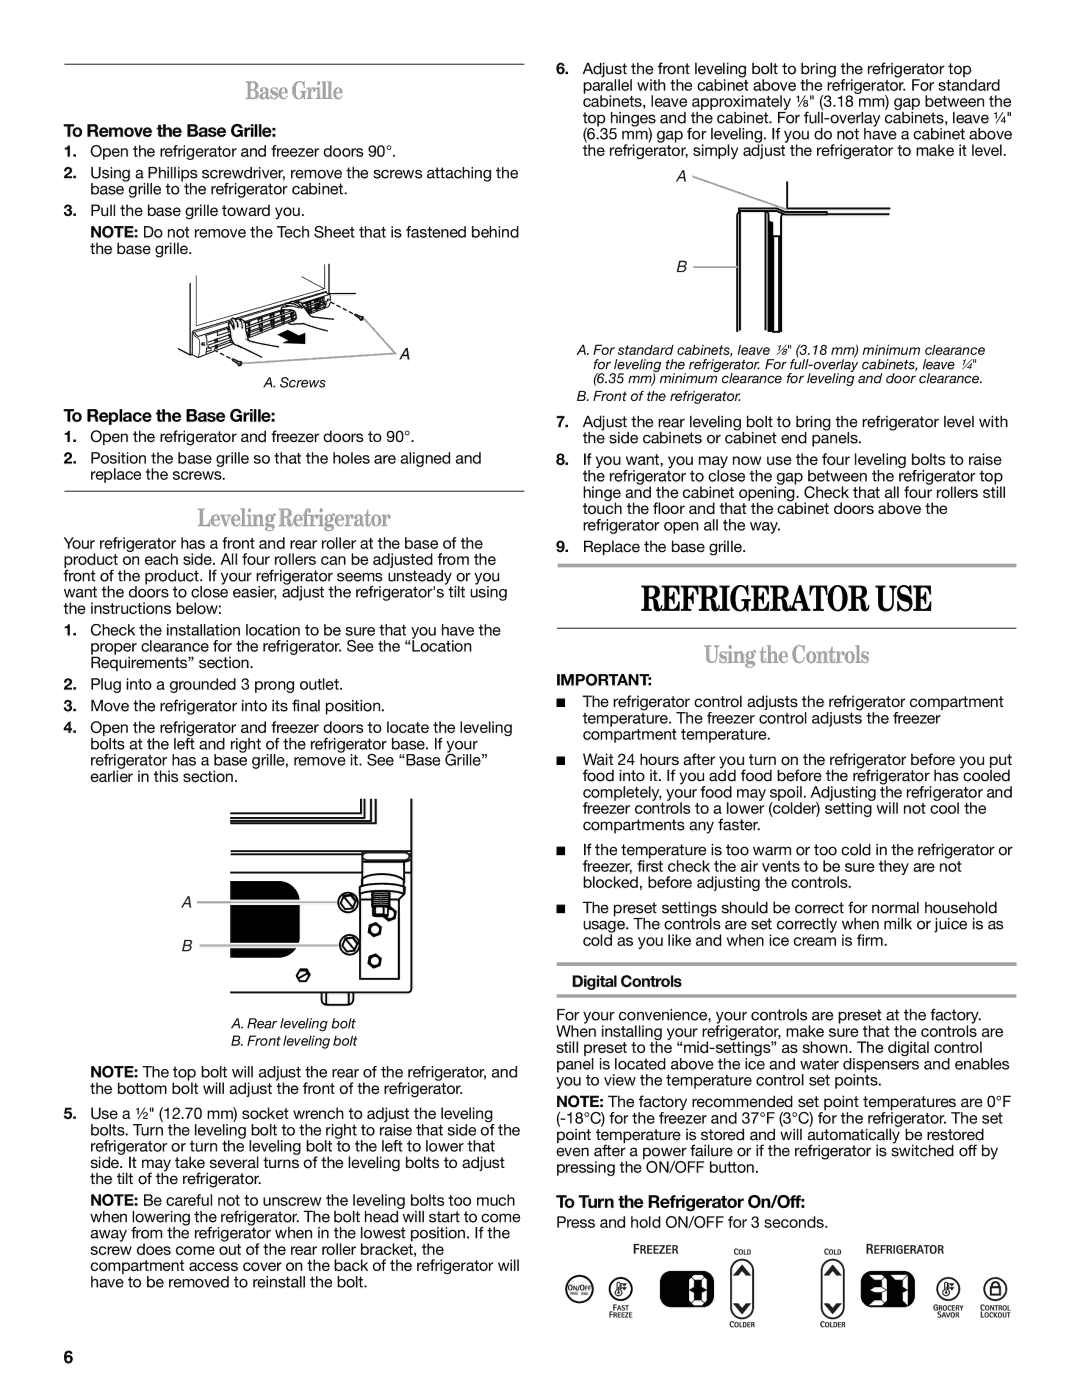
6.Adjust the front leveling bolt to bring the refrigerator top parallel with the cabinet above the refrigerator. For standard cabinets, leave approximately ¹⁄₈" (3.18 mm) gap between the top hinges and the cabinet. For
A
B
A. For standard cabinets, leave ¹⁄₈" (3.18 mm) minimum clearance for leveling the refrigerator. For
B. Front of the refrigerator.
7.Adjust the rear leveling bolt to bring the refrigerator level with the side cabinets or cabinet end panels.
8.If you want, you may now use the four leveling bolts to raise the refrigerator to close the gap between the refrigerator top hinge and the cabinet opening. Check that all four rollers still touch the floor and that the cabinet doors above the refrigerator open all the way.
9.Replace the base grille.
REFRIGERATOR USE
Using theControls
IMPORTANT:
■The refrigerator control adjusts the refrigerator compartment temperature. The freezer control adjusts the freezer compartment temperature.
■Wait 24 hours after you turn on the refrigerator before you put food into it. If you add food before the refrigerator has cooled completely, your food may spoil. Adjusting the refrigerator and freezer controls to a lower (colder) setting will not cool the compartments any faster.
■If the temperature is too warm or too cold in the refrigerator or freezer, first check the air vents to be sure they are not blocked, before adjusting the controls.
■The preset settings should be correct for normal household usage. The controls are set correctly when milk or juice is as cold as you like and when ice cream is firm.
Digital Controls
For your convenience, your controls are preset at the factory. When installing your refrigerator, make sure that the controls are still preset to the
NOTE: The factory recommended set point temperatures are 0°F
To Turn the Refrigerator On/Off:
Press and hold ON/OFF for 3 seconds.
6