GROUNDING INSTRUCTIONS
For a grounded, cord-connected washer:
This washer must be grounded. In the event of a malfunction or breakdown, grounding will reduce the risk of electrical shock by providing a path of least resistance for electric current. This washer is equipped with a cord having an
WARNING: Improper connection of the
Do not modify the plug provided with the appliance – if it will not fit the outlet, have a proper outlet installed by a qualified electrician.
For a permanently connected washer:
This washer must be connected to a grounded metal, permanent wiring system, or an equipment grounding conductor must be run with the circuit conductors and connected to the
INSTALLATION
INSTRUCTIONS
Remove Transport System
![]() WARNING
WARNING
Excessive Weight Hazard
Use two or more people to move and install washer.
Failure to do so can result in back or other injury.
IMPORTANT: Position the washer so that the rear of the unit is within approximately 3 ft (90 cm) of the final location.
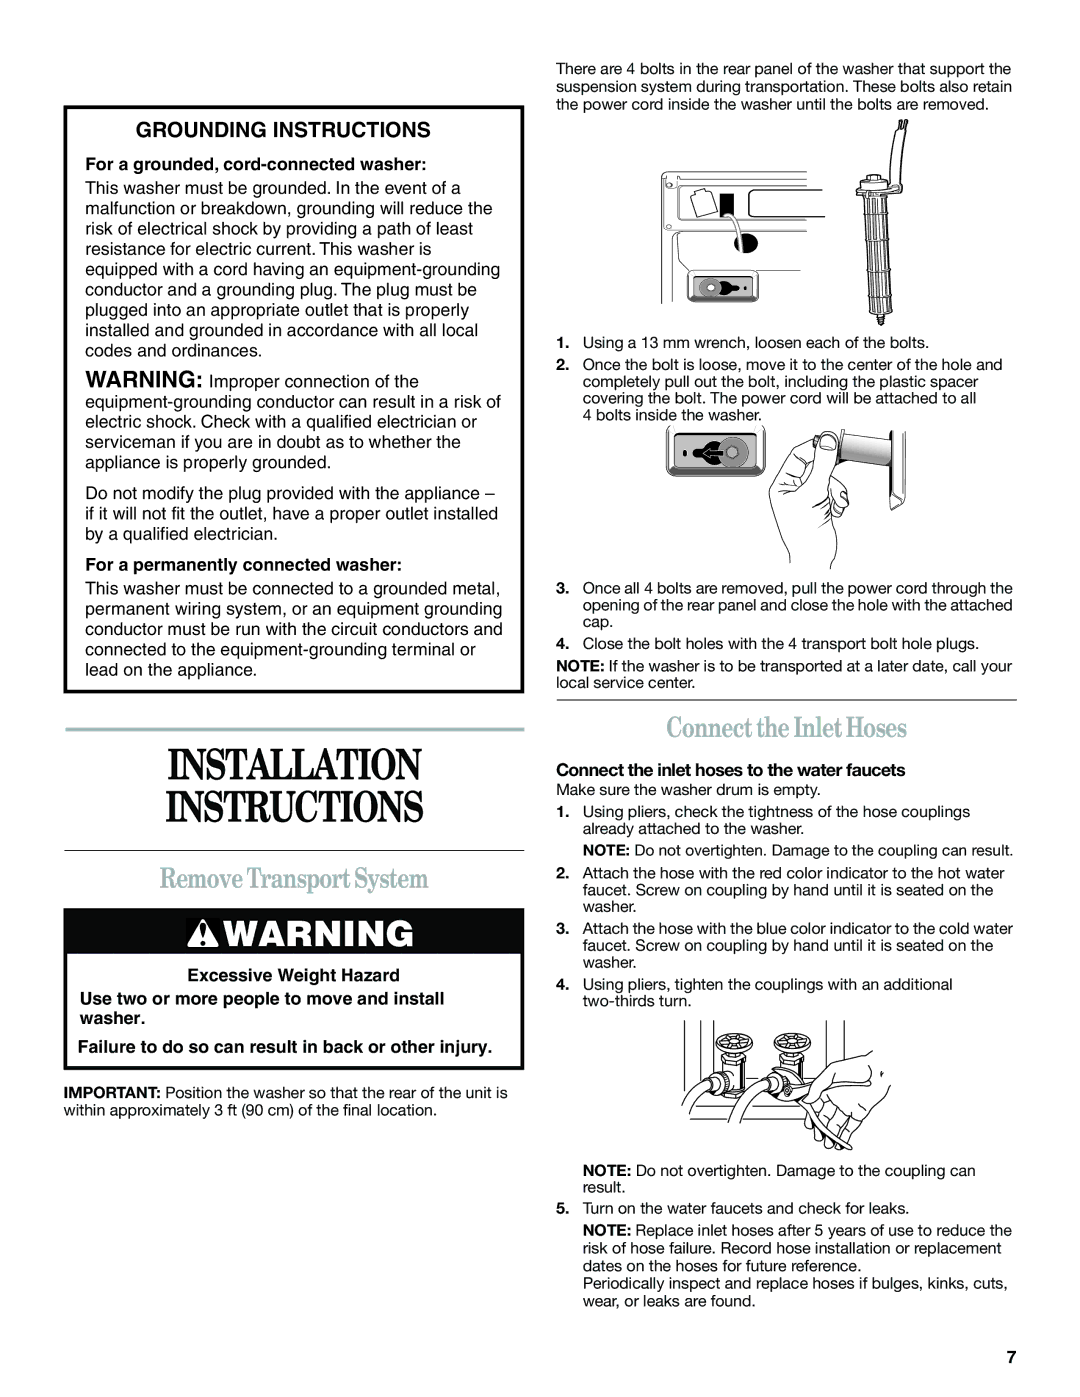
There are 4 bolts in the rear panel of the washer that support the suspension system during transportation. These bolts also retain the power cord inside the washer until the bolts are removed.
1.Using a 13 mm wrench, loosen each of the bolts.
2.Once the bolt is loose, move it to the center of the hole and completely pull out the bolt, including the plastic spacer covering the bolt. The power cord will be attached to all
4 bolts inside the washer.
3.Once all 4 bolts are removed, pull the power cord through the opening of the rear panel and close the hole with the attached cap.
4.Close the bolt holes with the 4 transport bolt hole plugs.
NOTE: If the washer is to be transported at a later date, call your local service center.
Connect the Inlet Hoses
Connect the inlet hoses to the water faucets
Make sure the washer drum is empty.
1.Using pliers, check the tightness of the hose couplings already attached to the washer.
NOTE: Do not overtighten. Damage to the coupling can result.
2.Attach the hose with the red color indicator to the hot water faucet. Screw on coupling by hand until it is seated on the washer.
3.Attach the hose with the blue color indicator to the cold water faucet. Screw on coupling by hand until it is seated on the washer.
4.Using pliers, tighten the couplings with an additional
NOTE: Do not overtighten. Damage to the coupling can result.
5.Turn on the water faucets and check for leaks.
NOTE: Replace inlet hoses after 5 years of use to reduce the risk of hose failure. Record hose installation or replacement dates on the hoses for future reference.
Periodically inspect and replace hoses if bulges, kinks, cuts, wear, or leaks are found.
7