4.Touch START.
The display will count down the cook time.
When the cycle ends, “END” will appear in the display, 4 end-
5.Touch CANCEL or open the door to clear the display and/or stop reminder tones.
Beverage
Beverages may be heated in the microwave oven by touching the BEVERAGE pad. One or two
To Use BEVERAGE:
1.Touch BEVERAGE.
The display will show the setting for heating 1 cup.
2.Touch BEVERAGE a second time to heat 2 cups.
The microwave oven will start 5 seconds after the appropriate number of cups to be heated is selected. The display will count down the cook time.
If more or less time is required, touch COOK POWER before the microwave oven starts to cook.
When the cycle ends, “END” will appear in the display, 4 end-
3.Touch CANCEL or open the door to clear the display and/or stop reminder tones.
Cooking in Stages
The oven can be set to cook at different cooking powers for various lengths of time, up to 3 stages.
Sensor cooking cannot be done in stages.
To Cook in Stages:
1.Touch COOK TIME.
2.Touch number pads to enter length of time to cook during the 1st stage.
3.Touch COOK POWER.
4.Touch the number pad(s) using the Cooking Power chart to set the cooking power for the 1st stage.
5.Repeat steps
6.Touch START.
The display will count down each of the cook times. A “1,” “2” and “3” will appear on the display during their respective stages.
When the cycle ends, “END” will appear in the display, 4 end-
7.Touch CANCEL or open the door to clear the display and/or stop reminder tones.
The cook time and cooking power of the cycling stage can be changed after touching START without interrupting cooking.
To Change Cook Time: Touch COOK TIME. Use the number pads to enter the new cook time. Touch START.
To Change Cooking Power: Touch COOK POWER. Use the number pads to enter the new cooking power or repeatedly touch COOK POWER. Touch START.
Reheating
Times and cooking power have been preset for reheating specific foods. Use the following chart as a guide.
FOOD | CODE | QUANTITY/INSTRUCTION | |
Pizza Slice | 1 | ||
|
| Place on paper towel. | |
|
|
|
|
Casserole | 2 | L) | |
|
|
|
|
Soup* | 3 | L)/ | |
|
| Cover with plastic and vent. | |
|
|
|
|
Sauce* | 4 | L)/ | |
|
| Cover with plastic and vent. | |
|
|
| |
Baked Goods | 5 | ||
(example: medium |
| Place on paper towel. | |
muffin or bagel) |
|
|
|
|
|
|
|
*Sensor function
To Use Reheat:
1.Touch REHEAT.
2.Touch number pad from chart
or
Touch REHEAT repeatedly to scroll through foods.
3.Touch number pads to enter quantity for Pizza Slice, Casserole and Baked Goods only.
The sensor will determine quantities for Soup and Sauce.
Reheat time may be adjusted at this time by touching COOK POWER.
4.Touch START.
The display will count down the reheat time.
When the cycle ends, “END” will appear in the display, 4 end-
5.Touch CANCEL or open the door to clear the display and/or stop reminder tones.
Two or More Plates
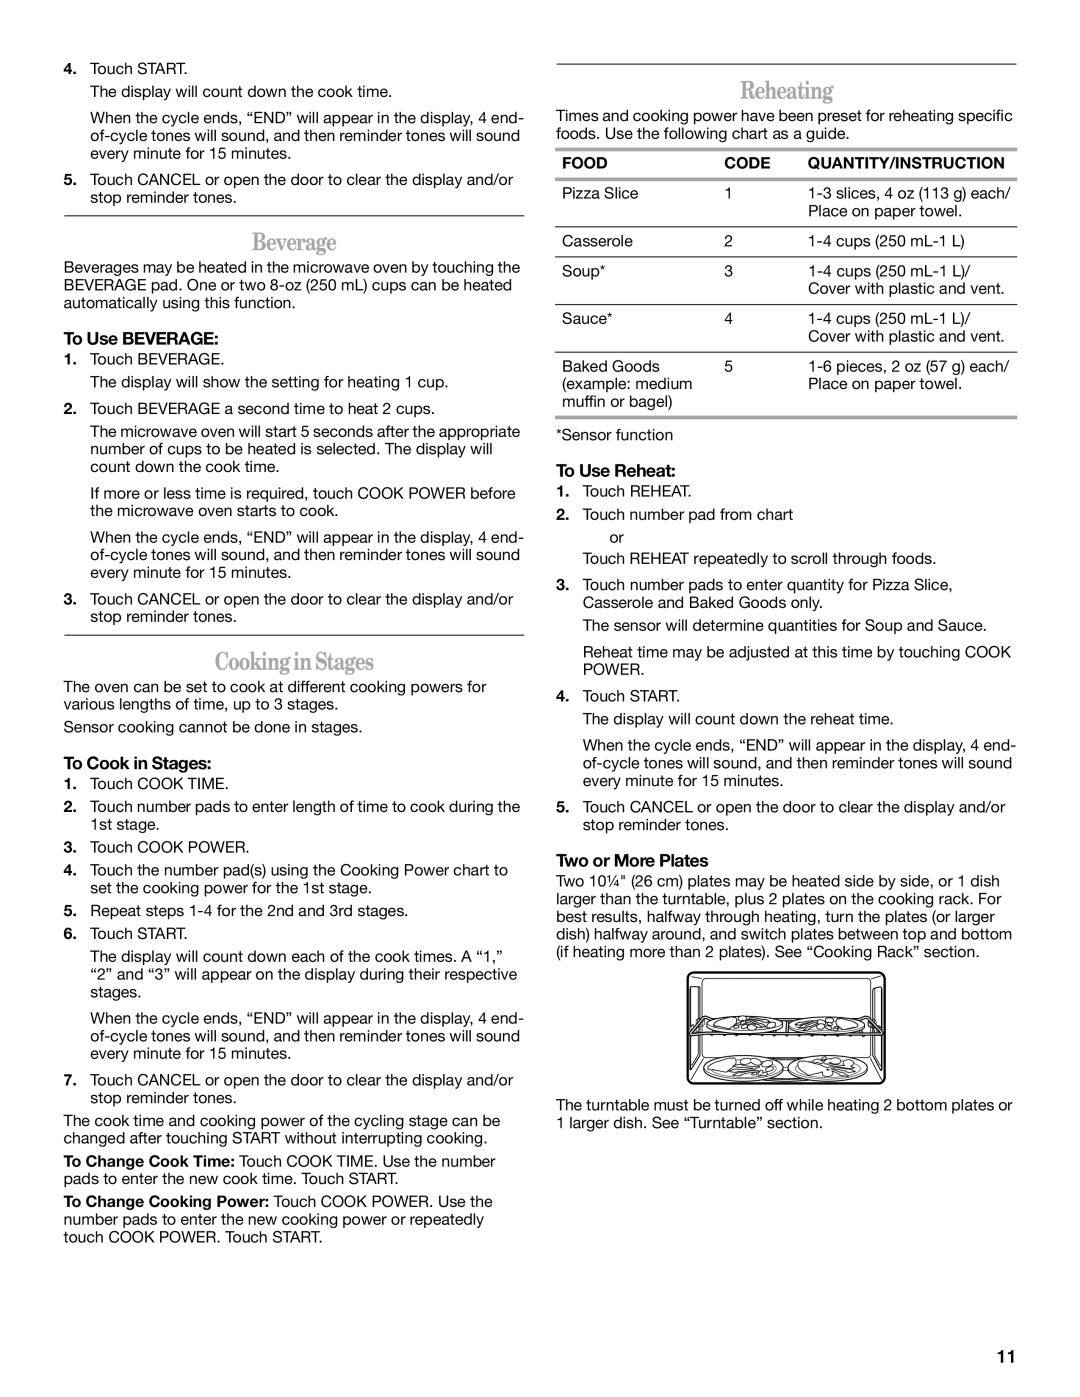
Two 10¼" (26 cm) plates may be heated side by side, or 1 dish larger than the turntable, plus 2 plates on the cooking rack. For best results, halfway through heating, turn the plates (or larger dish) halfway around, and switch plates between top and bottom (if heating more than 2 plates). See “Cooking Rack” section.
The turntable must be turned off while heating 2 bottom plates or 1 larger dish. See “Turntable” section.
11
