All-Purpose Appliance Cleaner Part Number 31662 (not included):

See “Assistance or Service” section to order.

OVEN CAVITY

Food spills should be cleaned when oven cools. At high temperatures, foods react with porcelain and staining, etching, pitting or faint white spots can result.

Cleaning Method:

Self-Cleaning cycle: See “Self-Cleaning Cycle” first. Do not use oven cleaners.

OVEN RACKS AND ROASTING RACKS

Cleaning Method:

Self-Cleaning cycle: See “Self-Cleaning Cycle” first. Remove racks or they will discolor and become harder to slide. If this happens, a light coating of vegetable oil applied to the rack guides will help them slide.

Steel-wool pad

BROILER PAN AND GRID (on selected models)

Cleaning Method:

Chrome only

Mildly abrasive cleanser: Scrub with wet scouring pad.

Solution of ¹₂ cup (125 mL) ammonia to 1 gal. (3.75 L) water: Soak for 20 minutes, then scrub with scouring or steel-wool pad.

Oven cleaner: Follow product label instructions.

Porcelain enamel only

Dishwasher

Do not clean in the Self-Cleaning cycle.

STORAGE DRAWER (on some models)

Make sure drawer is cool and empty before cleaning.

For more information, see “Storage Drawer” section.

Cleaning Method:

Mild detergent

Drawer Liner (on some models)

Remove all stored items from drawer and lift out drawer liner.

Clean with mild detergent.

All-Purpose Appliance Cleaner Part Number 31662 (not included):

See “Assistance or Service” section to order.

WARMING DRAWER and TRAY (on some models)

Make sure drawer is cool and remove tray.

Cleaning Method:

Mild detergent (for both)

All-Purpose Appliance Cleaner Part Number 31662 (not included):

See “Assistance or Service” section to order.

Oven Light

(on some models)

The oven light is a standard 40-watt appliance bulb. It will come on when the oven door is open. The oven light will not work during the Self-Cleaning cycle. On some models, when the oven door is closed, press the manual oven light switch on the backguard to turn on and off.

Before replacing, make sure the oven and cooktop are cool and the control knobs are in the off position.

To Replace:

1.Unplug range or disconnect power.

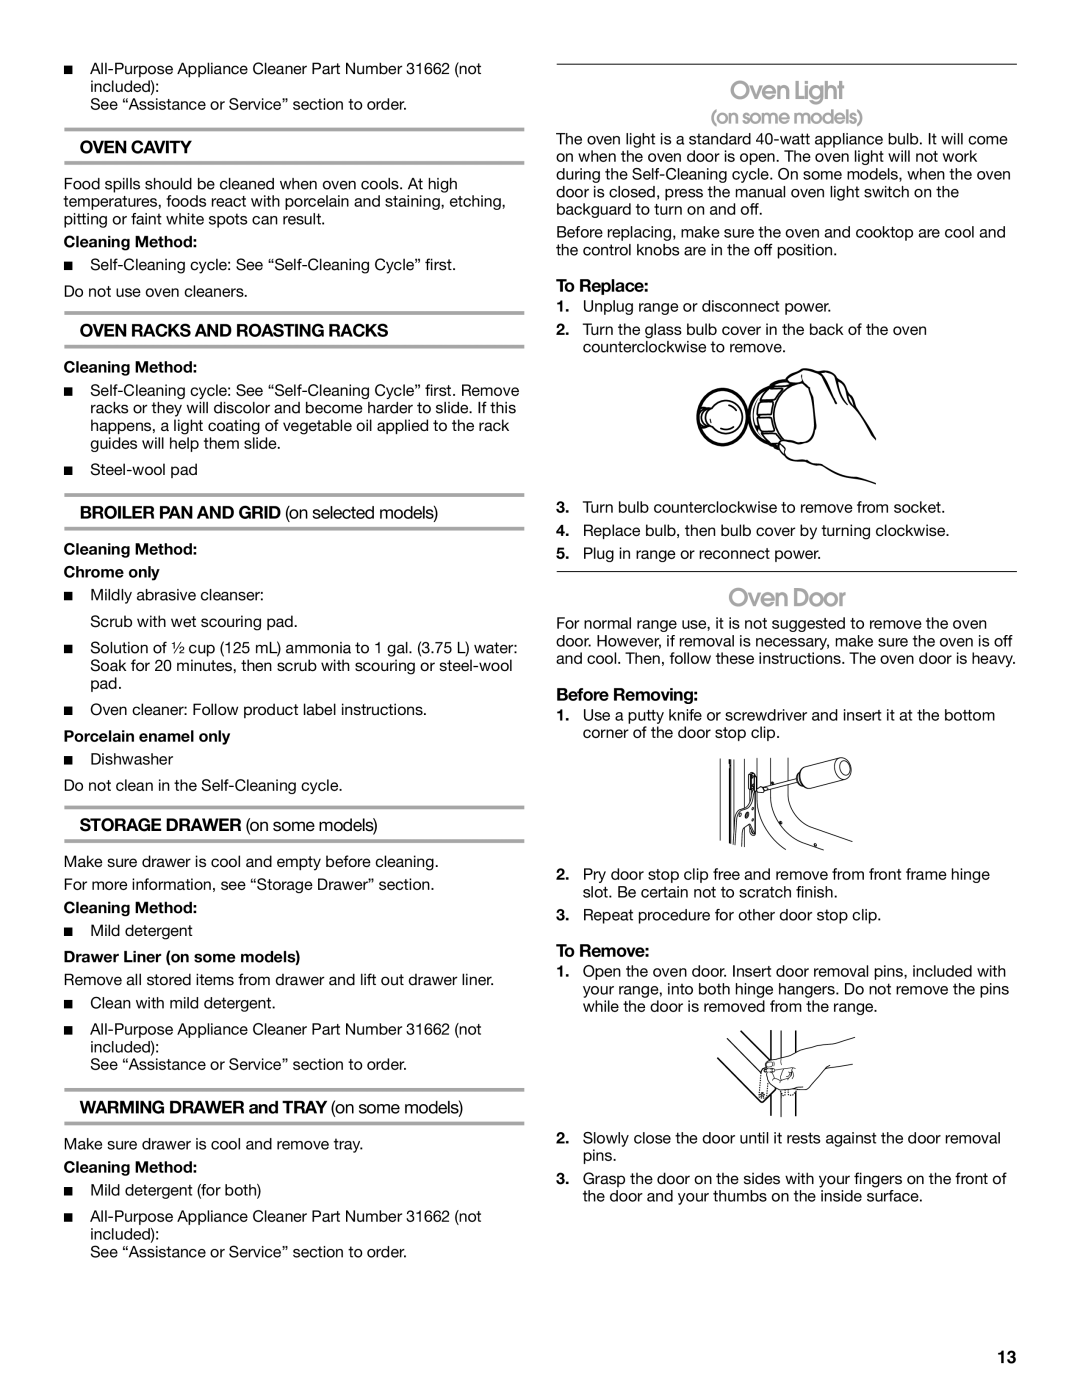
2.Turn the glass bulb cover in the back of the oven counterclockwise to remove.

3.Turn bulb counterclockwise to remove from socket.

4.Replace bulb, then bulb cover by turning clockwise.

5.Plug in range or reconnect power.

Oven Door

For normal range use, it is not suggested to remove the oven door. However, if removal is necessary, make sure the oven is off and cool. Then, follow these instructions. The oven door is heavy.

Before Removing:

1.Use a putty knife or screwdriver and insert it at the bottom corner of the door stop clip.

2.Pry door stop clip free and remove from front frame hinge slot. Be certain not to scratch finish.

3.Repeat procedure for other door stop clip.

To Remove:

1.Open the oven door. Insert door removal pins, included with your range, into both hinge hangers. Do not remove the pins while the door is removed from the range.

2.Slowly close the door until it rests against the door removal pins.

3.Grasp the door on the sides with your fingers on the front of the door and your thumbs on the inside surface.

13

Page 13
Image 13
Whirlpool TEP315RV1 manual Oven Light, Oven Door, Oven Cavity, Oven Racks and Roasting Racks

TEP315RV1 specifications

The Whirlpool TEP315RV1 is a standout choice in the realm of countertop microwaves, offering a blend of efficiency, functionality, and convenient features. This model is designed to address the diverse cooking needs of modern kitchens, ensuring that users can prepare meals quickly and easily without compromising on quality.

One of the main features of the Whirlpool TEP315RV1 is its impressive capacity. With a generous interior space, this microwave allows for the simultaneous heating of multiple dishes or larger food items, making it a perfect fit for families and busy individuals alike. The unit’s dimensions ensure it can seamlessly integrate into various kitchen setups, whether in a small apartment or a spacious family home.

The microwave utilizes advanced cooking technologies, such as sensor cooking and defrosting options, to deliver optimal results. The sensor cooking feature automatically adjusts cooking time and power levels based on the moisture released from the food, ensuring that every meal is cooked to perfection. This technology not only simplifies meal preparation but also enhances the quality of the food by preventing overcooking.

Another notable characteristic of the TEP315RV1 is its intuitive interface. The model comes equipped with straightforward controls, allowing users of all skill levels to operate the microwave with ease. Whether you’re reheating leftovers, cooking popcorn, or defrosting meat, the clearly labeled presets make it simple to choose the right setting without any guesswork.

In terms of design, the Whirlpool TEP315RV1 boasts a sleek, modern aesthetic that can complement various kitchen decors. Its clean lines and minimalist design ensure that it not only functions well but also adds to the overall appeal of the kitchen environment.

Safety features are also a priority in the Whirlpool TEP315RV1. The model includes a child lock function, giving parents peace of mind while ensuring that curious little hands cannot accidentally operate the microwave. Additionally, the appliance is designed to distribute microwave energy evenly, minimizing the risk of hot spots and providing a safer cooking experience.

Overall, the Whirlpool TEP315RV1 combines an array of advanced technologies with user-friendly features, making it an excellent addition to any kitchen. Its capacity, efficiency, and design, coupled with safety features, make it a reliable choice for those looking to enhance their cooking experience. Whether for quick reheats or more elaborate meals, this countertop microwave rises to the occasion.