INSTALLATION INSTRUCTIONS

Unpack Range

WARNING

Excessive Weight Hazard

Use two or more people to move and install range. Failure to do so can result in back or other injury.

1.Do not use oven door handle to lift or move the range

2.Remove shipping materials, tape and film from range. Keep cardboard bottom under range.

3.Remove oven racks and parts package from inside oven.

4.To place range on its back, take 4 cardboard corners from the carton. Stack one cardboard corner on top of another. Repeat with the other 2 corners. Place them lengthwise on the floor behind the range to support the range when it is laid on its back.

5.Using 2 or more people, firmly grasp the range and gently lay it on its back on the cardboard corners.

6.Pull cardboard bottom firmly to remove.

7.Use an adjustable wrench to loosen the leveling legs. Adjust the leveling legs to the correct height. Leveling legs can be loosened to add up to a maximum of 1" (2.5 cm). A minimum of ³⁄₁₆" (0.5 cm) is needed to engage the anti-tip bracket.

NOTE: If height adjustment is made when range is standing, tilt the range back to adjust the front legs, then tilt forward to adjust the rear legs.

8.Place cardboard or hardboard in front of range. Using 2 or more people, stand range back up onto cardboard or hardboard.

Install Anti-Tip Bracket

WARNING

Tip Over Hazard

A child or adult can tip the range and be killed.

Connect anti-tip bracket to rear range foot.

Reconnect the anti-tip bracket, if the range is moved.

Failure to follow these instructions can result in death or serious burns to children and adults.

Contact a qualified floor covering installer for the best procedure for drilling mounting holes through your type of floor covering.

Before moving range, slide range onto shipping base, cardboard or hardboard.

1.Remove template from the anti-tip bracket kit (found inside the oven cavity).

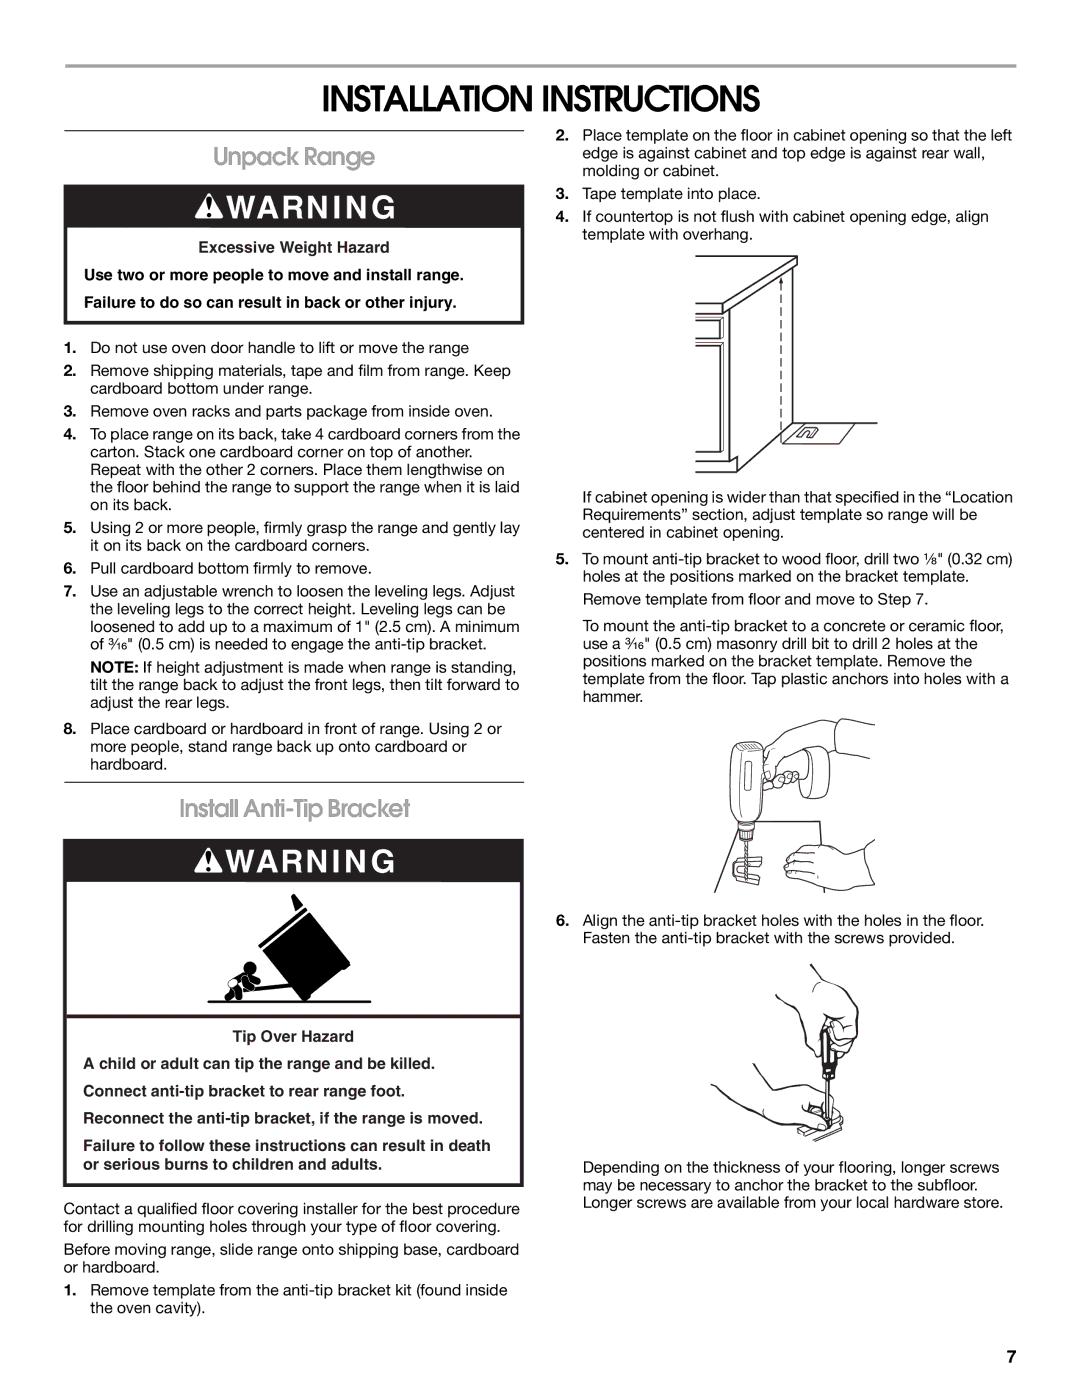
2.Place template on the floor in cabinet opening so that the left edge is against cabinet and top edge is against rear wall, molding or cabinet.

3.Tape template into place.

4.If countertop is not flush with cabinet opening edge, align template with overhang.

If cabinet opening is wider than that specified in the “Location Requirements” section, adjust template so range will be centered in cabinet opening.

5.To mount anti-tip bracket to wood floor, drill two ¹⁄₈" (0.32 cm) holes at the positions marked on the bracket template.

Remove template from floor and move to Step 7.

To mount the anti-tip bracket to a concrete or ceramic floor, use a ³⁄₁₆" (0.5 cm) masonry drill bit to drill 2 holes at the positions marked on the bracket template. Remove the template from the floor. Tap plastic anchors into holes with a hammer.

6.Align the anti-tip bracket holes with the holes in the floor. Fasten the anti-tip bracket with the screws provided.

Depending on the thickness of your flooring, longer screws may be necessary to anchor the bracket to the subfloor. Longer screws are available from your local hardware store.

7

Page 7
Image 7
Whirlpool W10032050B installation instructions Installation Instructions, Unpack Range, Install Anti-Tip Bracket

W10032050B specifications

The Whirlpool W10032050B is an innovative kitchen appliance that embodies modern design, advanced technology, and practicality. Tailored for a variety of cooking needs, this appliance represents a significant step forward for home chefs seeking efficiency and versatility in their kitchen.

One of the defining features of the Whirlpool W10032050B is its convection cooking capability. This technology circulates hot air throughout the oven cavity, ensuring that food cooks evenly and thoroughly. It significantly reduces cooking times while enhancing the flavor and texture of meals. Whether you are roasting vegetables or baking desserts, the convection function ensures consistent results every time.

Another standout characteristic of the W10032050B is its intuitive control panel, which is designed for user-friendliness. The touch controls allow for quick adjustments to temperature and cooking modes, making it easy to switch from baking to broiling or to set precise cooking times. Additionally, the panel often includes a digital display that provides clear information on cooking progress, helping users keep track of their meals without the need for constant checks.

Versatility is further enhanced by the W10032050B's multiple cooking modes. It typically includes options like bake, broil, and roast, giving home cooks the tools they need to execute a wide range of recipes with confidence. Furthermore, the large capacity of the oven can accommodate multiple dishes at once, ideal for family gatherings or dinner parties.

The design of the Whirlpool W10032050B does not go unnoticed either. Built with a sleek and modern aesthetic, this appliance integrates seamlessly into any kitchen décor. Its stainless steel finish not only provides a professional look but is also easy to clean and maintain.

Safety is another priority for Whirlpool, and this model often includes features such as a self-cleaning function that makes maintaining the oven a hassle-free experience. Additionally, the appliance may come equipped with safety lock features to prevent accidental operation, especially in households with young children.

In summary, the Whirlpool W10032050B stands out in the crowded market of kitchen appliances due to its powerful convection cooking capabilities, user-friendly controls, versatile cooking options, and stylish design. It provides everything that a modern home cook could need, making meal preparation not only easy but also enjoyable. This appliance is a smart investment for those aiming to elevate their culinary experience while ensuring convenience and efficiency in the kitchen.