
WHCF-SUFC, WHCF-SUF specifications
The Whirlpool WHCF-SUF and WHCF-SUFC are cutting-edge water filtration systems designed to provide high-quality drinking water for households. These models represent Whirlpool’s commitment to innovation, efficiency, and user-friendly design.One of the standout features of the WHCF-SUF and WHCF-SUFC is their advanced multi-stage filtration technology. This system employs a combination of activated carbon and sediment filters, which work together to remove impurities such as chlorine, sediment, and other contaminants. The result is clean and refreshing water that enhances the taste and safety of drinking water straight from the tap.
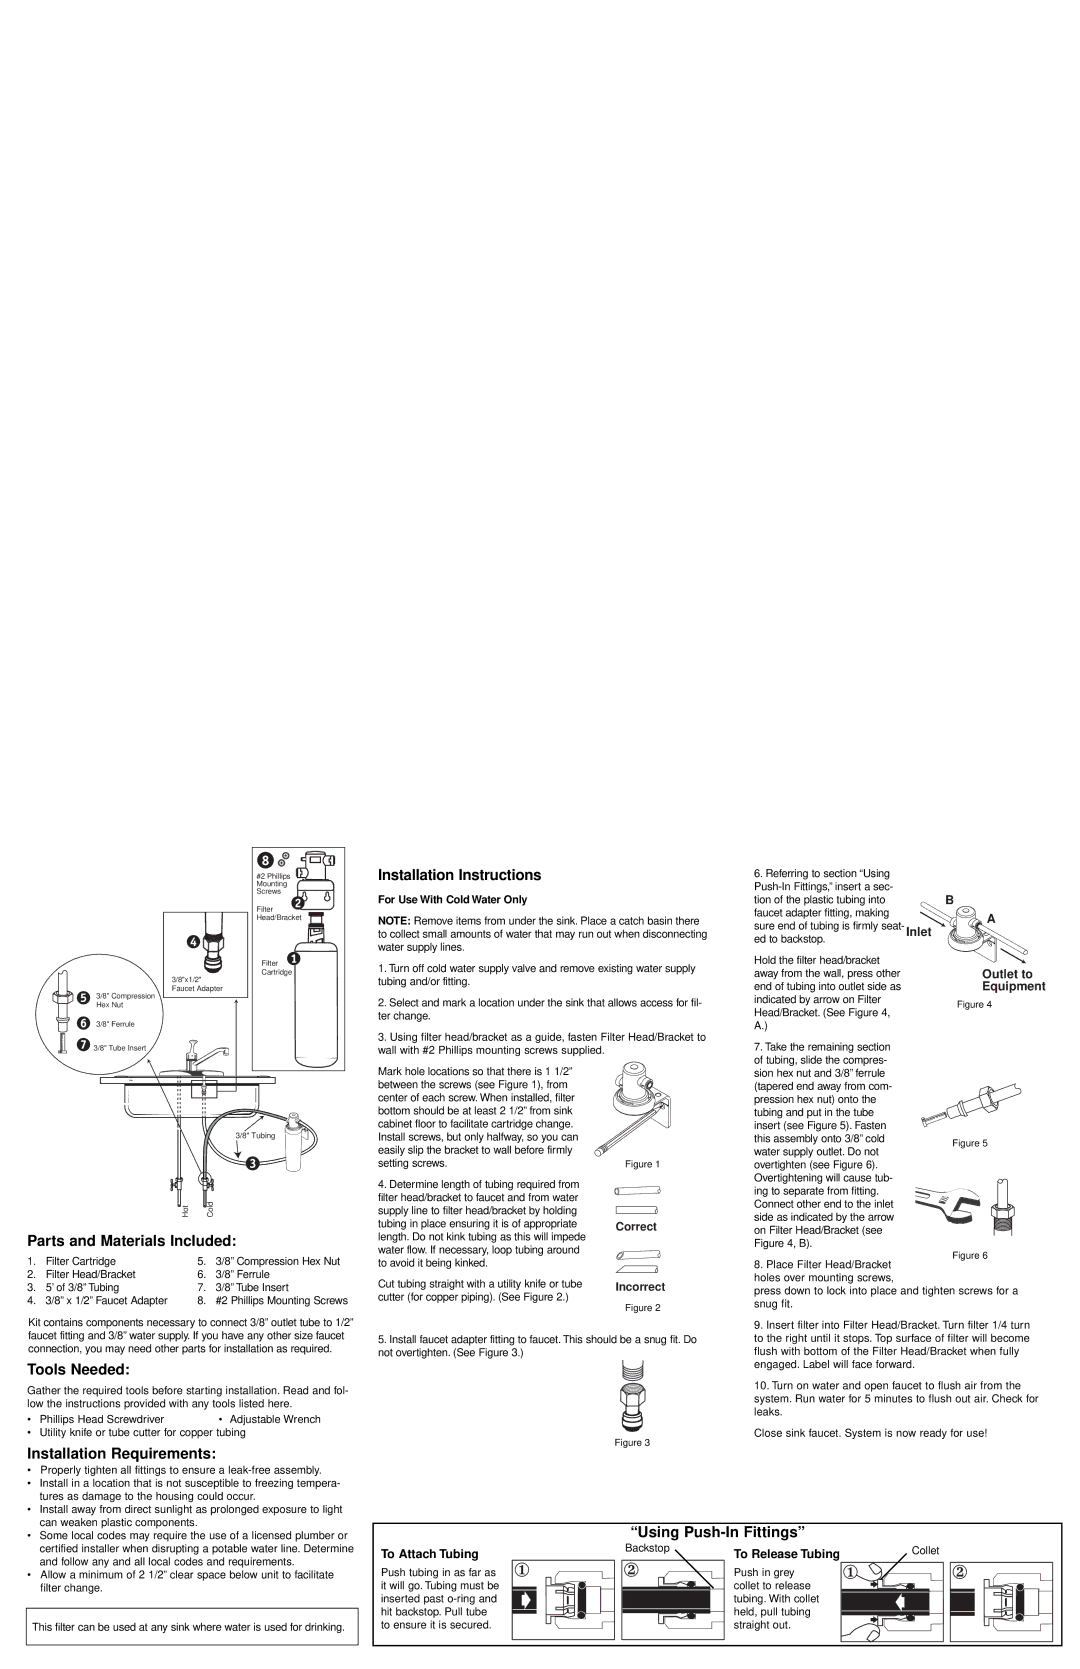
Both models are designed for easy installation and maintenance. They come with a comprehensive installation kit that typically includes all necessary components, allowing users to set up the system quickly and efficiently without professional assistance. Additionally, the filters are replaceable, ensuring that users can keep the filtration system in optimal working condition with minimal effort.
The filtration capacity of the WHCF-SUF and WHCF-SUFC is another notable characteristic. These systems are engineered to handle a substantial volume of water, making them ideal for family use or households with high water consumption. The long-lasting filter life reduces the frequency of replacements and ultimately lowers maintenance costs for users.
In terms of dimensions, both models are compact and designed to fit easily under kitchen sinks or in other tight spaces, ensuring that they do not disrupt the overall aesthetics of the kitchen environment. The white casing and streamlined design contribute to a modern look that complements various kitchen styles.
A notable technological feature of these models is the integrated filter change indicator that alerts users when it’s time to replace the filter, thus simplifying the maintenance process and ensuring that the system operates at peak performance.
In conclusion, the Whirlpool WHCF-SUF and WHCF-SUFC filtration systems offer a perfect blend of performance, ease of use, and reliability. By providing essential features and advanced filtration technology, they stand out as excellent choices for consumers seeking to ensure the purity and quality of their drinking water. Whether for everyday hydration or cooking, these systems deliver the safety and taste that modern families require, reinforcing Whirlpool’s position as a leader in home appliances.