5
Making
Adjustments
WARNING
Read, understand, and follow all instruc- tions and warnings on the machine and in this manual before operating.
Never attempt to make any adjust- ments while the engine is running, except where speci- fied in operator’s manual.
Figure 13
Figure 14
Figure 15
Auger Control
To adjust the auger control, refer to page 13.
Shift Cable
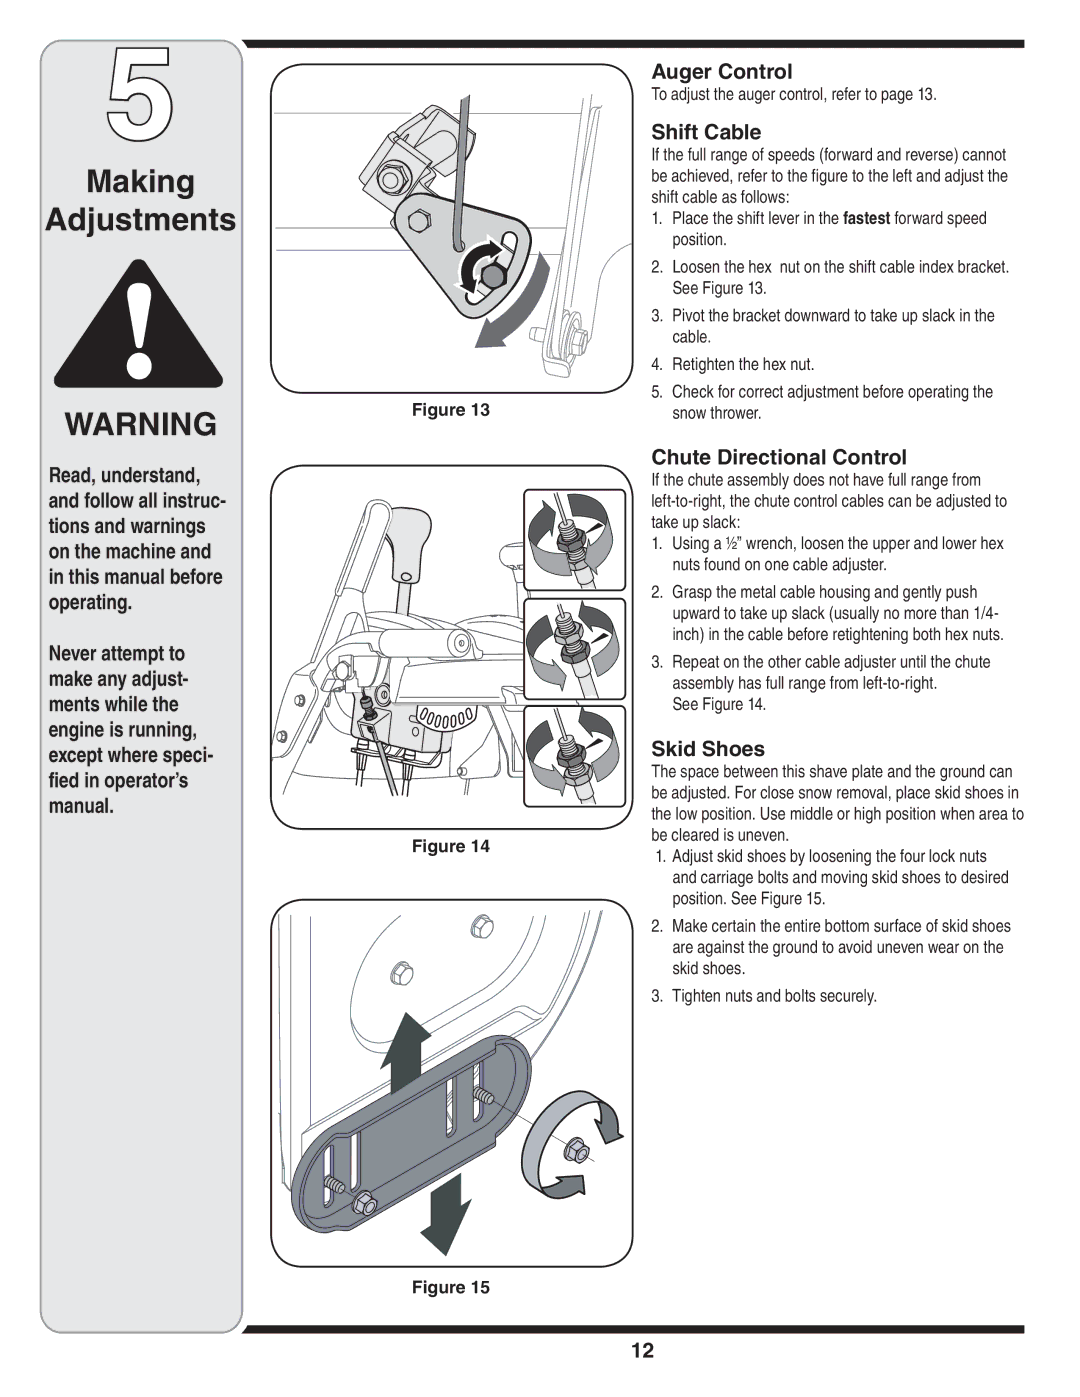
If the full range of speeds (forward and reverse) cannot be achieved, refer to the figure to the left and adjust the shift cable as follows:
1.Place the shift lever in the fastest forward speed position.
2.Loosen the hex nut on the shift cable index bracket. See Figure 13.
3.Pivot the bracket downward to take up slack in the cable.
4.Retighten the hex nut.
5.Check for correct adjustment before operating the snow thrower.
Chute Directional Control
If the chute assembly does not have full range from
1.Using a ½” wrench, loosen the upper and lower hex nuts found on one cable adjuster.
2.Grasp the metal cable housing and gently push upward to take up slack (usually no more than 1/4- inch) in the cable before retightening both hex nuts.
3.Repeat on the other cable adjuster until the chute assembly has full range from
See Figure 14.
Skid Shoes
The space between this shave plate and the ground can be adjusted. For close snow removal, place skid shoes in the low position. Use middle or high position when area to be cleared is uneven.
1.Adjust skid shoes by loosening the four lock nuts and carriage bolts and moving skid shoes to desired position. See Figure 15.
2.Make certain the entire bottom surface of skid shoes are against the ground to avoid uneven wear on the skid shoes.
3.Tighten nuts and bolts securely.
12
